
Top Tips for Studio Pet Photography
Sep 24, 2025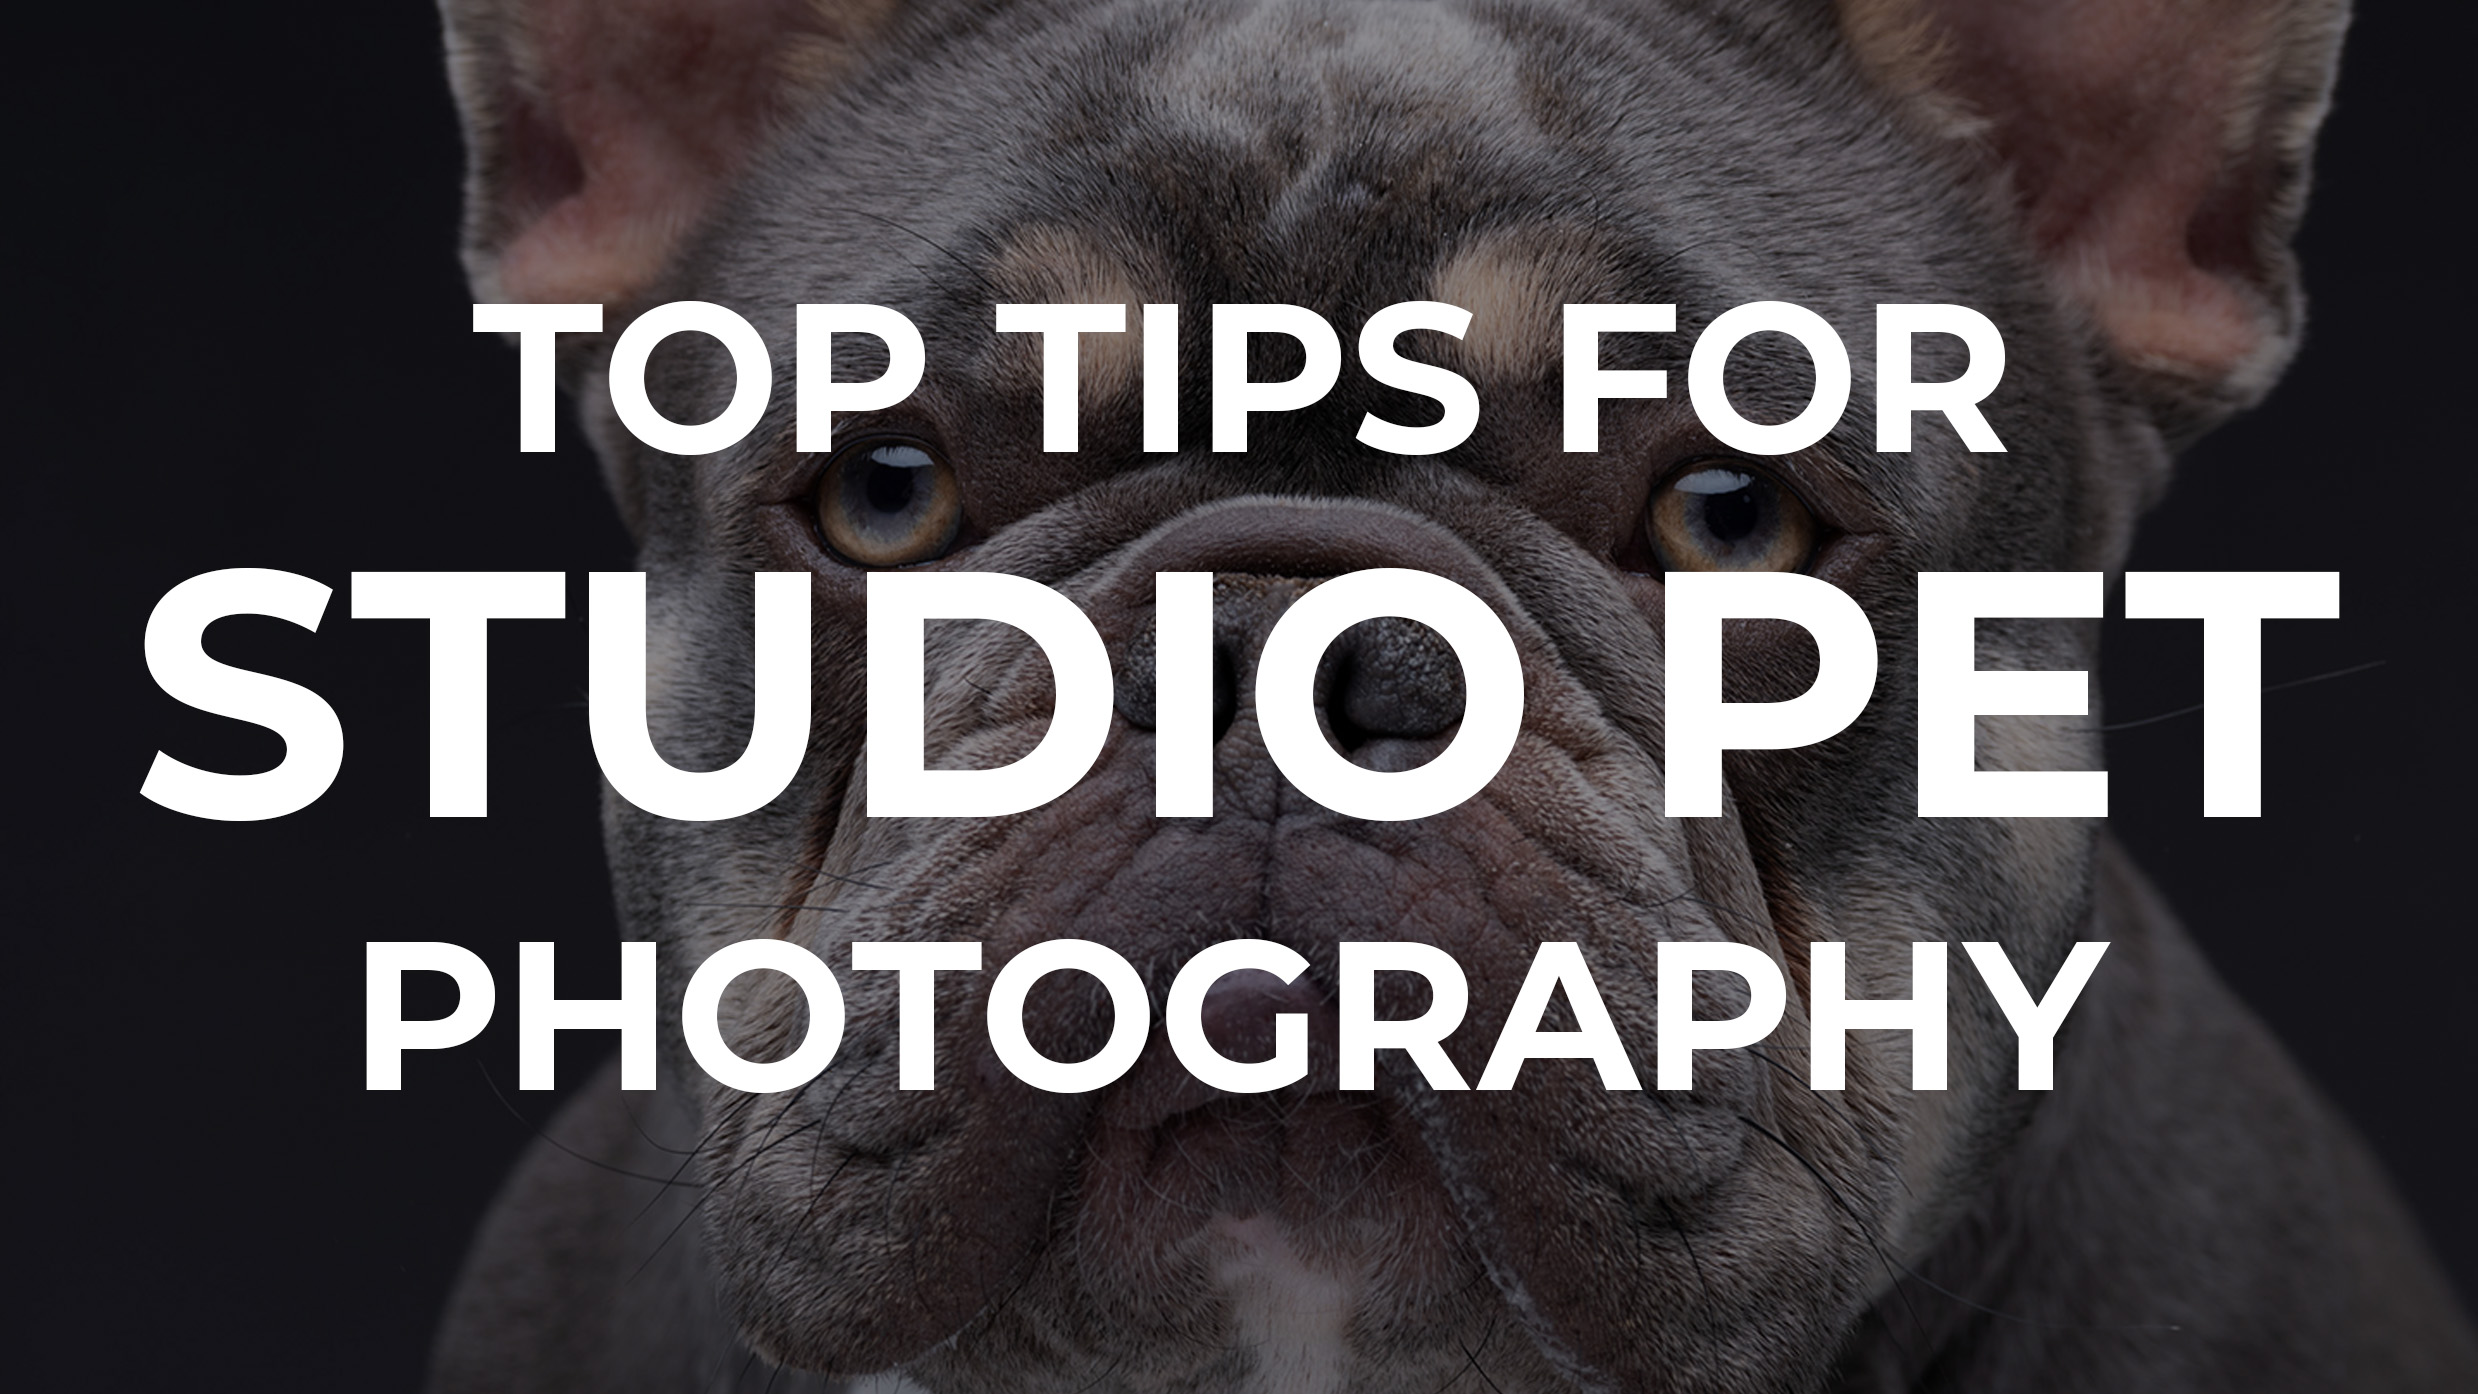
Photographing pets in the studio is so rewarding, when you get it right, the results are polished, personality-filled portraits that owners will treasure forever. But bringing animals into a strange, controlled environment provides for unique considerations, both technical and practical.
So today, in celebration of the launch of the brand new Pet Lighting Mastery course that I've recorded with world renowned photographer, all round creative genius and my friend, Richard Wood, we thought we'd share some top tips to help you create studio portraits that truly shine.
Let's get to it...
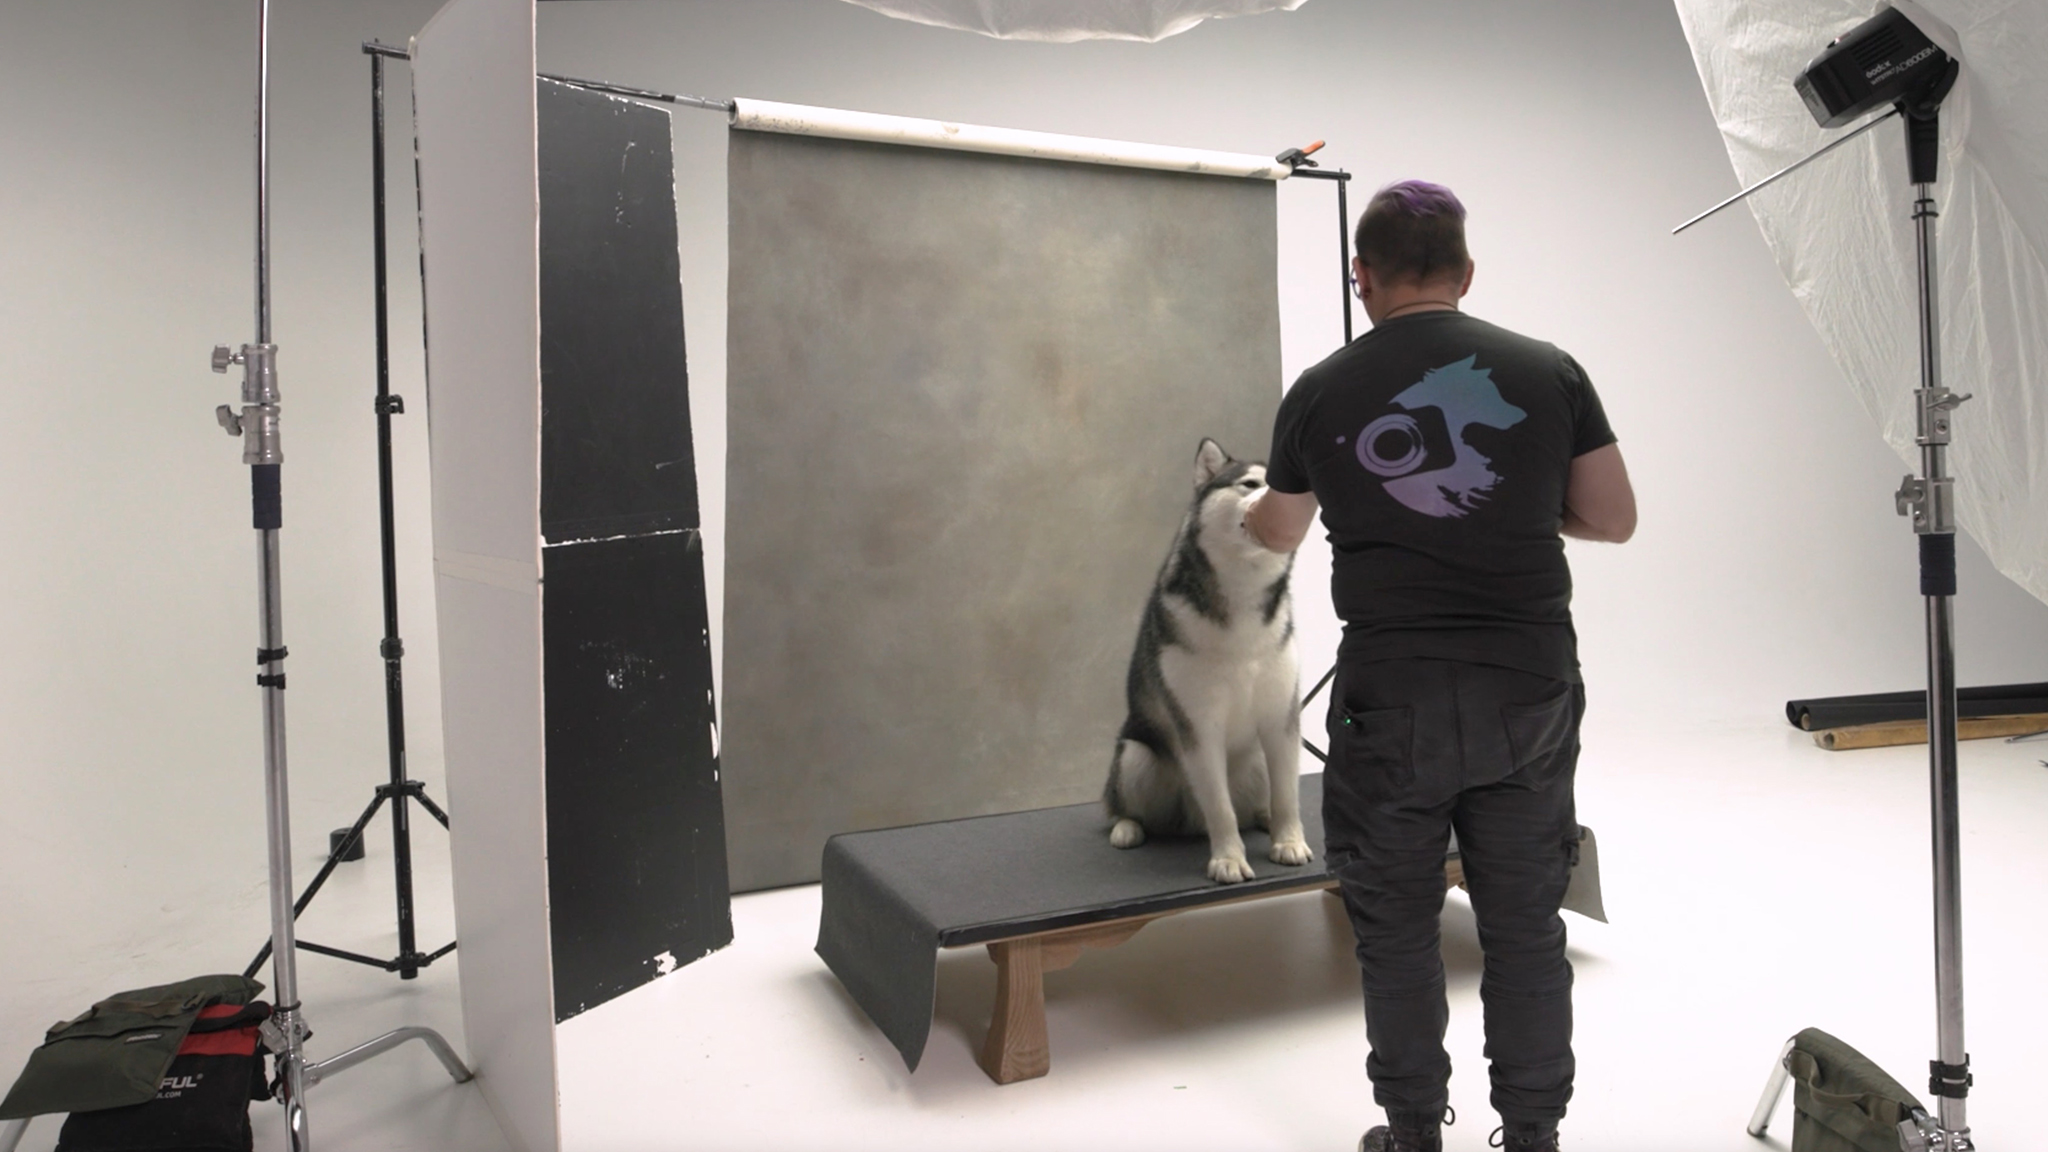
1. Safety First
Your number one priority is always the wellbeing of the pets in front of your camera. Avoid slippery surfaces where paws might slide and cause injury, or just make poses look super awkward. Consider rugs, non-slip mats, or textured flooring to keep pets steady If pets are elevated like in the example below, either on a stage low table or seat, make sure they are also stable and non slip.
Anchor your light stands with weights or sandbags, and tape down or cover loose cables to prevent curious paws (or tails) from getting tangled. A safe pet is a relaxed pet, and relaxed pets enable you to make better photos.
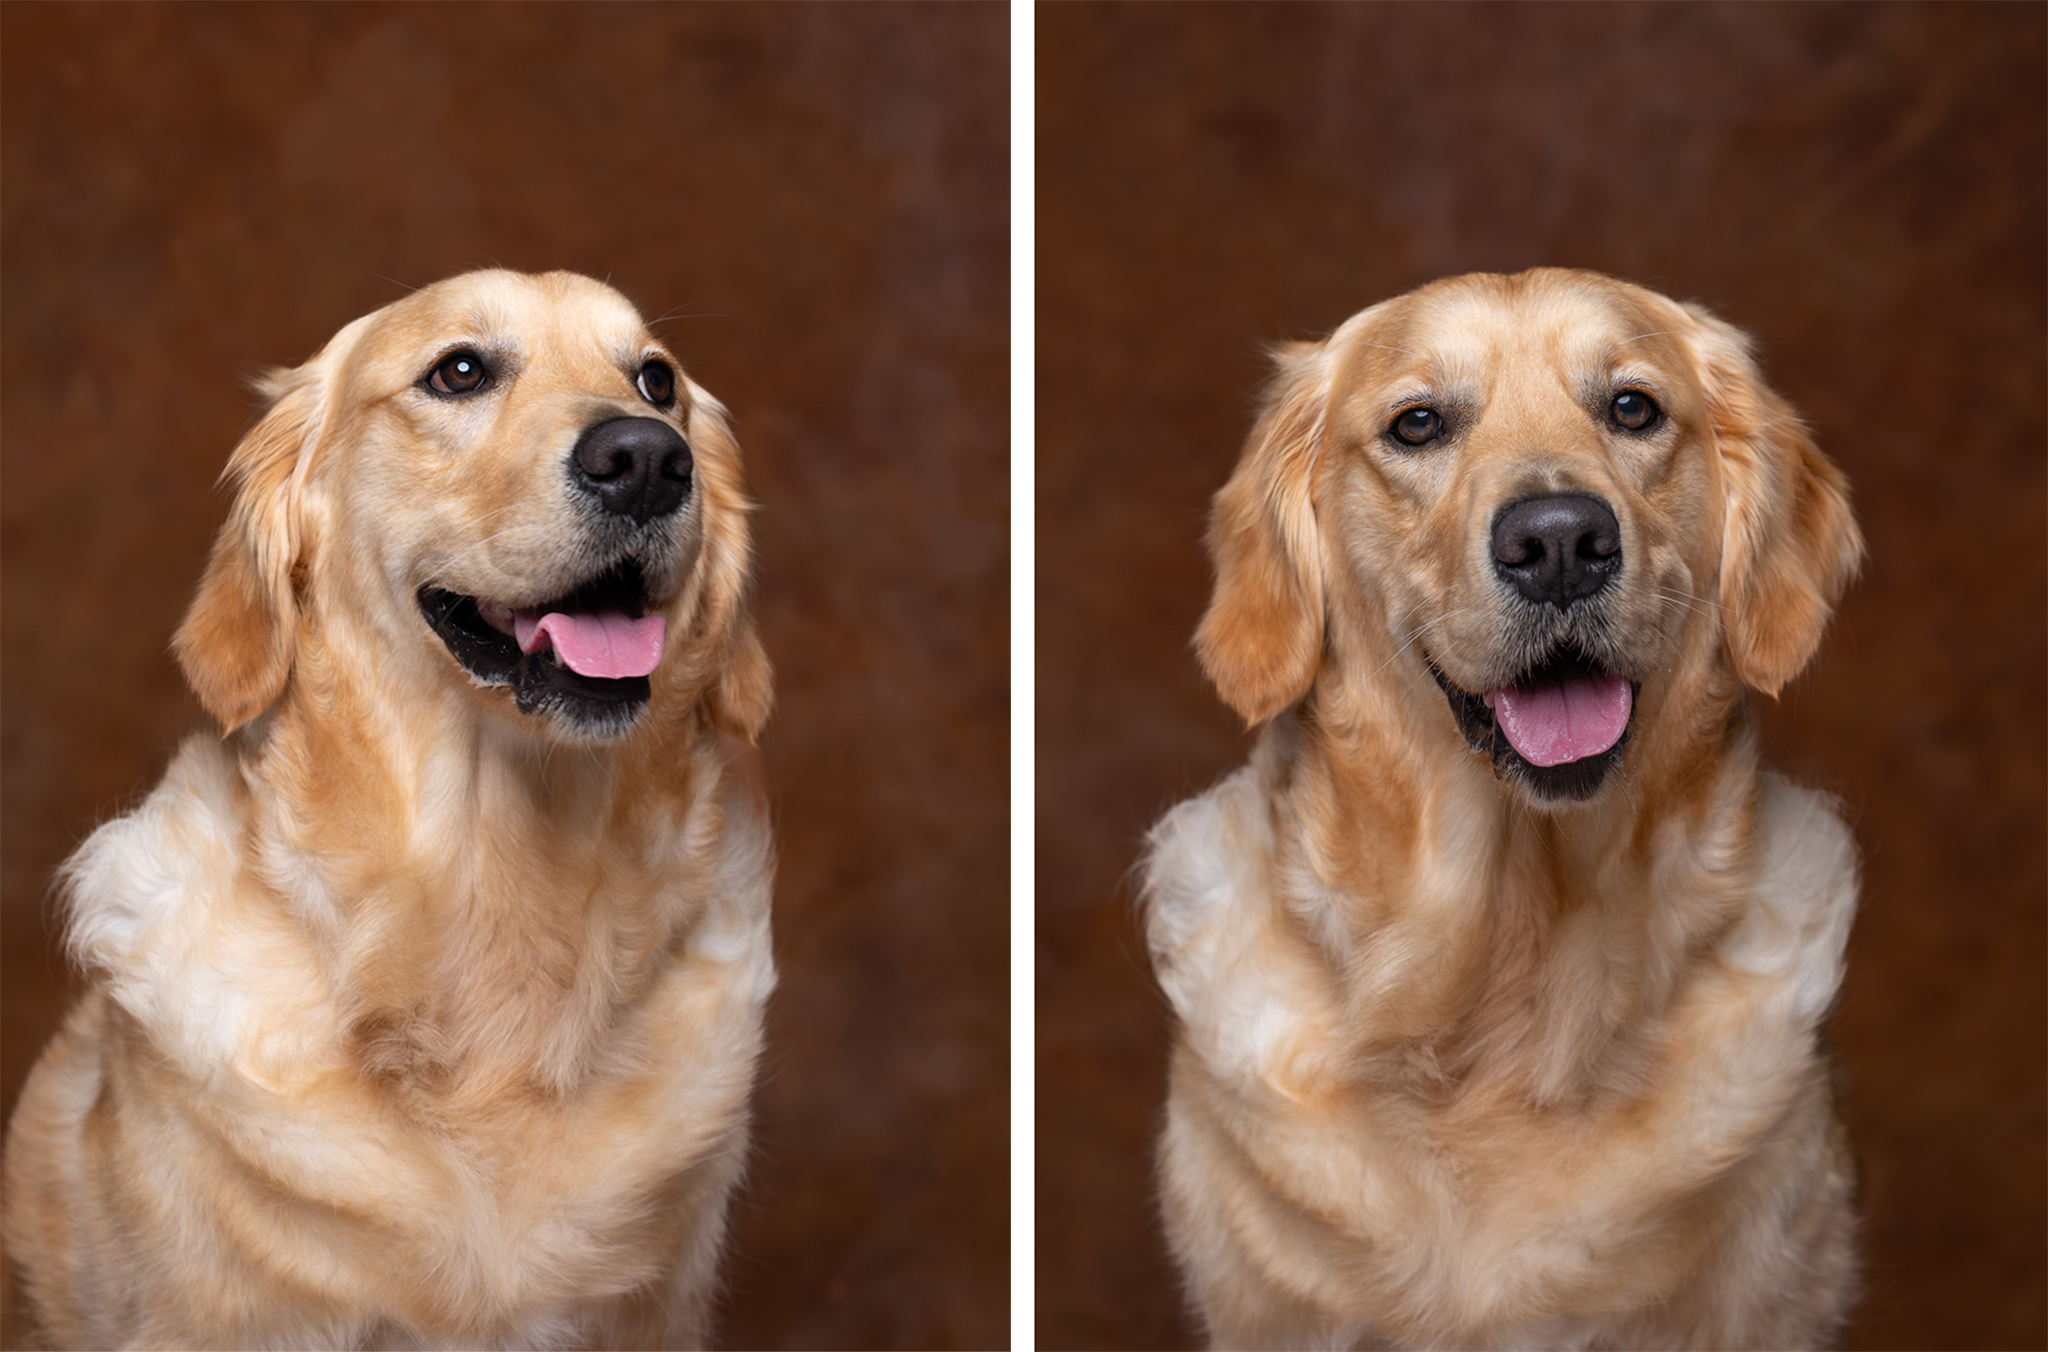
2. Capture Engaging Expressions
The best pet portraits are the ones brimming with personality. Use treats, toys, or silly noises to get those ears pricked and eyes locked on you. Some pets may need extra time to acclimatise to the studio environment, especially the flash of studio lights. Patience is your best tool - take breaks when needed and let the animal set the pace.
In the example images of Billie below, the left image is what we'd call an 'in-between expression'. That is to say she is between movements, looking away and ears down. This body language could also be interpreted as stress. The image on the right,, with bright eyes, alert ears and a relaxed mouth is much more engaging.
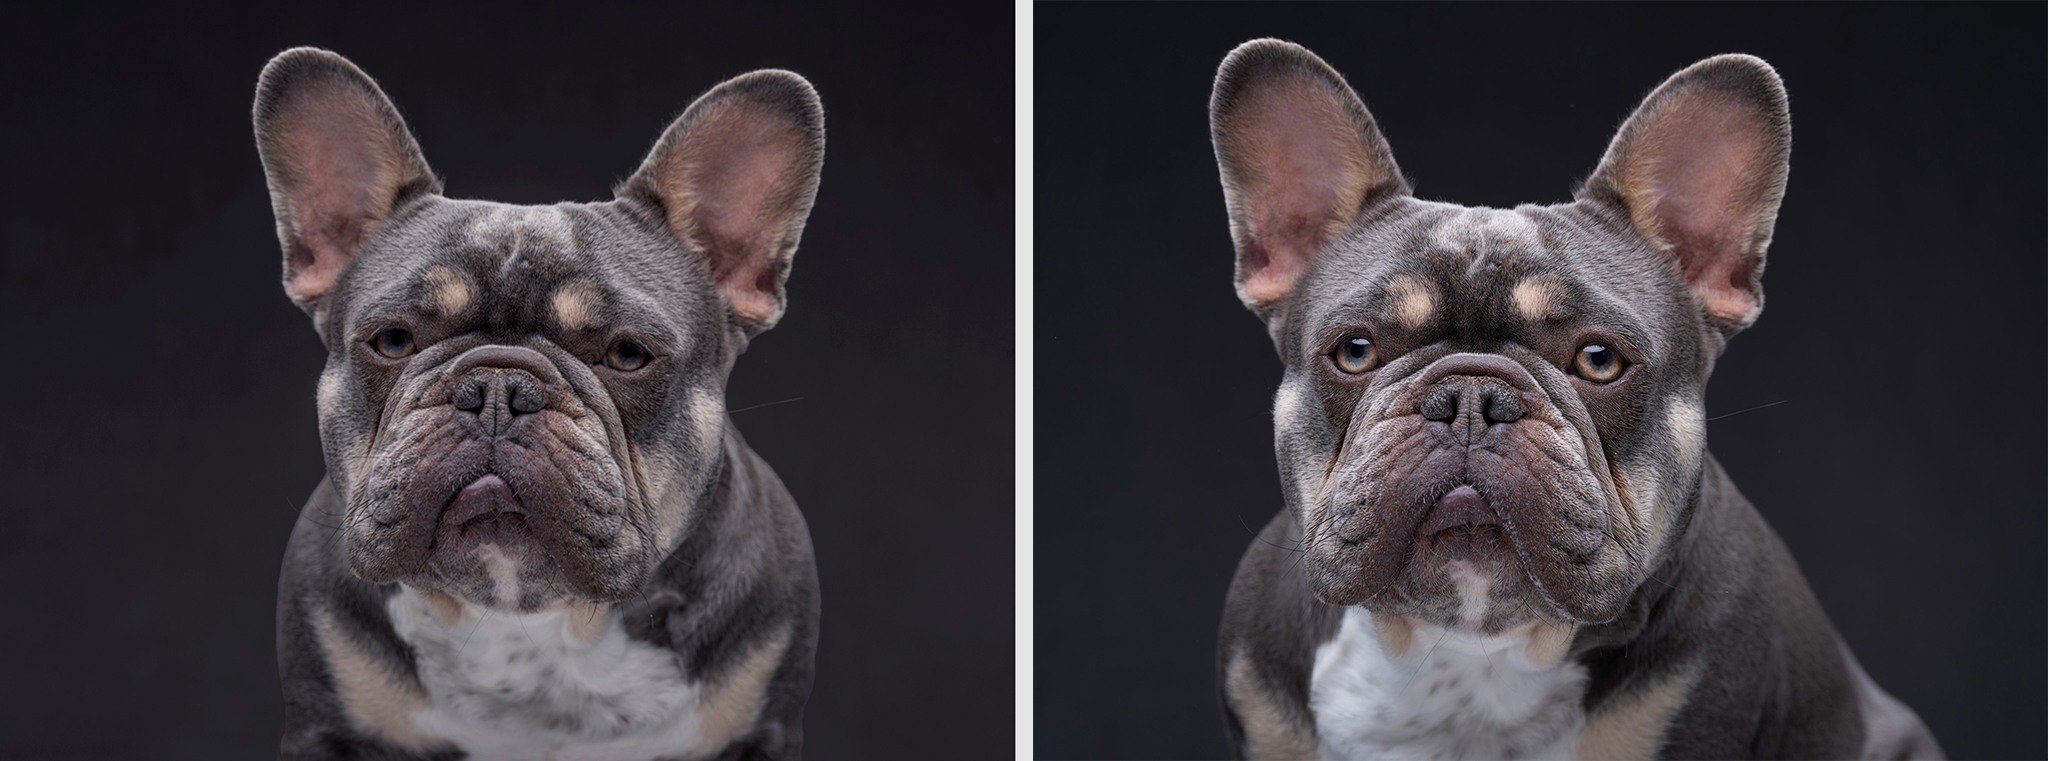
3. Pay Attention to Catchlights
If you know me, you'll know I love a good old cliché, so this won't come as a surprise... The eyes are the windows to the soul. Nothing brings them to life like beautiful catchlights. Position your lights so that you achieve clean, well-placed reflections in the eyes. Catchlights add sparkle, draw viewers in, and can transform a technically solid photo into something truly captivating.
Look at how lifeless Sage's eyes look in the left hand image below, and how the life just sparkles in the right. A slight adjustment in the position of the light is all it took to make this transformation.
4. Keep Lighting Simple in Small Spaces
Working in a home studio or smaller setup? Don’t overcomplicate things. One light and a reflector or v-flat is all you need to create images with different looks. By mastering simple setups, you’ll have more control, less clutter, and fewer distractions for the pets.
In the example below, you can see how the light and v-flat were positioned to give a Rembrandt style light to Loki's portrait.

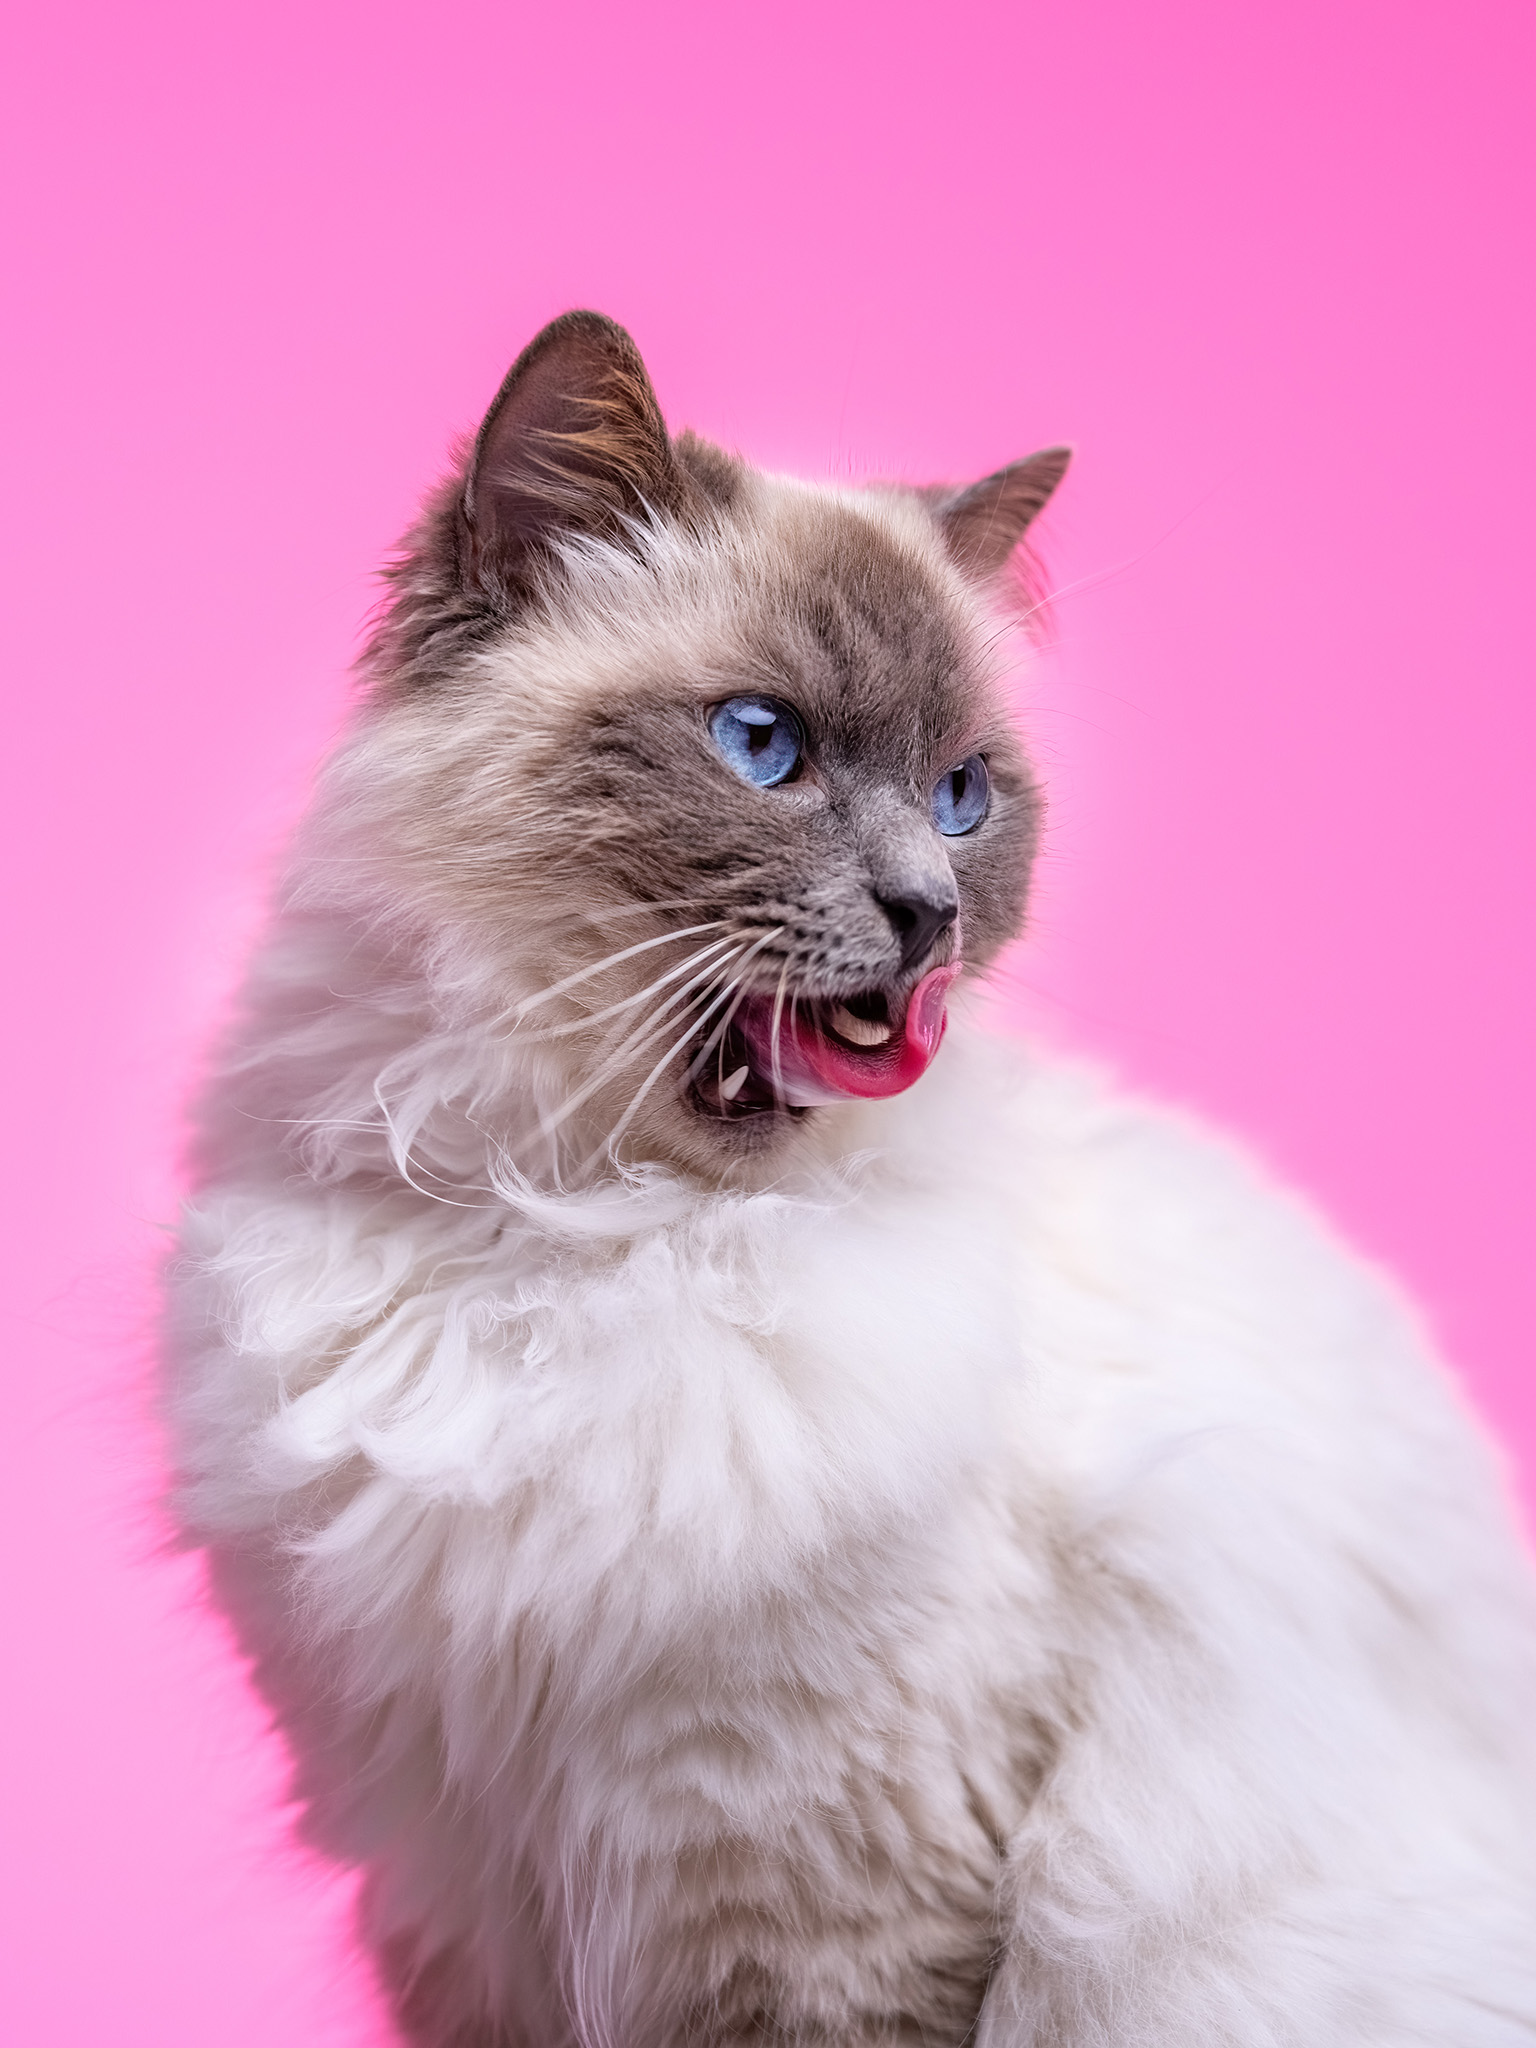
5. Choose Harmonious Backdrops
The backdrop is more than just a background - it sets the tone of the whole portrait. Consider the colour of the pet’s coat when choosing your backdrop. Complementary or contrasting colours can make your subject pop, while harmonious tones create a more subtle, elegant look.
In this portrait of Walker, we used a pop of pink to accentuate his tongue, but also contrast with those blue eyes.
6. Get on Their Level
I can't say this often enough, photographing pets with your camera at least at their eye level, preferably lower, creates a sense of intimacy and connection. It helps viewers feel like they’re stepping into the animal’s world, rather than looking down from above. Get down lower!
7. Keep Sessions Short and Positive
Pets don’t have the same stamina for posing as adult people, they're much more like 5-year-olds. Instead of long sessions, work in short bursts, 30 to 45 minutes should be ample time to capture a variety of great images, even when giving breaks filled with treats, praise, or play. This keeps the mood light, the pet engaged, and the experience enjoyable for everyone.
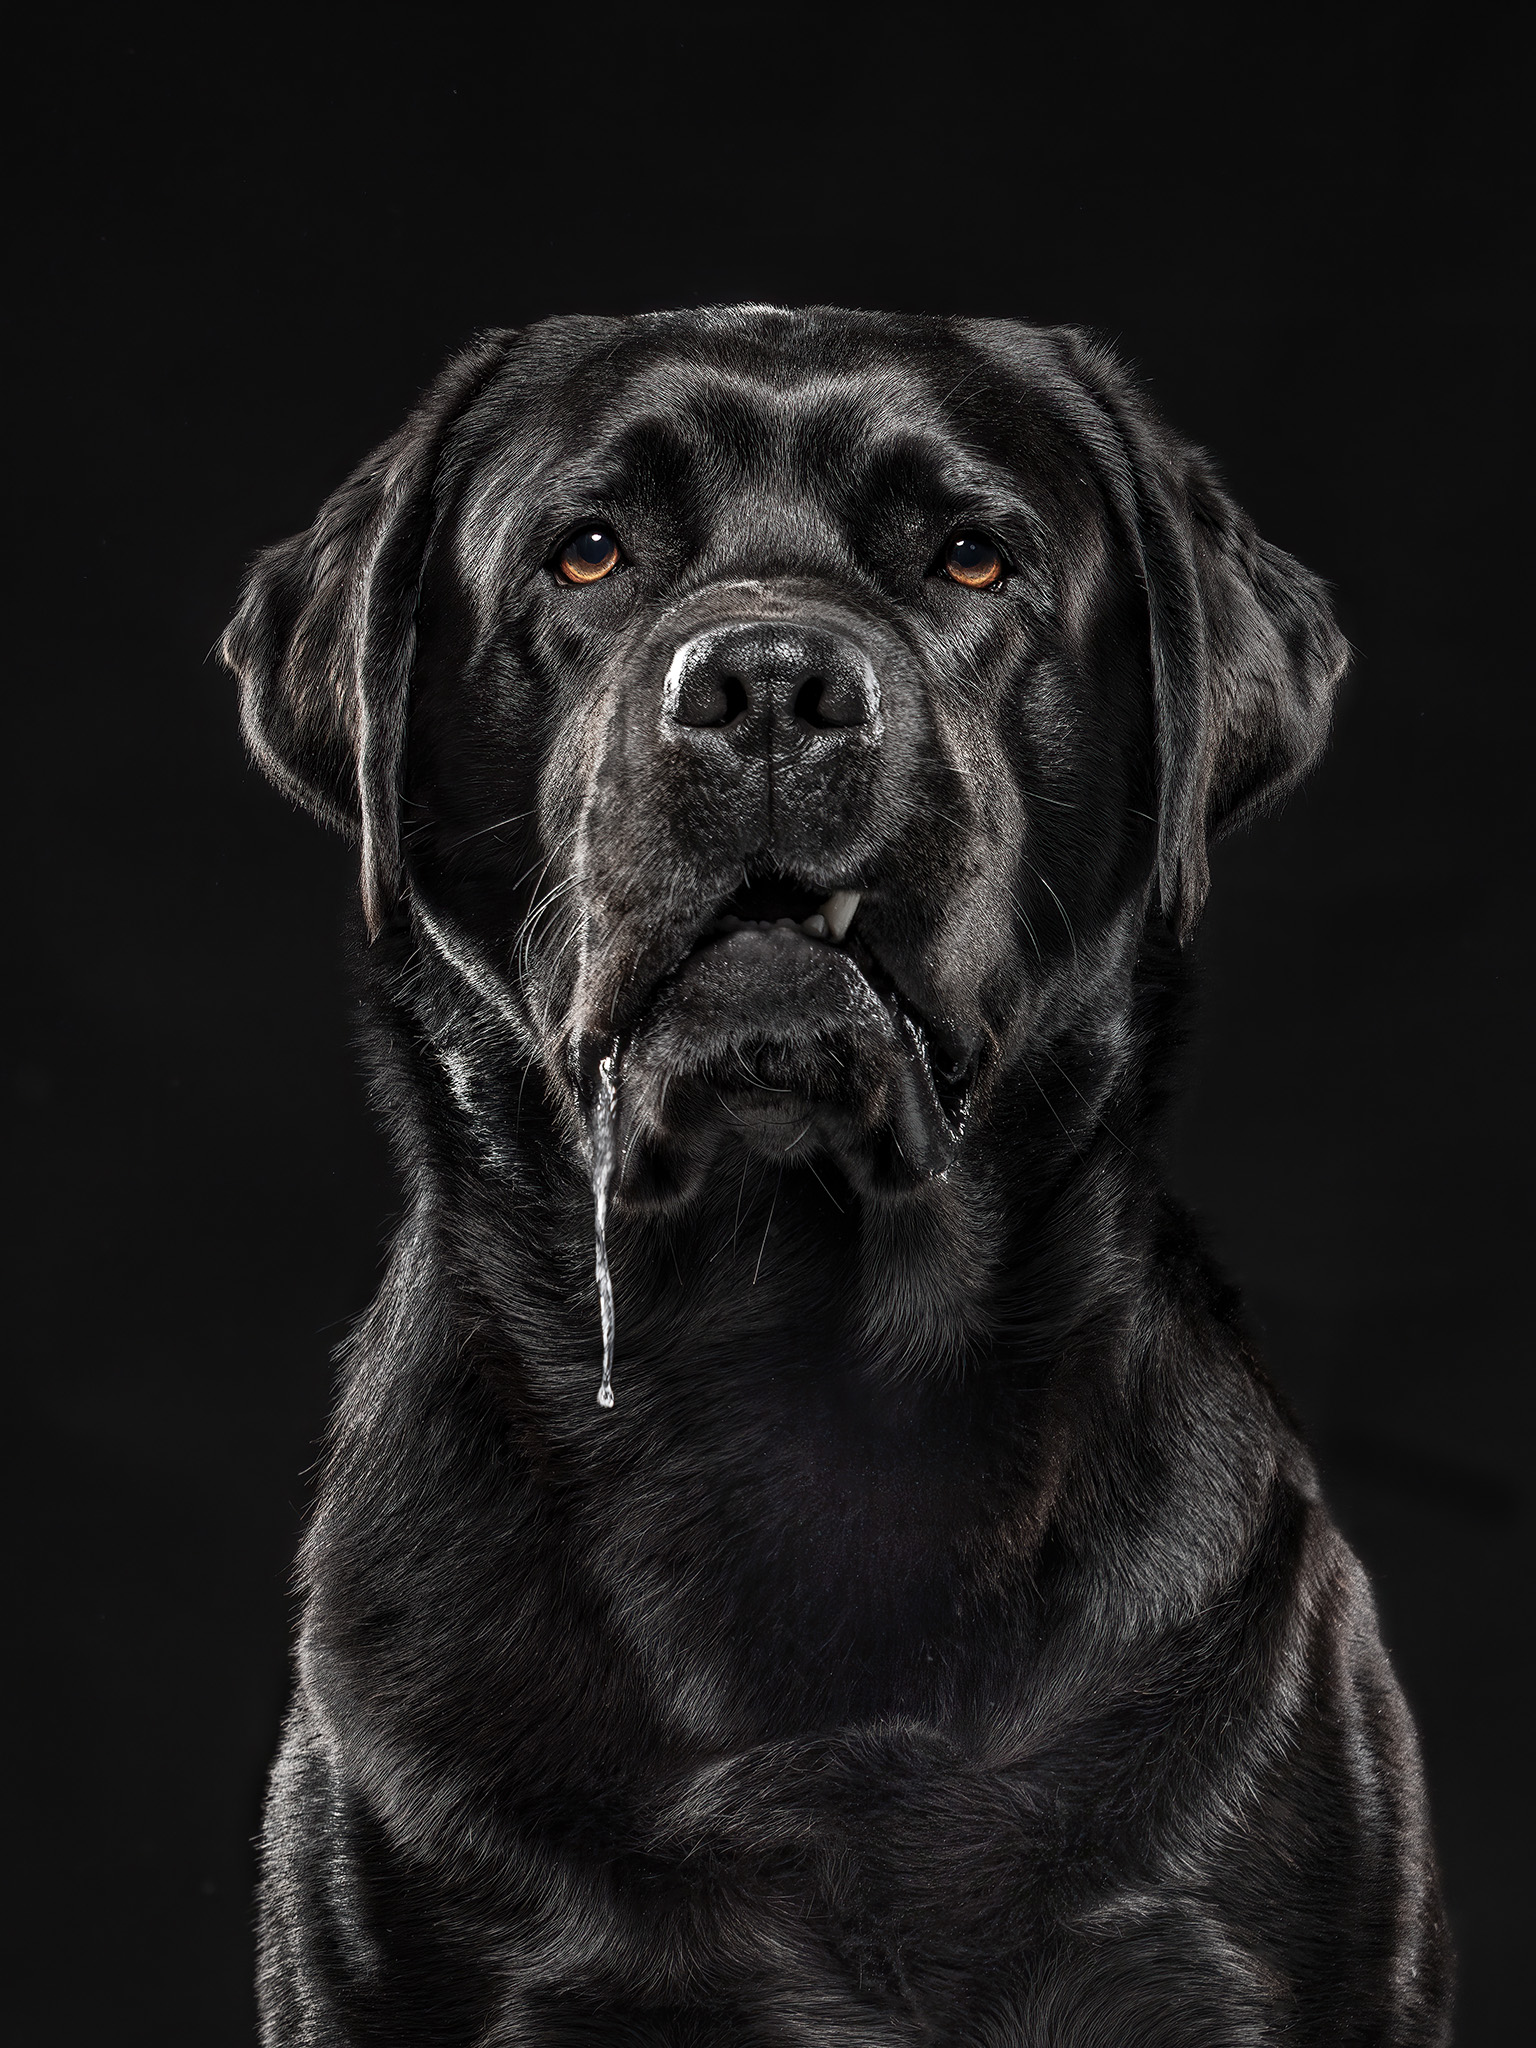
8. Be Flexible and Creative
Every pet is different. Some will sit patiently, others will wriggle, bark, or bounce. Embrace their individuality and be willing to adapt your approach. Sometimes the most magical portraits happen when you let go of rigid plans and capture the spontaneity of the moment.
Like Sam here, his owner warned us he was a big drooler whenever food was near, so we took advantage of that to capture a portrait that isn't traditionally 'pretty', but is it truly representative of Sam.
Bringing It All Together
Studio pet photography can feel intimidating at first, but with the right approach, it becomes an incredibly rewarding way to showcase pets at their very best. Safety, patience, and simplicity go a long way in creating portraits that are not only beautiful but full of life.
If you’d like to take a deeper dive into the world of studio pet photography and learn how to master lighting, handle pets with confidence, and create stunning results every single time - check out our brand-new course, Pet Lighting Mastery. Created by Craig Turner-Bullock and Richard Wood, it includes 14 lighting videos, a ton of handling and safety tips and demonstrations plus bonuses like Craig's Furtography Photoshop actions and downloadable Lighting Design cheatsheets.
👉 Discover Pet Lighting Mastery here
Join our mailing list!
Want to improve your pet photography with free tips and expert advice?
Join our mailing list and get a guided tour of what we have to offer, along with our weekly newsletter packed with practical pet photography insights.
📩 Sign up now and start learning with us!
We hate SPAM. We will never sell your information, for any reason.