
10 Tips for Taking Better Action Photos of Dogs
Jan 01, 2015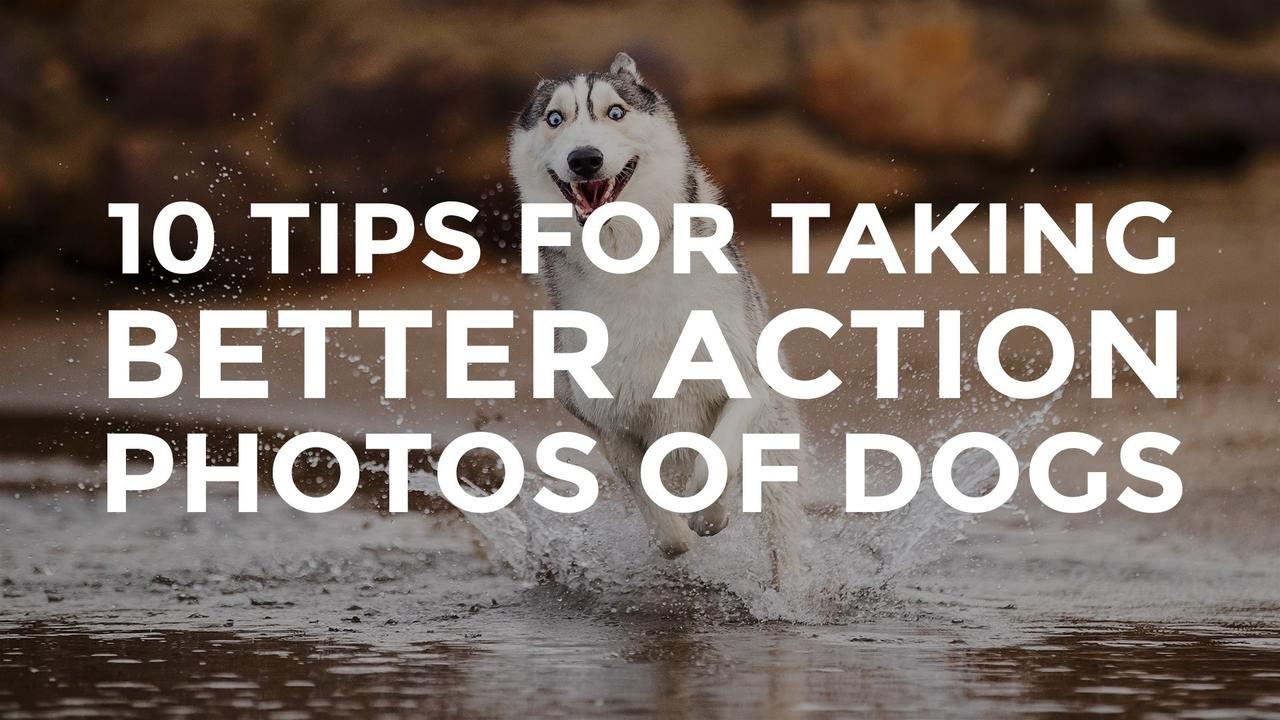
Flying ears, flapping tongues and crazy eyes. Action photos of dogs are often hilarious and always incredibly popular, but as you may have discovered, they’re not always the easiest to capture. Obtaining sharp action shots can be tricky, but these tips should help you on your way to creating fun shots that will wow your clients.
While these tips are presented sequentially, they actually tie in together and are all important pieces of the puzzle when shooting action.
1. Find a good location
Shooting action outdoors in open, well-lit areas usually creates the best results. Dog parks, the beach, natural spacious areas or even large playing fields are great places to take action photos, as they offer lots of room to run and play with plentiful light in the right weather conditions and time of day.

At the beach - Canon EOS 1D X, Canon EF 70-200mm f/2.8L IS II @ 200mm, ISO 100, 1/3200 sec, f/2.8
Steer clear of shooting action indoors or directly under trees or other sources of shade. Open areas with clear sky overhead and trees in the background are fine and can actually help to filter the sun when shooting with backlight later in the day.

Open area with trees in background - Canon EOS 1D X, Canon EF 70-200mm f/2.8L IS II @ 115mm, ISO 1000, 1/1250 sec, f/2.8
Suburban backyards, especially small ones, are also not usually suitable due to the surrounding houses and possibly trees and other sources of shade.
2. Pay attention to the light
Plenty of natural light is required when photographing dogs in action. Shooting action outdoors in open, well-lit areas usually creates the best results as it allows you to use a fast shutter speed.
Whatever the lighting conditions, it's important that it's consistent. Attempting to get good consistent shots of a dog running in and out of partly shaded areas is very difficult and nigh on impossible if you are shooting using manual exposure mode (which I highly recommend).
When you’ve got a great location sorted out, have an evaluative look at the light.
- What direction is the light coming from? (where is the sun in the sky?)
- How bright is the light? (bright, dull etc)
- What's the quality of the light? (soft, harsh etc)
- Is there anything blocking the light? (are there any sources of shade nearby?)
Sunny Days
Overhead midday sun – although providing plentiful light – is usually harsh and creates high contrast with deep shadows and bright areas, so I often avoid shooting in the middle hours of the day.
My favourite time to shoot is on a sunny day with a clear sky, towards the end of the day, preferably in the last hour or two before sunset. When you're first starting out, aim to shoot with the sun behind you or just off over your shoulder, so the sunshine is illuminating the dog evenly and brightly.
If you're shooting in full sun it's so important that you consistently shoot with the sun behind you – make sure you stay between the subject and the sun. Sidelight is never usually flattering and turning around to shoot with backlight will mean you underexpose your subject if you are shooting in manual exposure mode (which I highly recommend).

Full sun, late afternoon - Canon EOS 1D X, Canon EF 70-200mm f/2.8L IS II @ 200mm, ISO 320, 1/3200 sec, f/2.8
Shooting in the other direction - into the sun - can be trickier - but it can be done!
If you are shooting in any automatic exposure mode, the very bright background may fool your camera into underexposing the image.
Shooting towards the sun can also mean the lens struggles to find focus.
Focusing systems work by locking onto areas of contrast - this is why backlit black dogs are the most difficult to shoot in action. Direct sunlight falling on the end element of your lens causes the image to "flare" out and reduces contrast, making it very hard for the lens to focus. Whenever you shoot towards the sun, try and make sure the end of your lens is shaded.

Backlit, late afternoon - Canon EOS 1D X, Canon EF 70-200mm f/2.8L IS II @ 90mm, ISO 640, 1/1600 sec, f/2.8
Also, try to make sure there is something other than bright sky behind the dog. Small trees and bushes are ideal to filter the sun. This also creates a darker background for the dog to stand out against.
Cloudy Days
Overcast or cloudy conditions result in even lighting and no harsh shadows, just as long as it’s not too early or late in the day, as clouds greatly cut down the amount of available light. If it’s overcast, you’re probably better not shooting so late in the day. On cloudy days it's also even more important to steer clear of sources of shade, as this cuts the available light down even further.
 Heavily overcast day - Canon EOS 1D X, Canon EF 70-200mm f/2.8L @ 200mm, ISO 500, 1/2000 sec, f/2.8
Clouds in the sky act as a very large softbox, making the quality of the light much softer and less directional. It's often possible to shoot in many directions when the light is soft like this, opening up possibilities for different backgrounds.
 Cloudy morning at the beach - Canon EOS 1D X, Canon EF 70-200mm f/2.8L @ 155mm, ISO 500, 1/1600 sec, f/2.8
3. Use a fast shutter speed
One of the biggest issues people face when trying to capture action is blurry images. This happens when the shutter speed is not fast enough to “freeze” the dog in action. During the fraction of a second when the image is being recorded, the dog moves and causes blur.
To capture expressive and sharp action photos of your dog you’ll need to use a fast shutter speed.
A fast shutter speed means the shutter is only open for a very short period of time to let light onto the camera's sensor. Since it's not open long, that fraction of a second of light needs to be very bright to form the image. This is why it is so important to choose a suitable location with plentiful light.
 Early morning, full sun - Canon EOS 1D X, Canon EF 70-200mm f/2.8L IS II @ 142mm, ISO 160, 1/1600 sec, f/4
So, which shutter speed is fast enough to capture action sharply?
For a dog running towards you, shoot at a minimum of 1/1000 second. Faster if possible!
For a dog running past you, when you're using a wide angle lens, or to capture water droplets sharper, it needs to be higher. I recommend a minimum of 1/1600 sec, preferably higher.
If you're not comfortable with shooting in full manual exposure (my mode of choice 99% of the time), you'll want to choose an exposure mode where you set the shutter speed and ISO and the camera decides on the aperture. This is usually called shutter speed priority mode and labelled “TV” by Canon cameras and “S” by Nikon.
You could also shoot in aperture priority mode (AV or A). Select the shallowest depth of field available and a fairly high ISO. The ISO needs to be high enough so that the shutter speed won't drop too low. This means you'll need to carefully monitor the shutter speeds the camera is choosing as you shoot.
 Late afternoon, backlit open area - Canon EOS 1D X, Canon EF 70-200mm f/2.8L IS II @ 145mm, ISO 1250, 1/1250 sec, f/2.8
Another mode that can be useful, though it's not available on all DSLR bodies, is Auto ISO. It allows you to set the shutter speed and aperture manually, then the camera meters the exposure and decides what ISO to use. You can usually set the upper and lower limits of the ISO you want the camera to use, for more control.
Panning is a fun action technique to play with that doesn’t involve a fast shutter speed, but this will be the topic of a separate post in the future.
4. Get down low
This is something I always recommend doing when photographing dogs in most situations, but it’s especially essential when shooting action. Shooting at dog level gives the resulting images a more accurate sense of scale and perspective, allowing you to see their expressions clearly and giving an impression of their world.
 Late afternoon, open shade - Canon EOS 1D X, Canon EF 70-200mm f/2.8L IS II @ 180mm, ISO 2000, 1/1250 sec, f/4
If the dog is leaping or jumping around, it’s easy to lose that sense of scale when shooting down on them from above. Photos of dogs leaping up into the sky taken from a very low angle create visual space between their jumping legs and the ground. This low angle creates much greater visual impact.
 Late afternoon, open shade - Canon EOS 1D X, Canon EF 70-200mm f/2.8L @ 125mm, ISO 640, 1/1250 sec, f/2.8
Getting down low to the ground helps avoid casting your shadow on your subject when shooting in full sun with the sun low in the sky behind you.
 Late afternoon, full sun - Canon EOS 1D X, Canon EF 70-200mm f/2.8L IS II @ 200mm, ISO 400, 1/8000 sec, f/2.8
5. Choose the right lens
The most popular style of action shot people like to see is dogs running, playing or leaping into the air. Action like this is easiest to follow when you are away from the action observing from a distance. My favourite lens to use when shooting action is a 70-200mm telephoto zoom.
It allows me to hang back, track what’s going on then easily frame and take the shot when I see an opportunity.
I recommend a dedicated telephoto zoom with a fixed minimum aperture, instead of an "all purpose" zoom that goes from wide angle to telephoto with a variable minimum aperture.
 Late afternoon, beach - Canon EOS 5D Mark II, Canon EF 70-200mm f/2.8L @ 200mm, ISO 125, 1/1600 sec, f/4
The ability to zoom is also handy for events like dog agility, where you’re not actually allowed to get up close. It’s also fantastic for sitting back and observing the action at dog parks and the beach, where you don’t necessarily want to be in the middle of the flying fur, whipping tails and stomping feet!
A note about IS - Image Stabilisation (Canon) and VR - Vibration Reduction (Nikon). While great for shooting at lower shutter speeds to help stabilise camera shake, these features don't come into play when photographing dogs in action, as the shutter speed you're using is high enough so that it's not required. You're not trying to keep the camera steady - you're trying to freeze the motion of your subject.
 Shooting wide and blind - Canon EOS 1D X, Canon EF 24-70mm f/2.8L II @ 24mm, ISO 500, 1/1600 sec, f/2.8
I also like to get amongst the action for some really wide angle, up-close shots. This does make it harder to track what’s going on and the focus success rate isn’t as high, but when you nail it, it’s totally worth it!
A fun technique to try is shooting blind, which means shooting without looking through the camera's viewfinder, holding the camera down low.
Using a wide-angle lens, hold the camera down close to the action and aim as best you can. Increasing the depth of field can help if your focus isn't great to start with. The more you practice this technique, the better your aiming accuracy becomes and the more in-focus shots you'll end up with.
6. Be steady and stable
Holding the camera as steady as possible is very important. The more stable you are, the less chance there is of your aim, focus or ability to follow the action being compromised.
Some examples of stable positions could be:
- Lying down on your belly facing the action, with your elbows on the ground for stability
- Sitting cross-legged with your elbows on your knees or (depending on your flexibility) on the ground in front of you
- Lying sideways or slightly back with your elbow out wide
- Shoulder braced against something solid
- You could also consider using a monopod if the action is not too random - for example - show dogs trotting around the ring

7. Focus!
Obtaining sharp focus in action shots is possibly the most important aspect of them all - and the hardest!
Focus Points
The number, configuration and accuracy of the focus points available varies greatly between different DSLR models. As a general rule, higher-end professional camera bodies have more available focus points over a wider area of the image. Most digital SLR cameras will have the option of selecting either a single focus point, group of focus points or all focus points.
In most cases, a single central focus point will often be the best choice when the dog is running directly towards you - and I always try and keep that point on the dog's face - preferably an eye.
The central focus points (as opposed to the ones around the edges) are usually the most accurate. If you Google your camera make and model and the term "cross-type focus points" you can usually find out which focus points are the more accurate cross-type points. The available cross-type focus points will also depend on what lens you are using. I also advice to thoroughly read your camera’s manual for more information.
With my camera - the Canon 1D-X Mark II (which has a similar autofocus system to the 5D Mark III and IV, and also the 7D Mark II) - the autofocus area selection mode I use mainly when the dog is running towards me is either the Single point-AF, or if the camera is struggling to track the dog, I switch to AF Point Expansion - with either 4 or 8 surrounding assist points.
 Canon 1D X - Single focus point, viewed with the Show Focus Points Plugin for Lightroom
Very fast or randomly moving dogs can be trickier to track with a single focus point. When you’re closer to or involved in the action yourself - say, playing a game of tug with the dog - a single focus point may not be forgiving enough of missed aim.
Switching to a small group of focus points will usually allow the camera’s autofocus tracking system come into play. However, as clever as your camera may be, I don't recommend modes where ALL the focus points are activated as the camera often fails to focus on the desired object.
 Canon 1D X - Single + 4 surrounding assist focus points, viewed with the Show Focus Points Plugin for Lightroom
On high-end cameras, the use of groups of focus points is often accompanied by additional settings that determine the type of tracking, controlling everything from tracking sensitivity to shutter or focus release priorities.
The high-end professional Canon SLR's have 6 Focus Cases to choose from. For dogs, I have the best success with Case 1, Case 5 or 6. You can read more about the Cases (and other focus-related settings) in this PDF from Canon. It relates to the 1D-X but other high end Canon SLR's have the same (or similar) focusing systems.
I can’t emphasise how important it is for you to read your camera’s manual and thoroughly understand the capabilities and available options of your camera.
Focus Modes
The most suitable focus mode for focusing on moving objects is continuous focus. This is called AI Servo by Canon and Continuous-servo or AF-C by Nikon.
In this mode, camera’s autofocus system locks on to the subject, continuously tracking its movement - whether it’s the tiny movements of a dog sitting stationary - or the big fast motion of a dog running full tilt towards you. I have my camera set to AI-Servo full time.
My preferred focus technique for pet photography is the back button focus (BBF) method. Not to be confused with BFF. Though, you may become BFF with your BBF! Anyway, I digress. You can read more about back button focus for pet photographers in this blog post, totally dedicated to this focusing technique. Back button focus is also covered in my e-book Fetching Photos.
8. Shoot continuously
Shooting at multiple frames per second helps increase your success rate and gives you more shots to choose from. This increases your chances of obtaining that one "perfect" shot in the dog's stride, or at the very top of their leap.
When I am shooting action, I look through the viewfinder to visually track the action, then shoot in bursts at the peak of the action.
Modern digital SLRs are capable of higher and higher frames per second. My Canon 1D X Mark II can shoot up to 14 frames per second - I call it "machine gun mode"! Even entry-level bodies should be able to offer at least 3 frames per second, which is more than you could shoot manually by repeatedly pressing the shutter button.
 Late afternoon, full sun - Canon EOS 1D X, Canon EF 70-200mm f/2.8L IS II @ 105mm, ISO 125, 1/2500 sec, f/2.8
9. Re-create the action
Anything that involves rapid motion and direction changes can be tricky to capture, but there are ways of making movement more predictable.
Some dogs won't give you much to work with - they might just not be into it! When you're practising, try to use a dog that is willing and eager to repeat actions over and over again. Encouraging predicable action should be your aim.
You could start by photographing the dog running towards you, as this is easily re-created time after time so you can practice.
There’s a few different ways to get the dog racing directly towards you, depending on their level of training. If the dog has a good "stay" command, just have the owner or handler them up at a distance, then when you’re ready, release and call them towards you. If they love to play fetch, throw a ball for them, then photograph them as they are on their way back to you. Alternately, ask a helper to throw a ball or toy towards you (I always tell people to try and hit me with the ball!) to get the dog racing in your direction.
 Chasing a ball - Canon EOS 1D X, Canon EF 70-200mm f/2.8L @ 200mm, ISO 800, 1/1600 sec, f/2.8
You could also set up the scene so the dog runs across in front of you-you'll need a helper for this one. While shooting, keep the camera trained on the dog the whole time while shooting continuously – this is called "panning". Aim to capture the shot sharply to begin with, then to create some background blur, start reducing the shutter speed. This technique definitely takes some practice and is covered in its own chapter in my e-book Dog Shots (along with many other action techniques).
 Panning with slower shutter speed - Canon EOS 1D X, Canon EF 70-200mm f/2.8L @ 200mm, ISO 250, 1/500 sec, f/2.8
10. Practice!
Like most things you want to get better at in life, the key to obtaining consistently great action photos is to practice! Most of the shots taken in this article were taken on professional digital SLR cameras I’ve owned, but if you put some time in with your camera and really get to know how it works and which settings are best to use, it’s amazing what you can capture with more basic equipment.
Anything that you can get your dog to do repetitively – say, jumping for a ball or jumping into a lake – can provide a great opportunity to set yourself up for the shot and practice over and over, increasing your chances of success. Concentrate on one topic at a time (say, shooting action of a dog running towards you) and for each little step within that isn't working (say, not holding the camera steady enough), find a way to fix it, practice it, and then integrate it into the process.
Once you've worked out the best way to achieve each little step - practice the whole process until it becomes second nature - and then you can move onto the next thing you're struggling to master.
Check out this fantastic article about "deliberate practice" on one of my favourite blogs.
I often take my own dogs out to practice. During a recent trip to the river, my main aim was to get some great water action shots of Fletcher and Opal jumping into the river. I had my husband on the shore on stick-throwing duty and I was thigh deep in a shallow section of the rive, shooting with the sun behind me covered in light cloud. I used a very fast shutter speed as I know that is important to freeze the water droplets. We repeated the throw about 10 times, or until my husband had had enough. The dogs would have happily fetched sticks from the river for hours!
 Fletcher in action - Canon EOS 1D X, Canon EF 70-200mm f/2.8L IS II @ 102mm, ISO 500, 1/2500 sec, f/2.8
 Opal in action - Canon EOS 1D X, Canon EF 70-200mm f/2.8L IS II @ 110mm, ISO 1000, 1/2500 sec, f/2.8
I ended up with a bunch of shots that I love - my two favourites are above.
However - I did learn things from this exercise!
Mostly, I learned that I need to remember to zoom in more. Both the shots above have been cropped fairly heavily. I was only using half the reach of my 200mm lens and could have definitely zoomed in more to fix that. Something to work on for next time!
My final thoughts? There is no magic button. You have to put the work in. At least if you’re playing fetch in the process, there won’t be any complaint from your doggy subject.
Oh, and if you are interested in some more pet photography action tips, there are no less than ten action photography "recipes" in my e-book Dog Shots. Just saying!
Join our mailing list!
Want to improve your pet photography with free tips and expert advice?
Join our mailing list and get a guided tour of what we have to offer, along with our weekly newsletter packed with practical pet photography insights.
📩 Sign up now and start learning with us!
We hate SPAM. We will never sell your information, for any reason.