
Grid Games Challenge Instructions
Closed captions are available in multiple languages. Translations have been created by AI and may not be 100% correct.
Challenge Brief
Capture an image of any type of pet that successfully uses the rule of thirds as the primary compositional component. Your composition should largely be created in-camera, and not rely on heavy cropping later to fix it. Your image may include action, multiple pets, or pets with people.
Cheat Sheet
We recommending downloading this, then taking a photo of it on a fresh memory card with your camera before you go shooting for the challenge. To refer to it when shooting, just flick forward to the first image on your camera when you review your images, for a handy reminder of the brief and challenge instructions.
Quick Menu
Overview
Video Timecode – 00:31
Composition is one of the most powerful tools you have as a photographer.
It determines where the viewer looks first, how their eye moves through the frame, the final focal point (or points), and how balanced the final image feels.
One of the most widely used compositional guides in photography is the rule of thirds.
Imagine your image divided into a grid of nine equal rectangles by two vertical and two horizontal lines. These create nine separate areas and four key intersection points.
These lines and intersections are where our eyes are naturally drawn.
Instead of placing your subject directly in the centre of the frame, the rule of thirds encourages you to place important elements along these lines or at the intersections.
As a compositional rule, the rule of thirds doesn’t exist in isolation. It often pairs with complementary elements such as leading lines, negative space and balancing elements, which we'll also cover.
But keep in mind that for this challenge, the rule of thirds should always be the dominant compositional element.
It’s important to keep in mind that it’s not enough to just place things randomly on third intersections and lines - that’s not how it works. You have to have a reason for your positioning choices - and that’s what we’re going to be covering in this challenge lesson.
It’s time to play… Grid Games!
Technique
Video Timecode – 02:00
There are lots of ways you can interpret the rule of thirds for this challenge. Keep in mind that we want to see the rule of thirds as the primary compositional element. While other elements might be at play, they have to be less dominant than the rule of thirds.
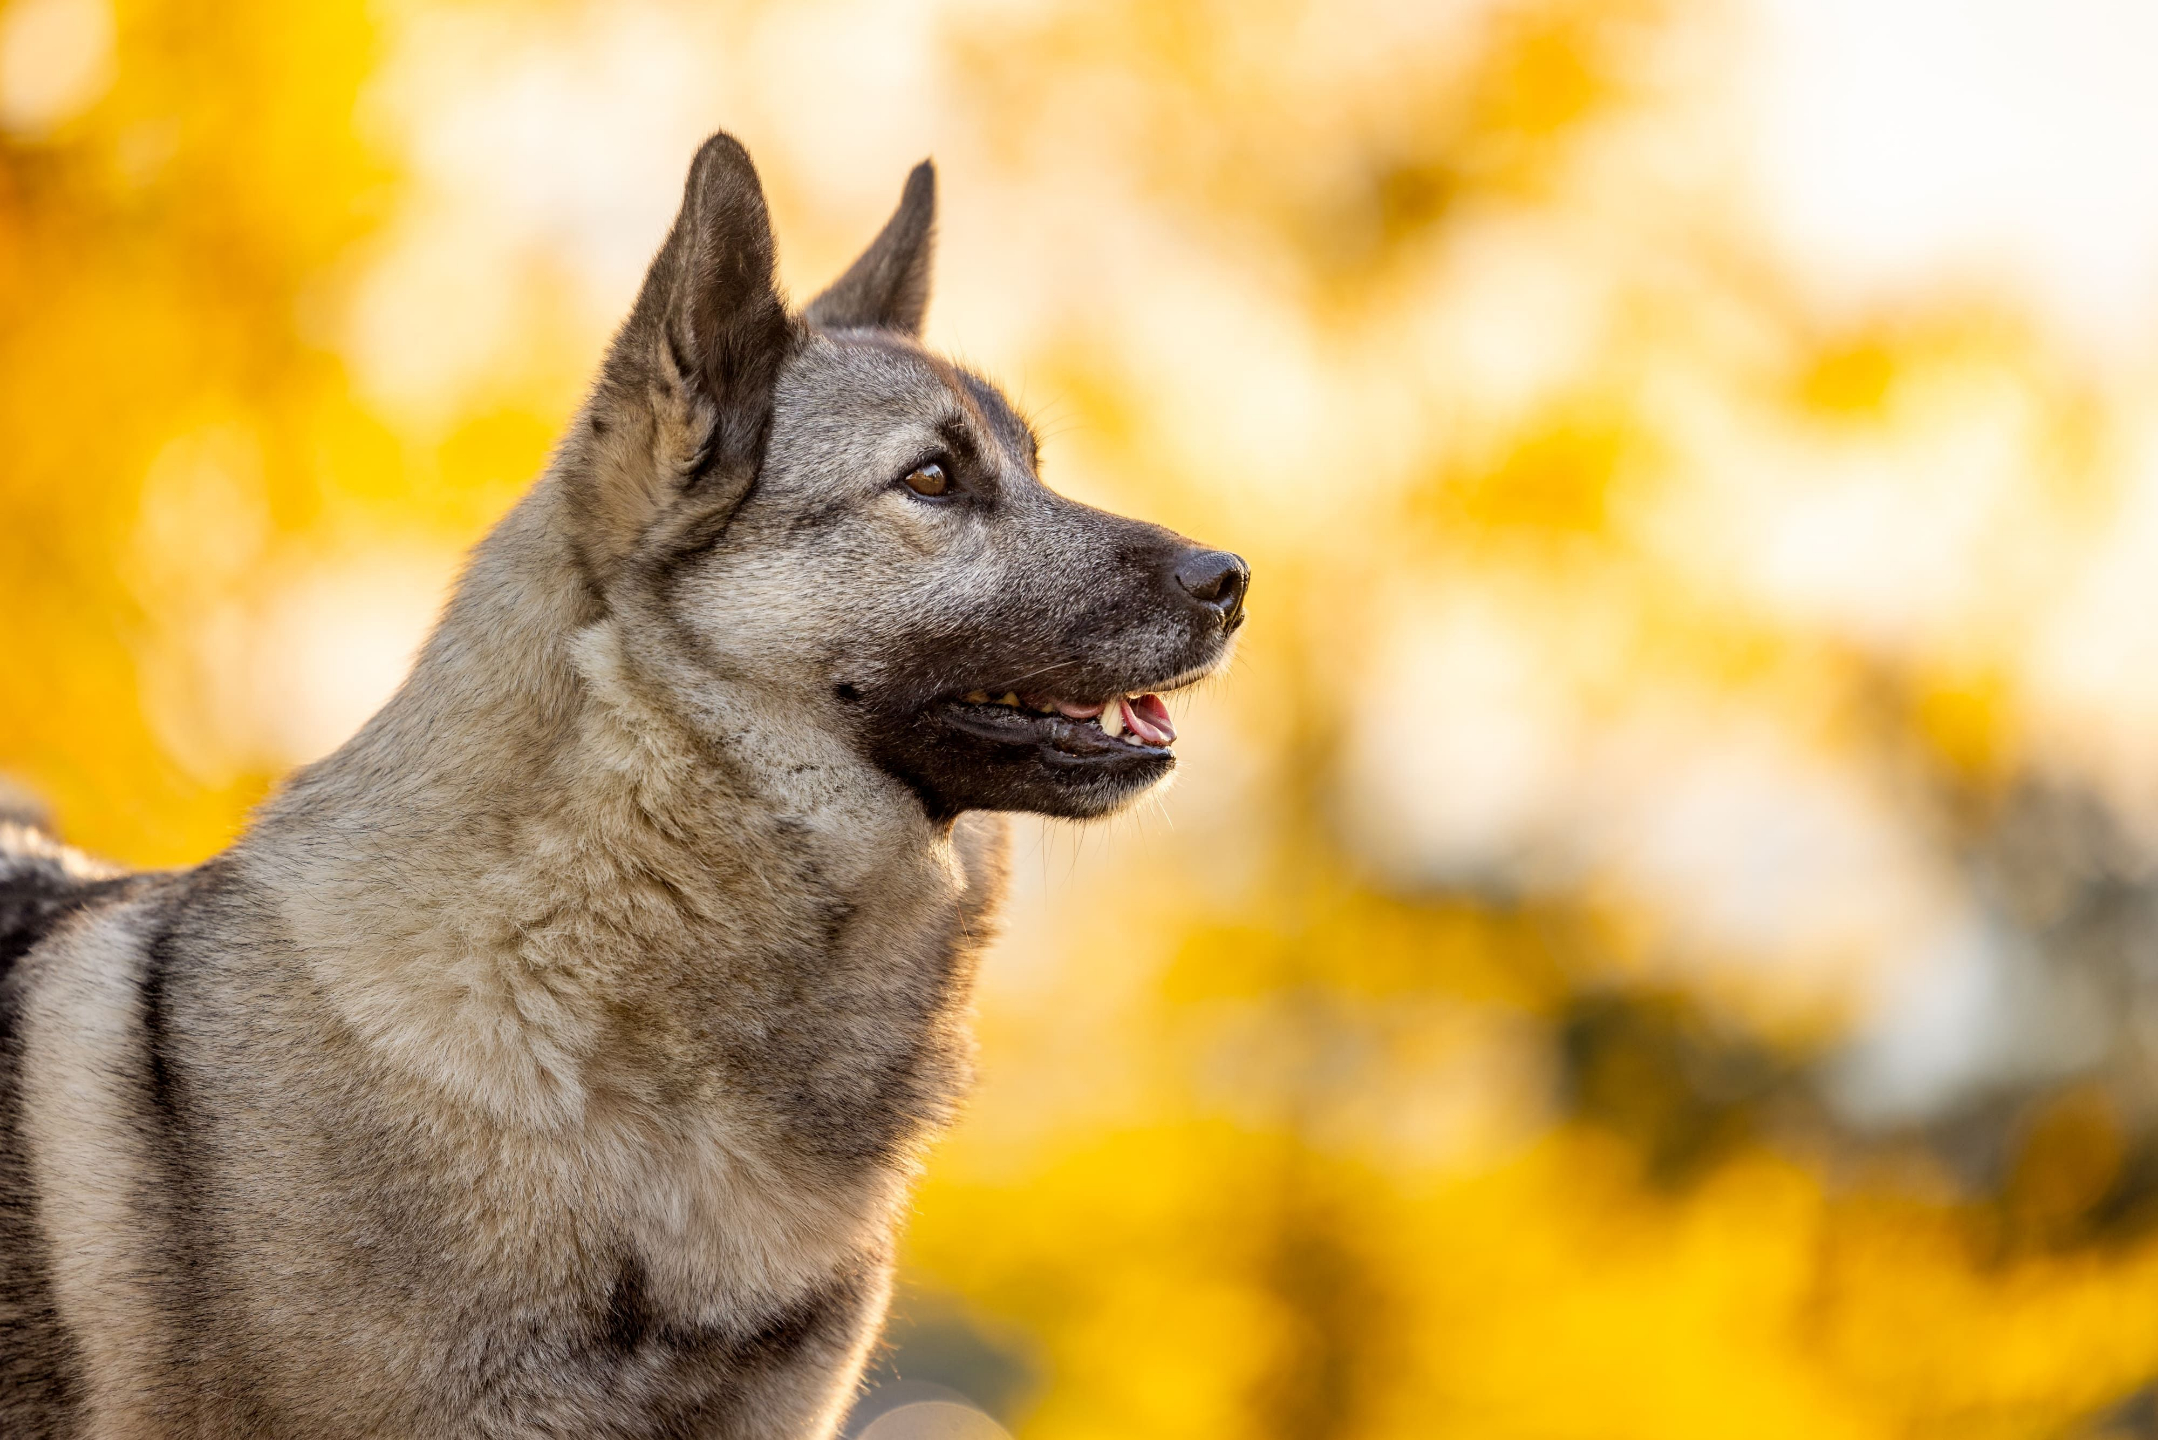
For example, even though the eyes are exactly on the top third line in this image, the dominant compositional technique is centering, so images like this won’t meet the brief for this challenge.
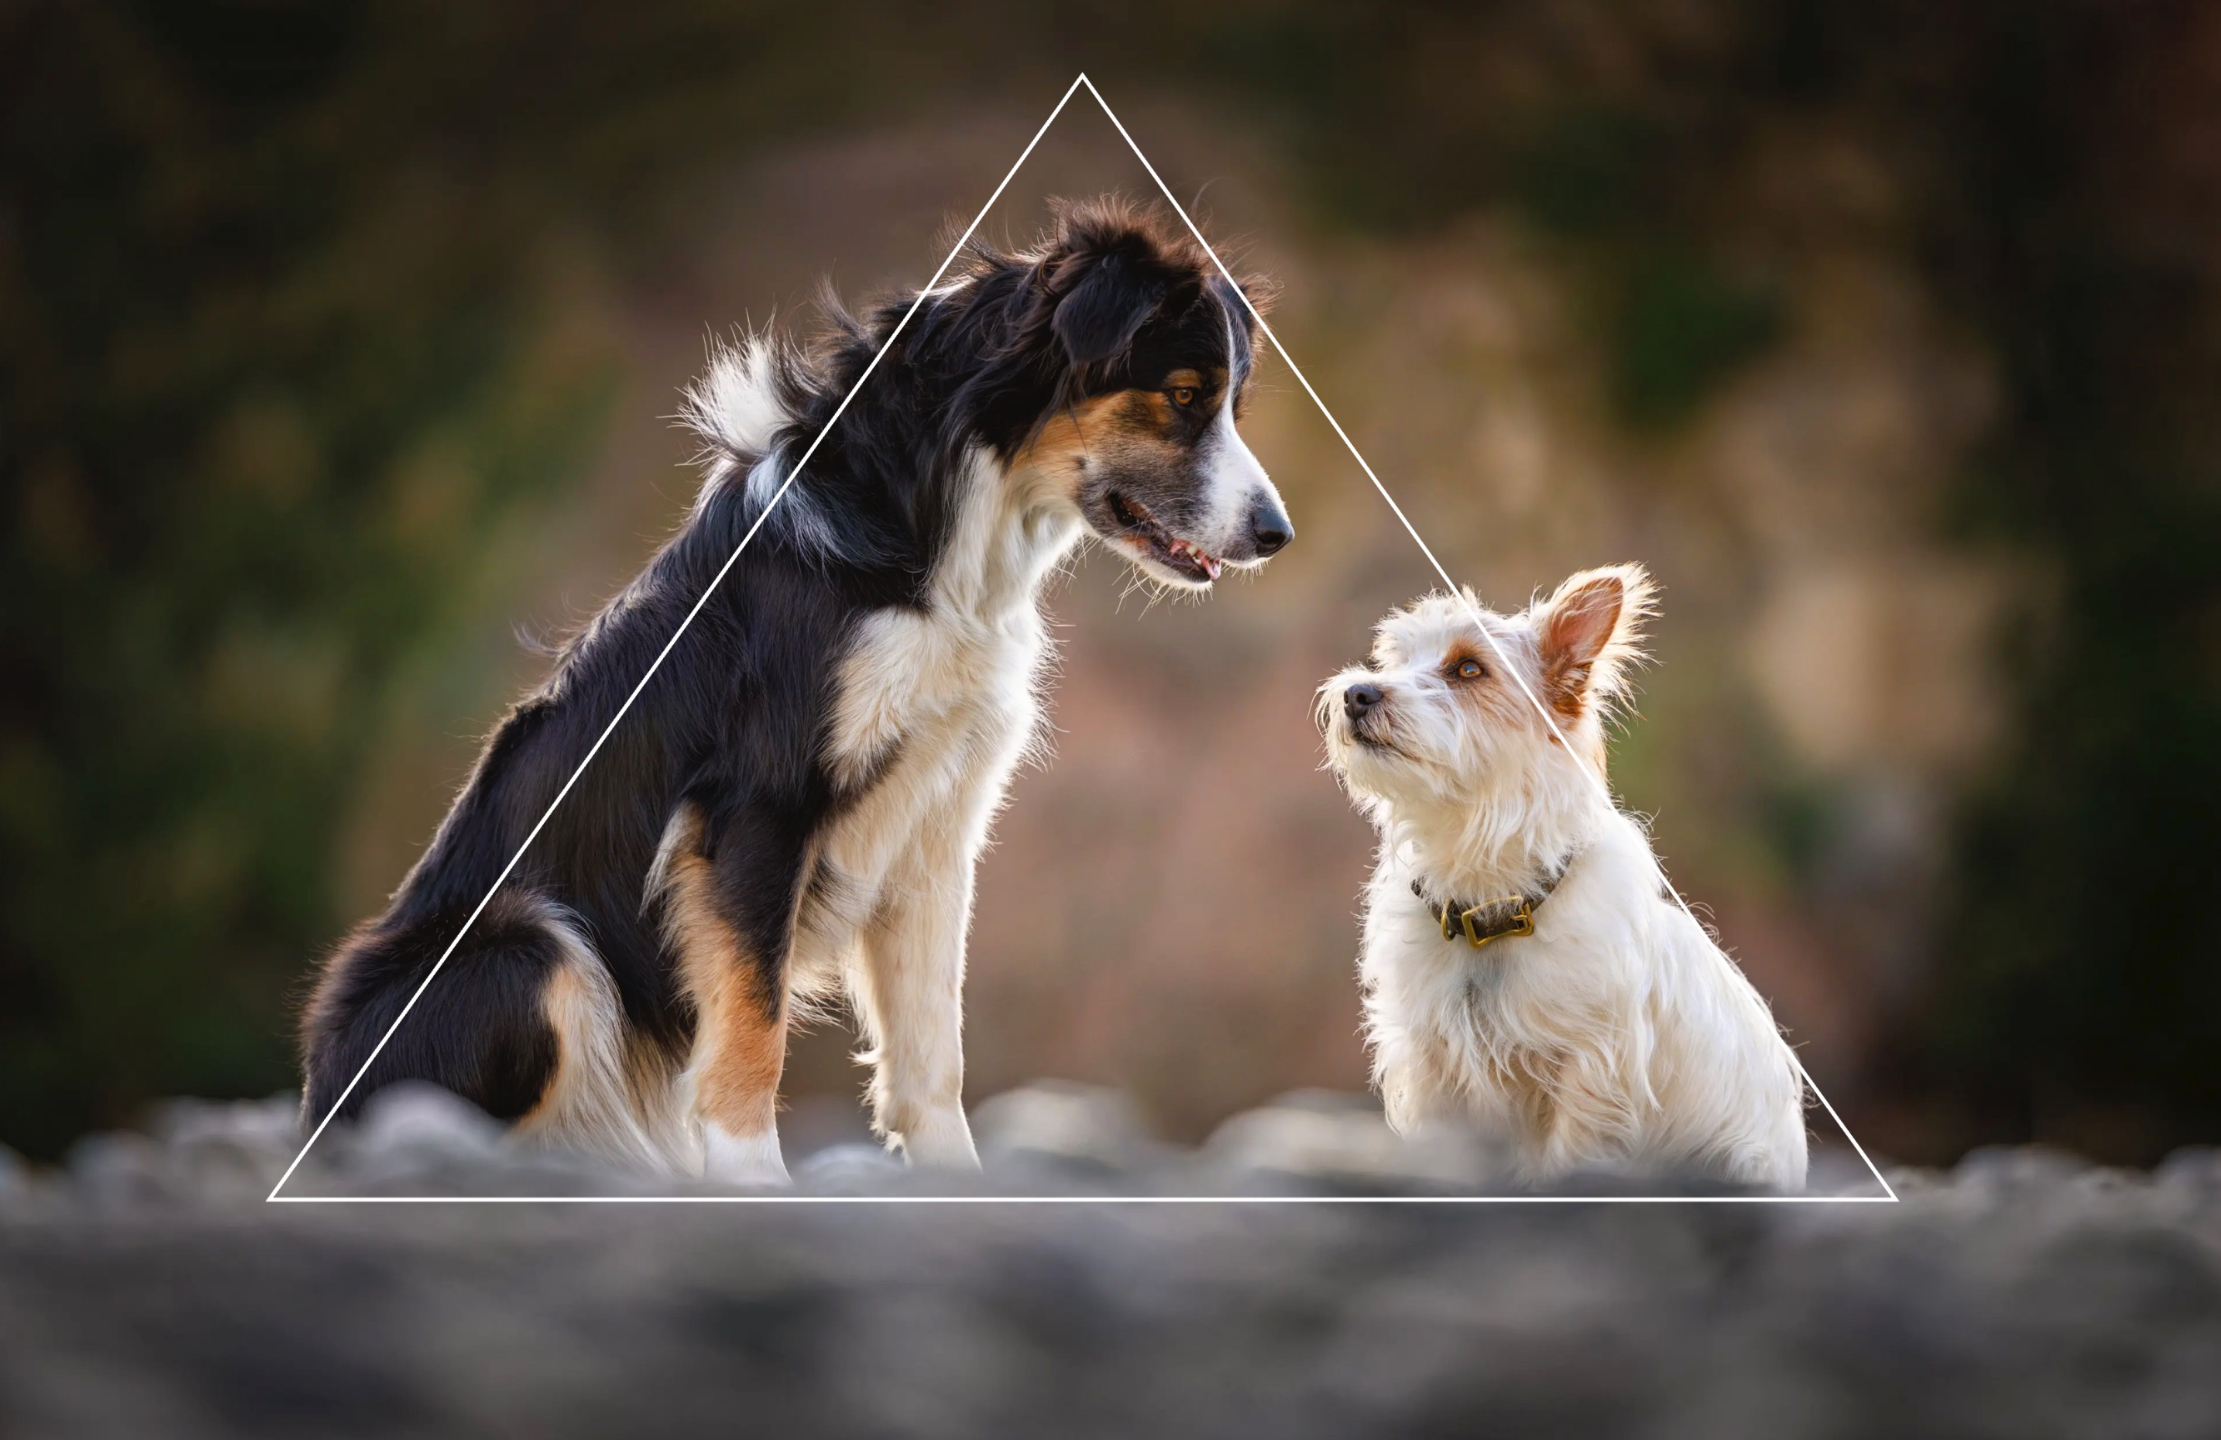
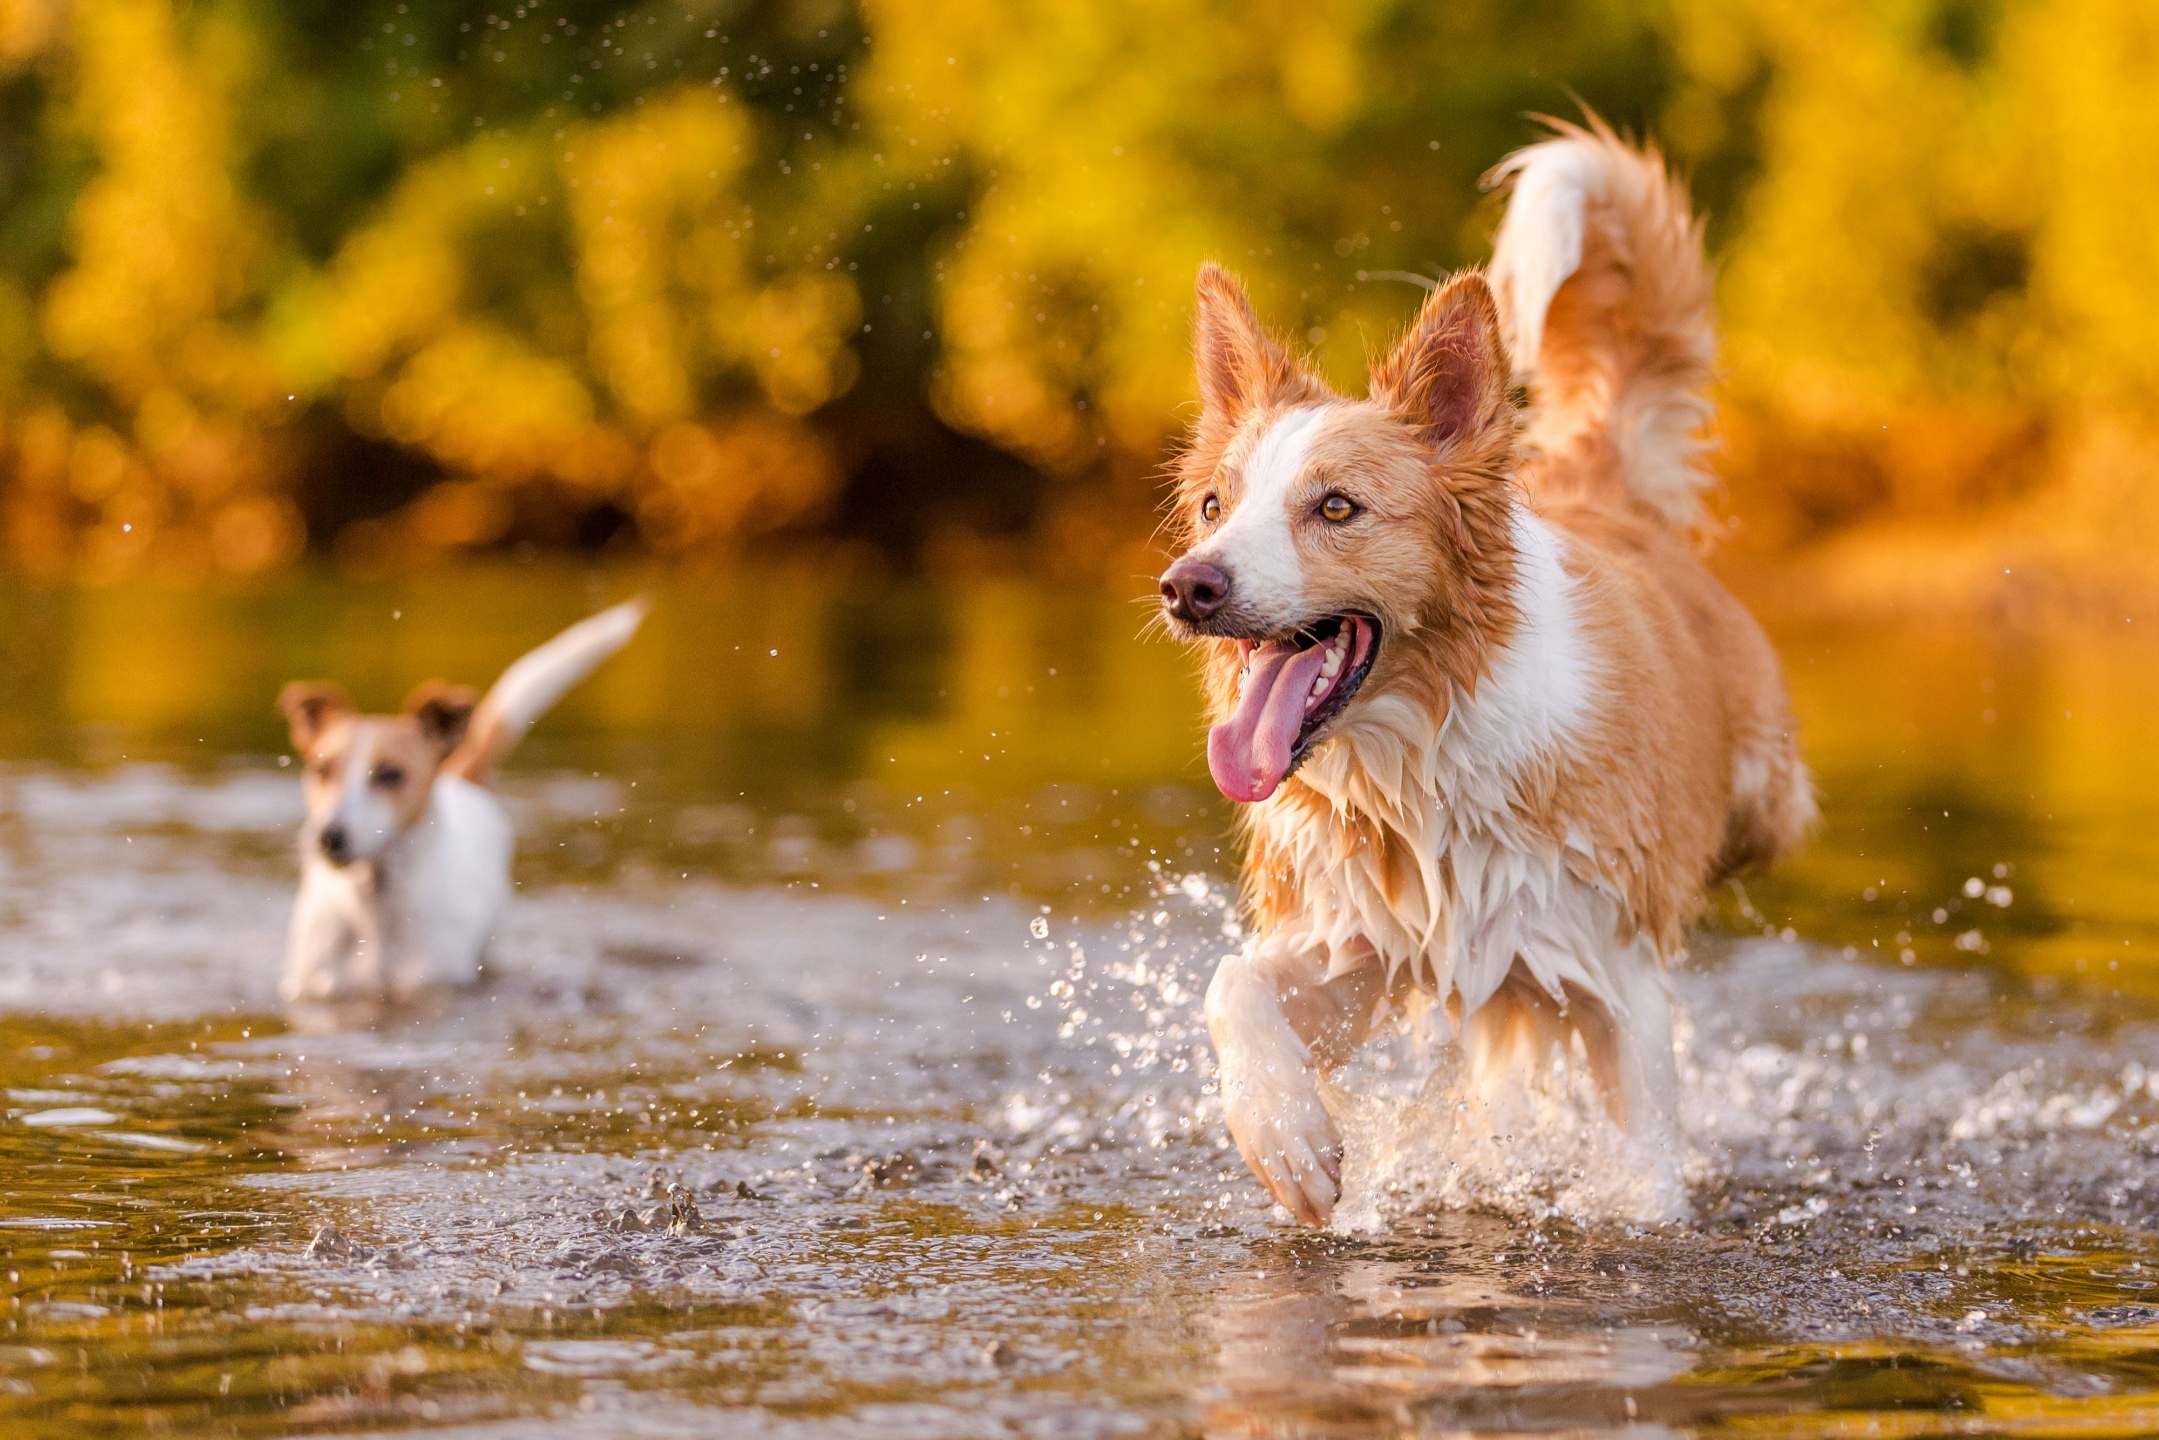
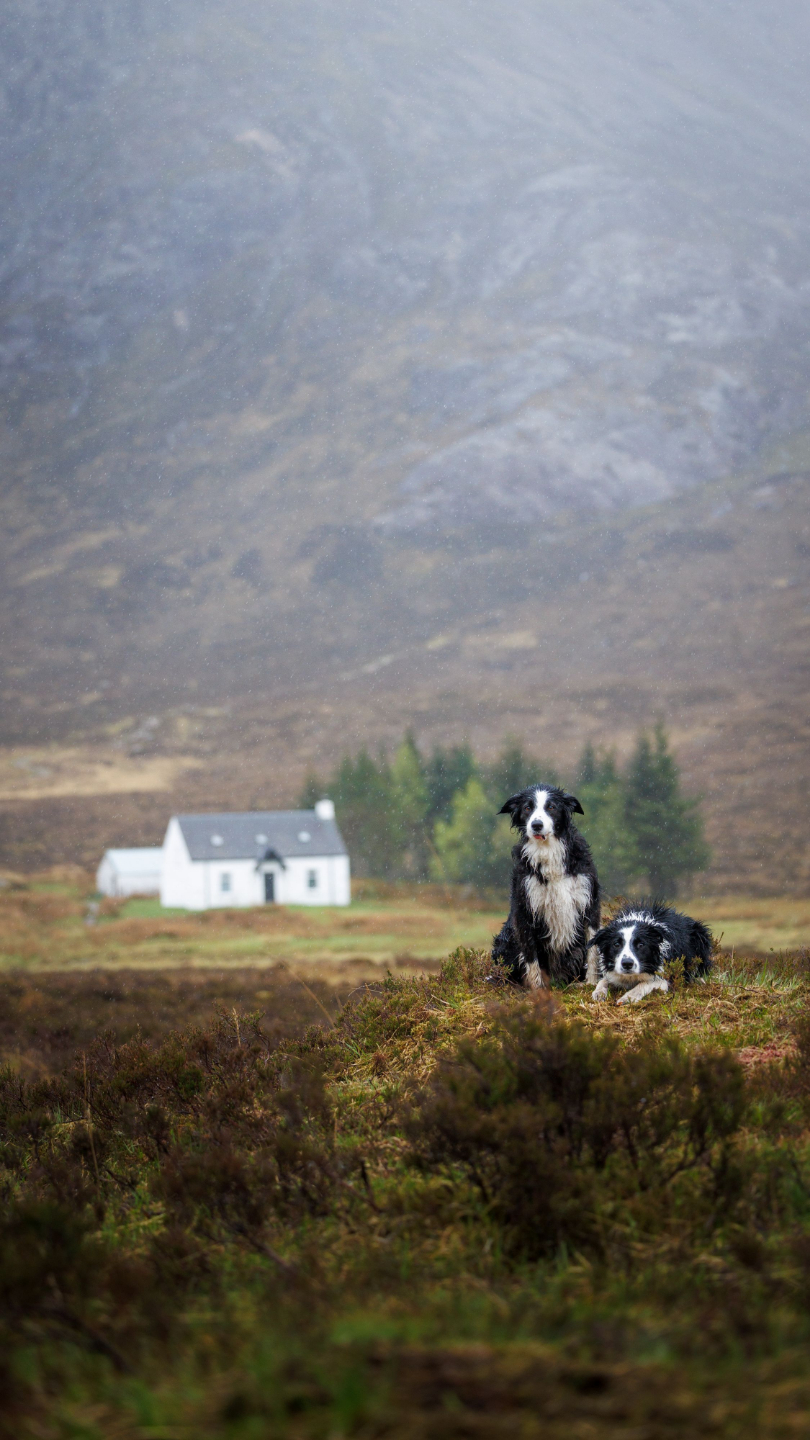
While the dogs in this image are placed roughly on the vertical third lines, the dominant compositional element is really triangles.
When we first look at the image, we want to immediately see the use of rule of thirds, not have to go searching for it.
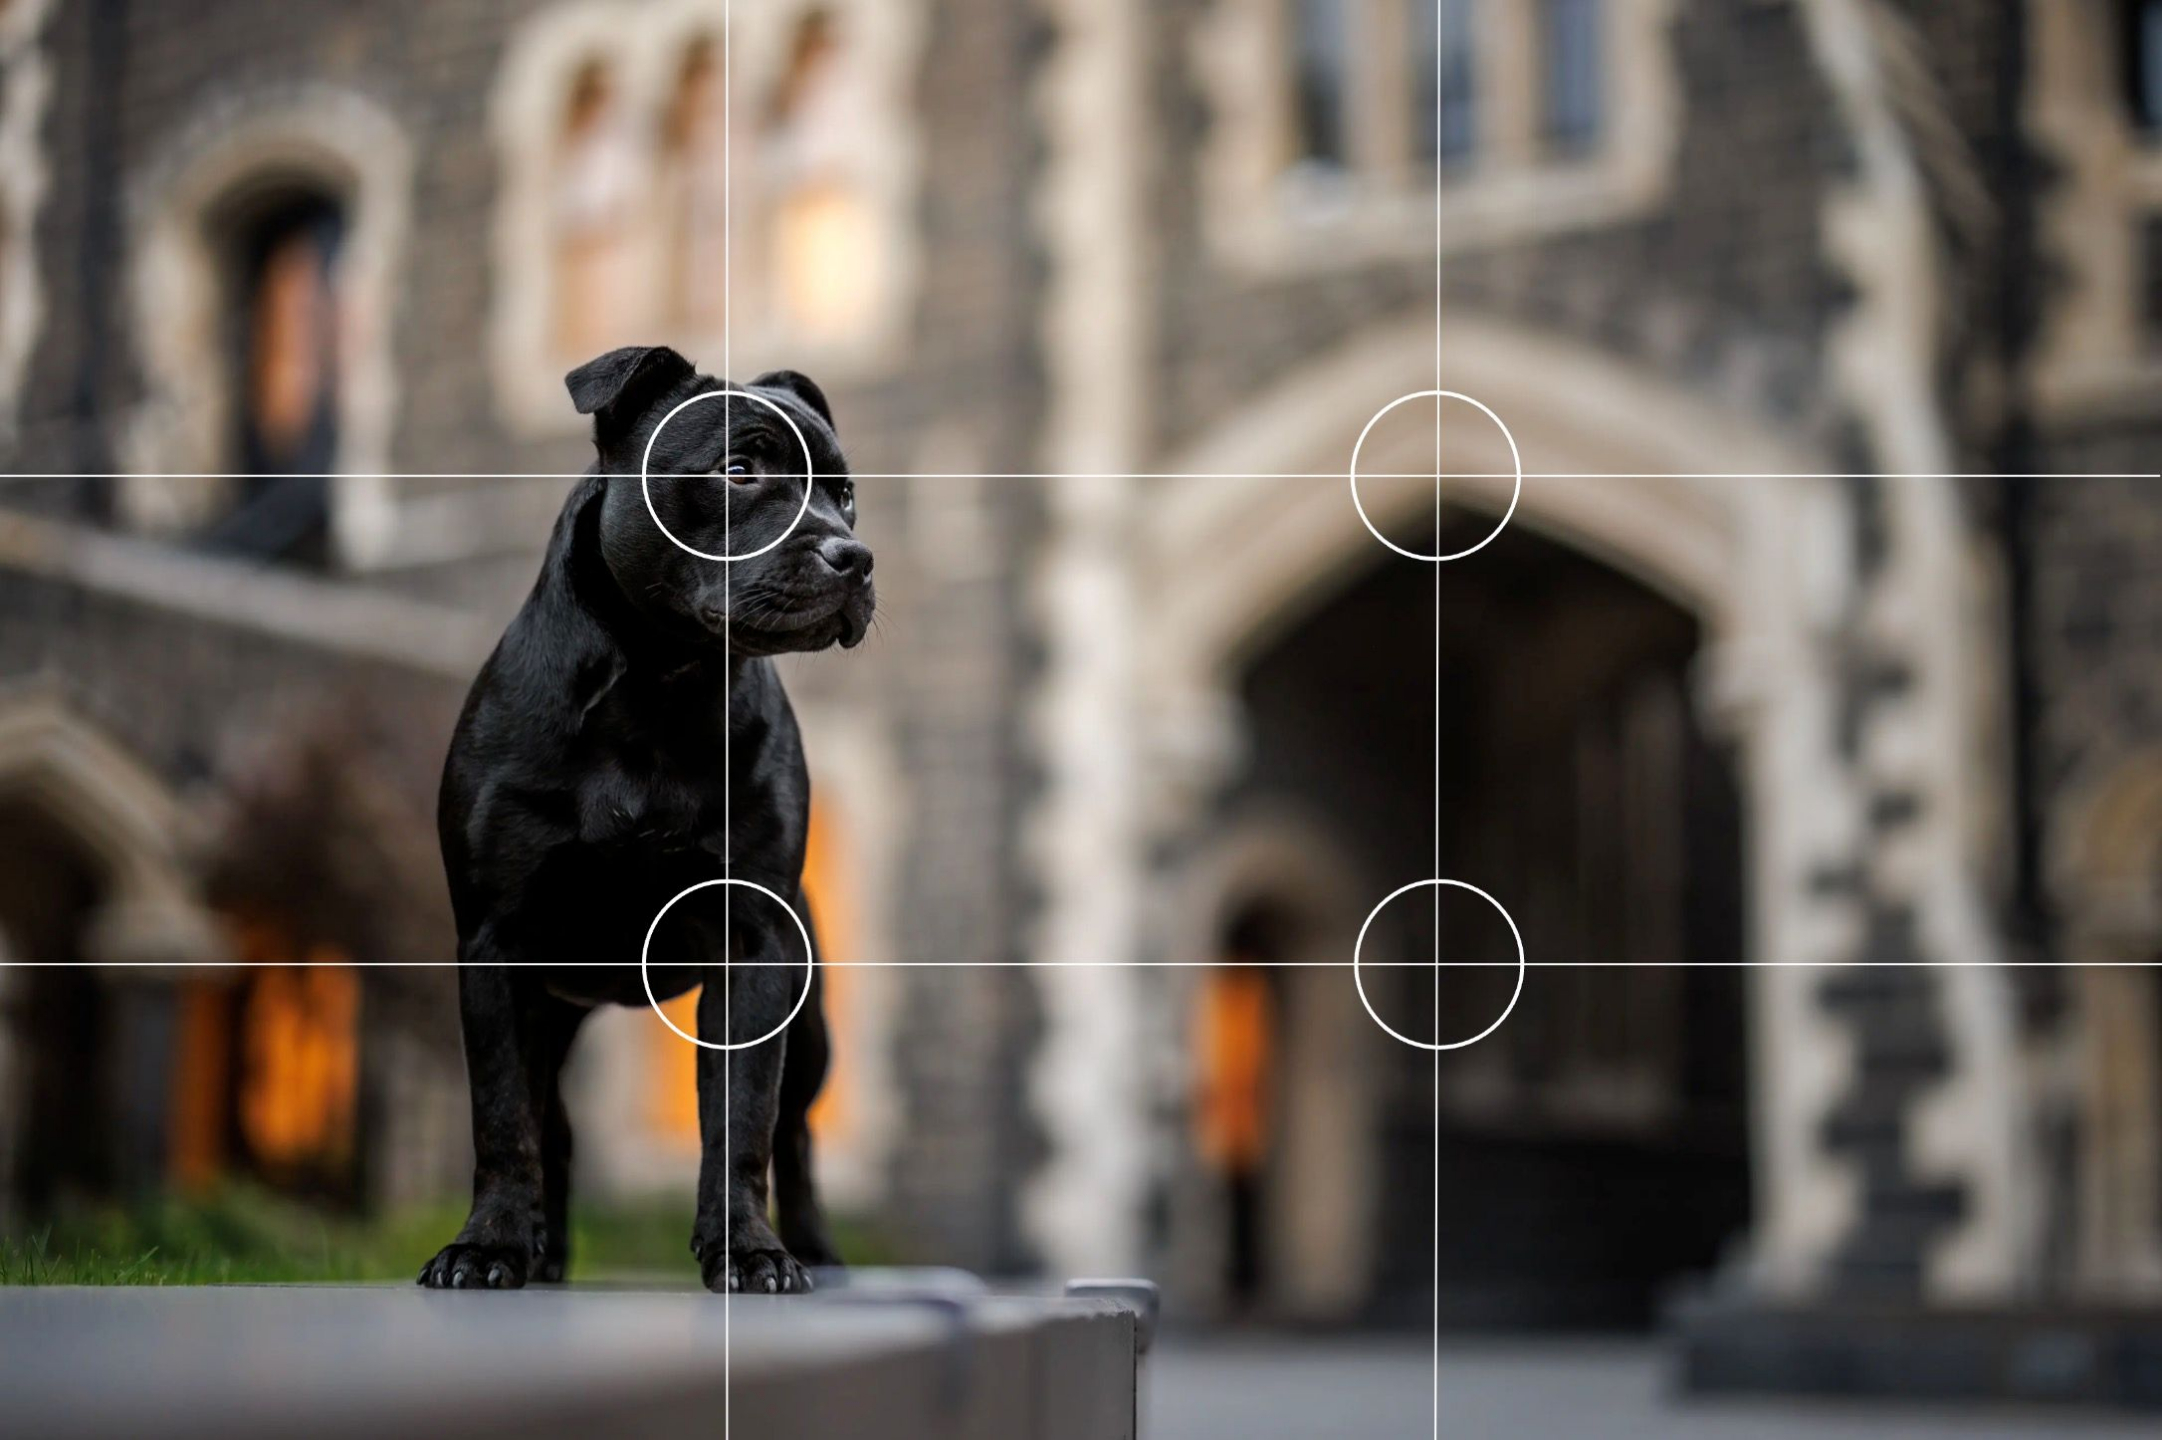
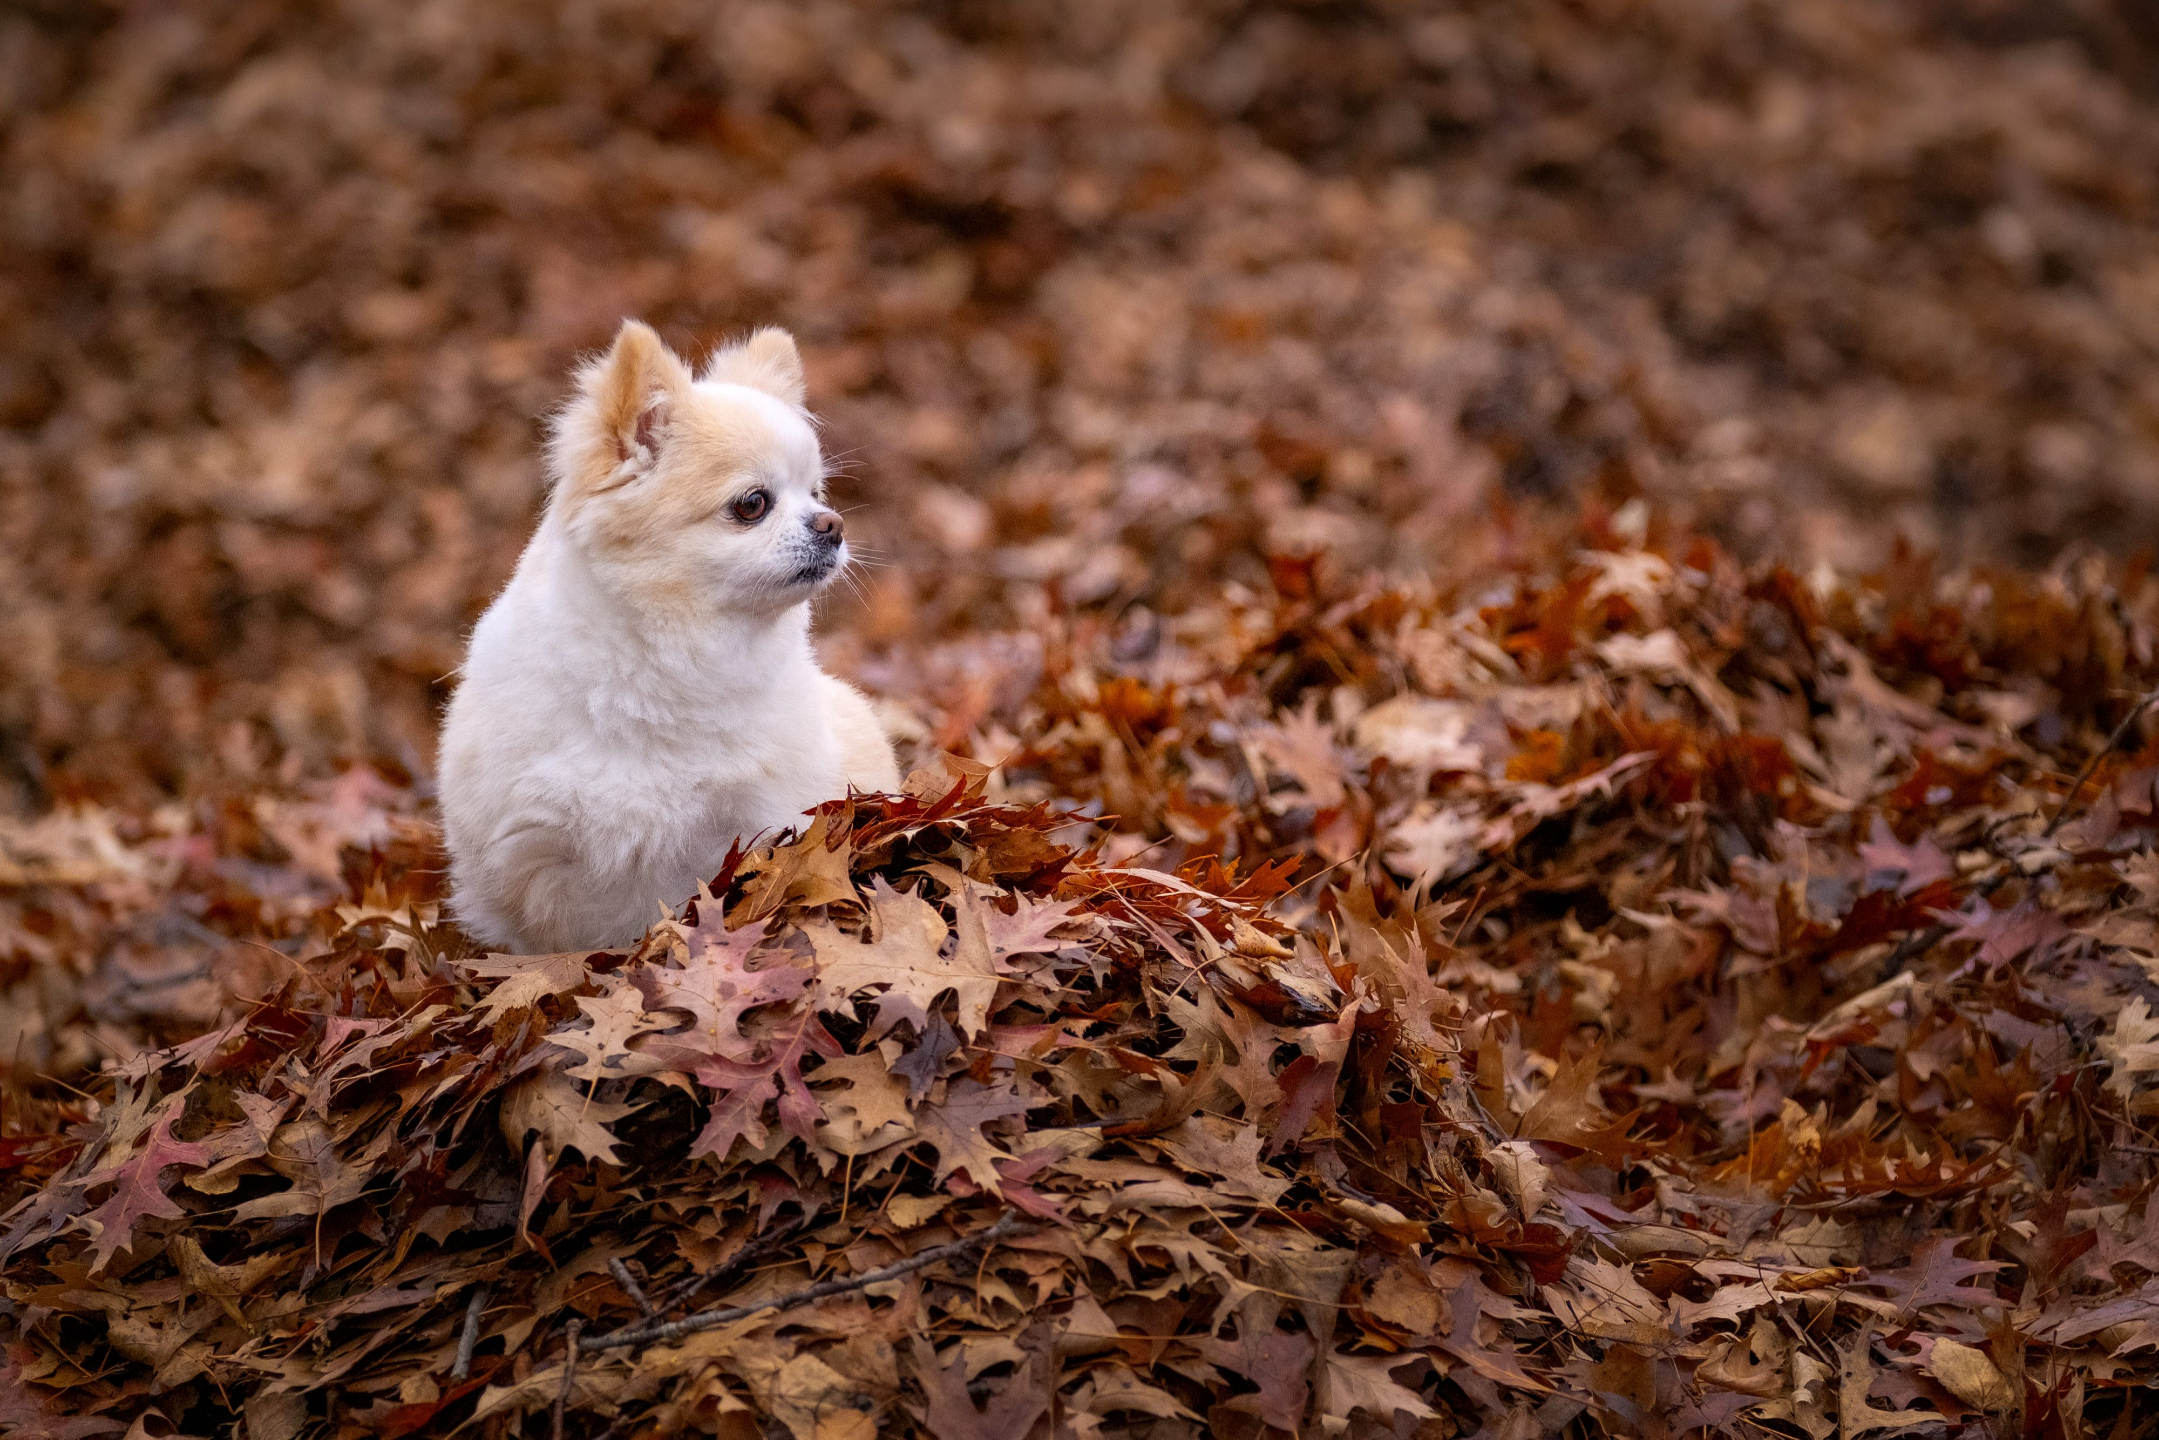
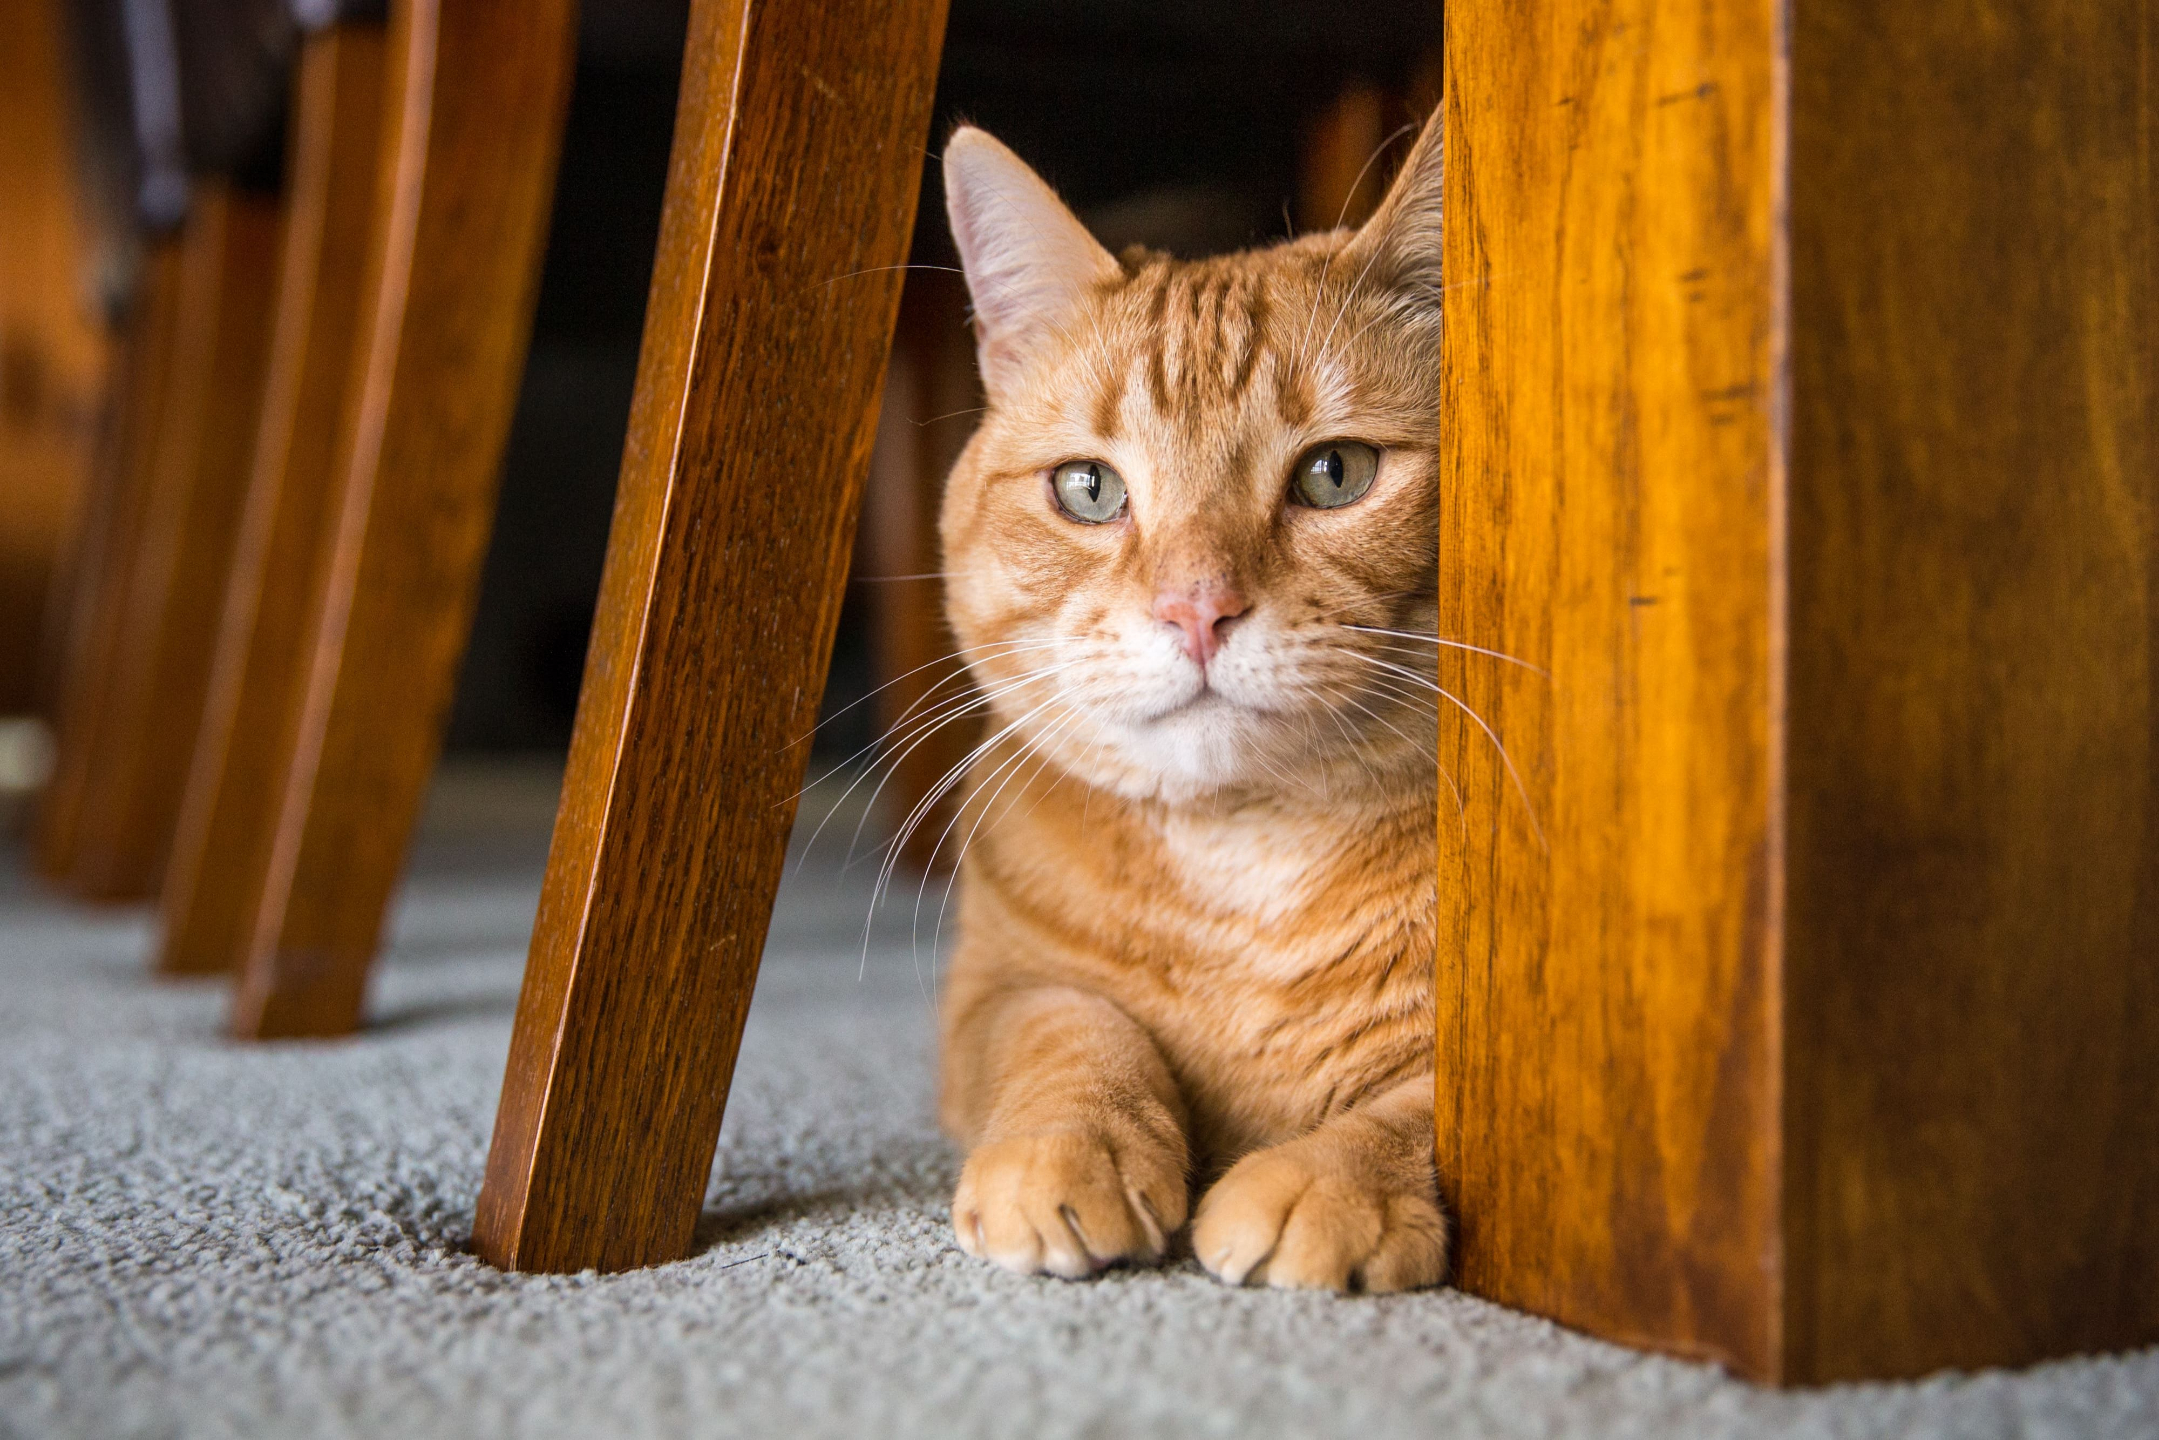
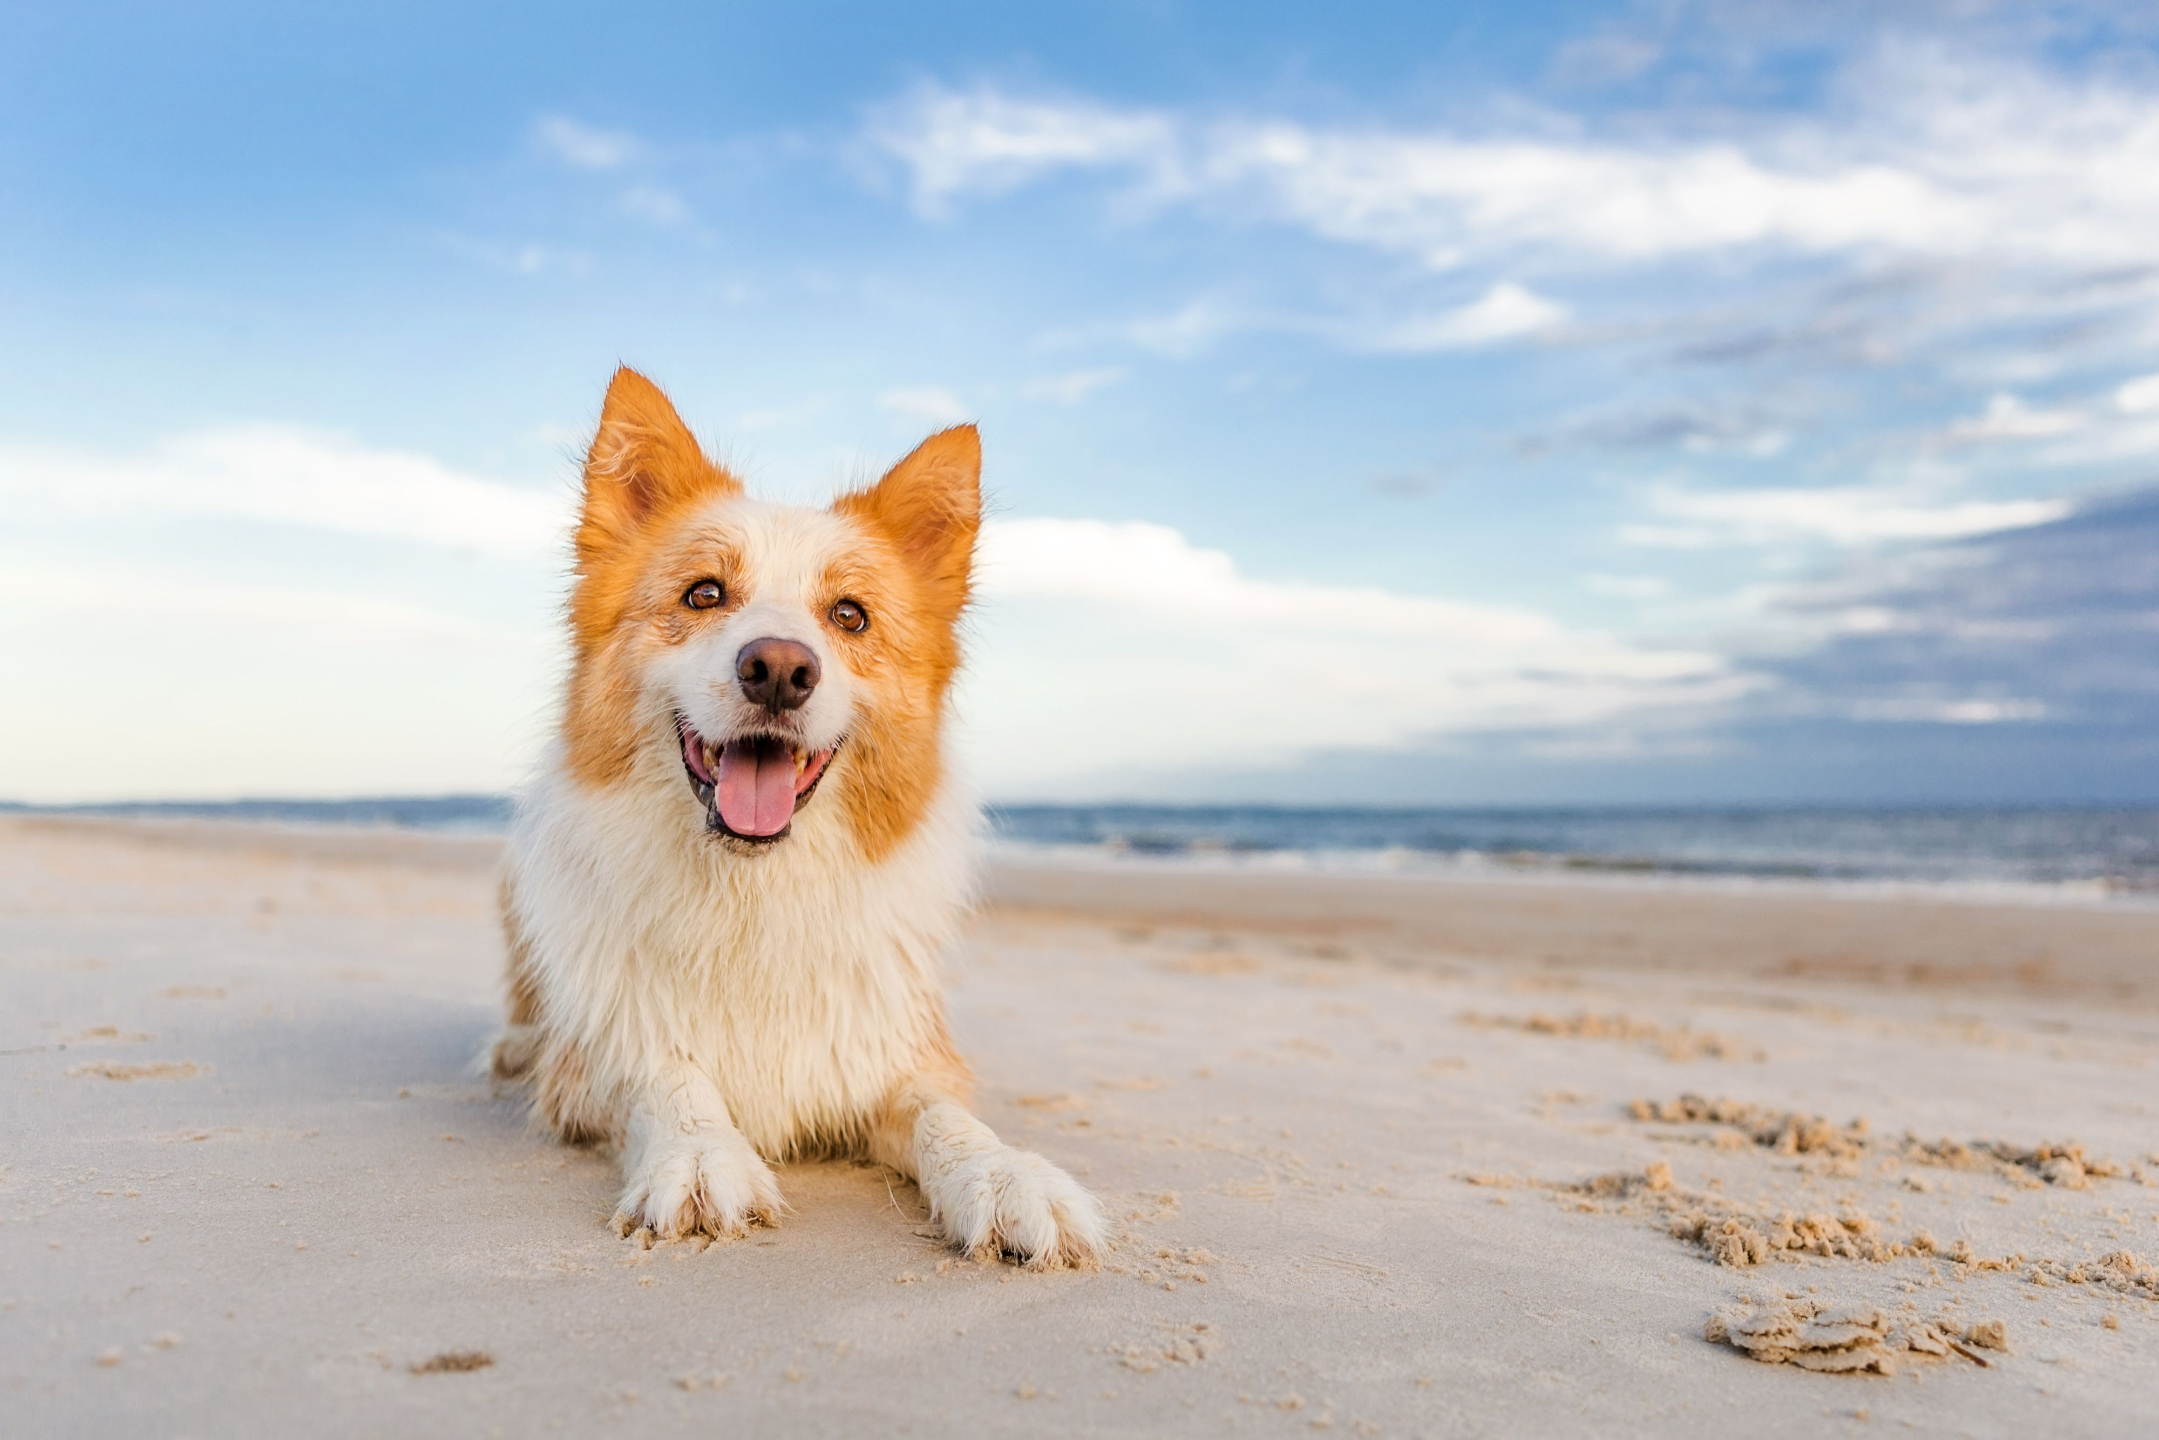
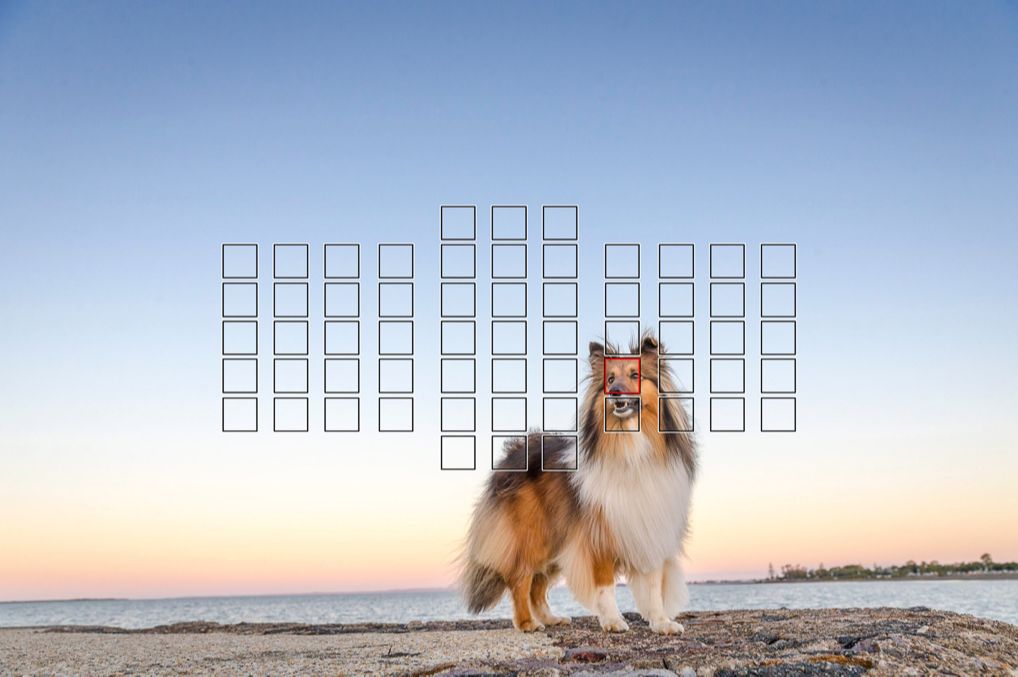
When using the rule of thirds on closer shots, you’ll be placing important elements on one of those four intersections - mostly eyes and faces.
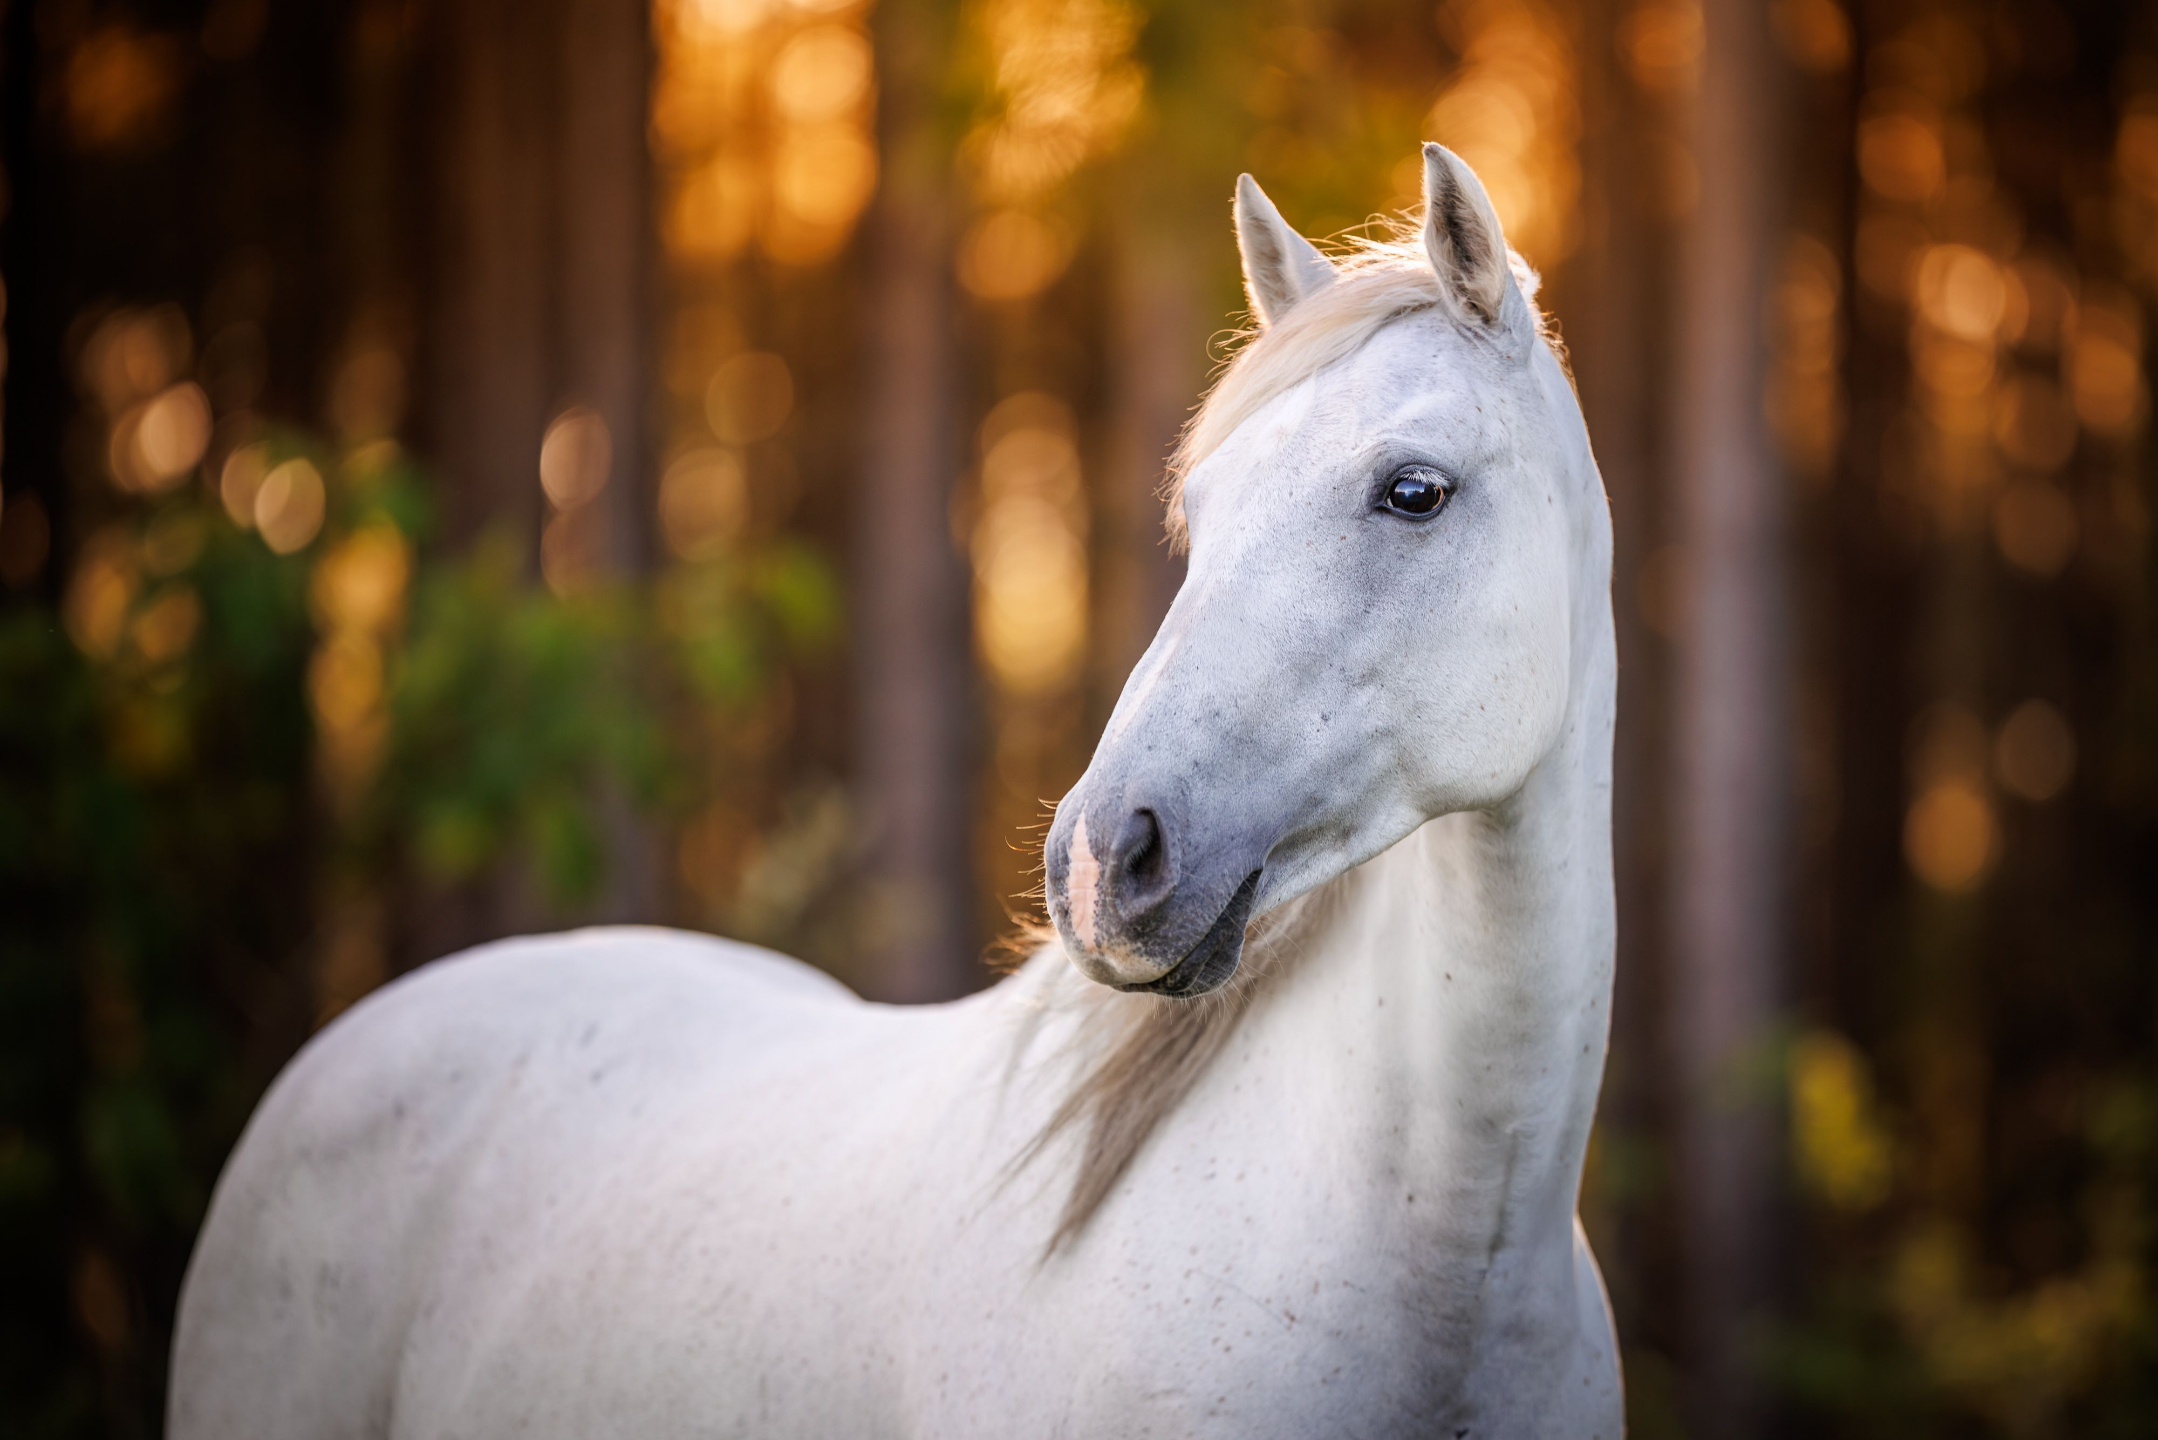
Or if the subject is smaller in the frame, the entire body.
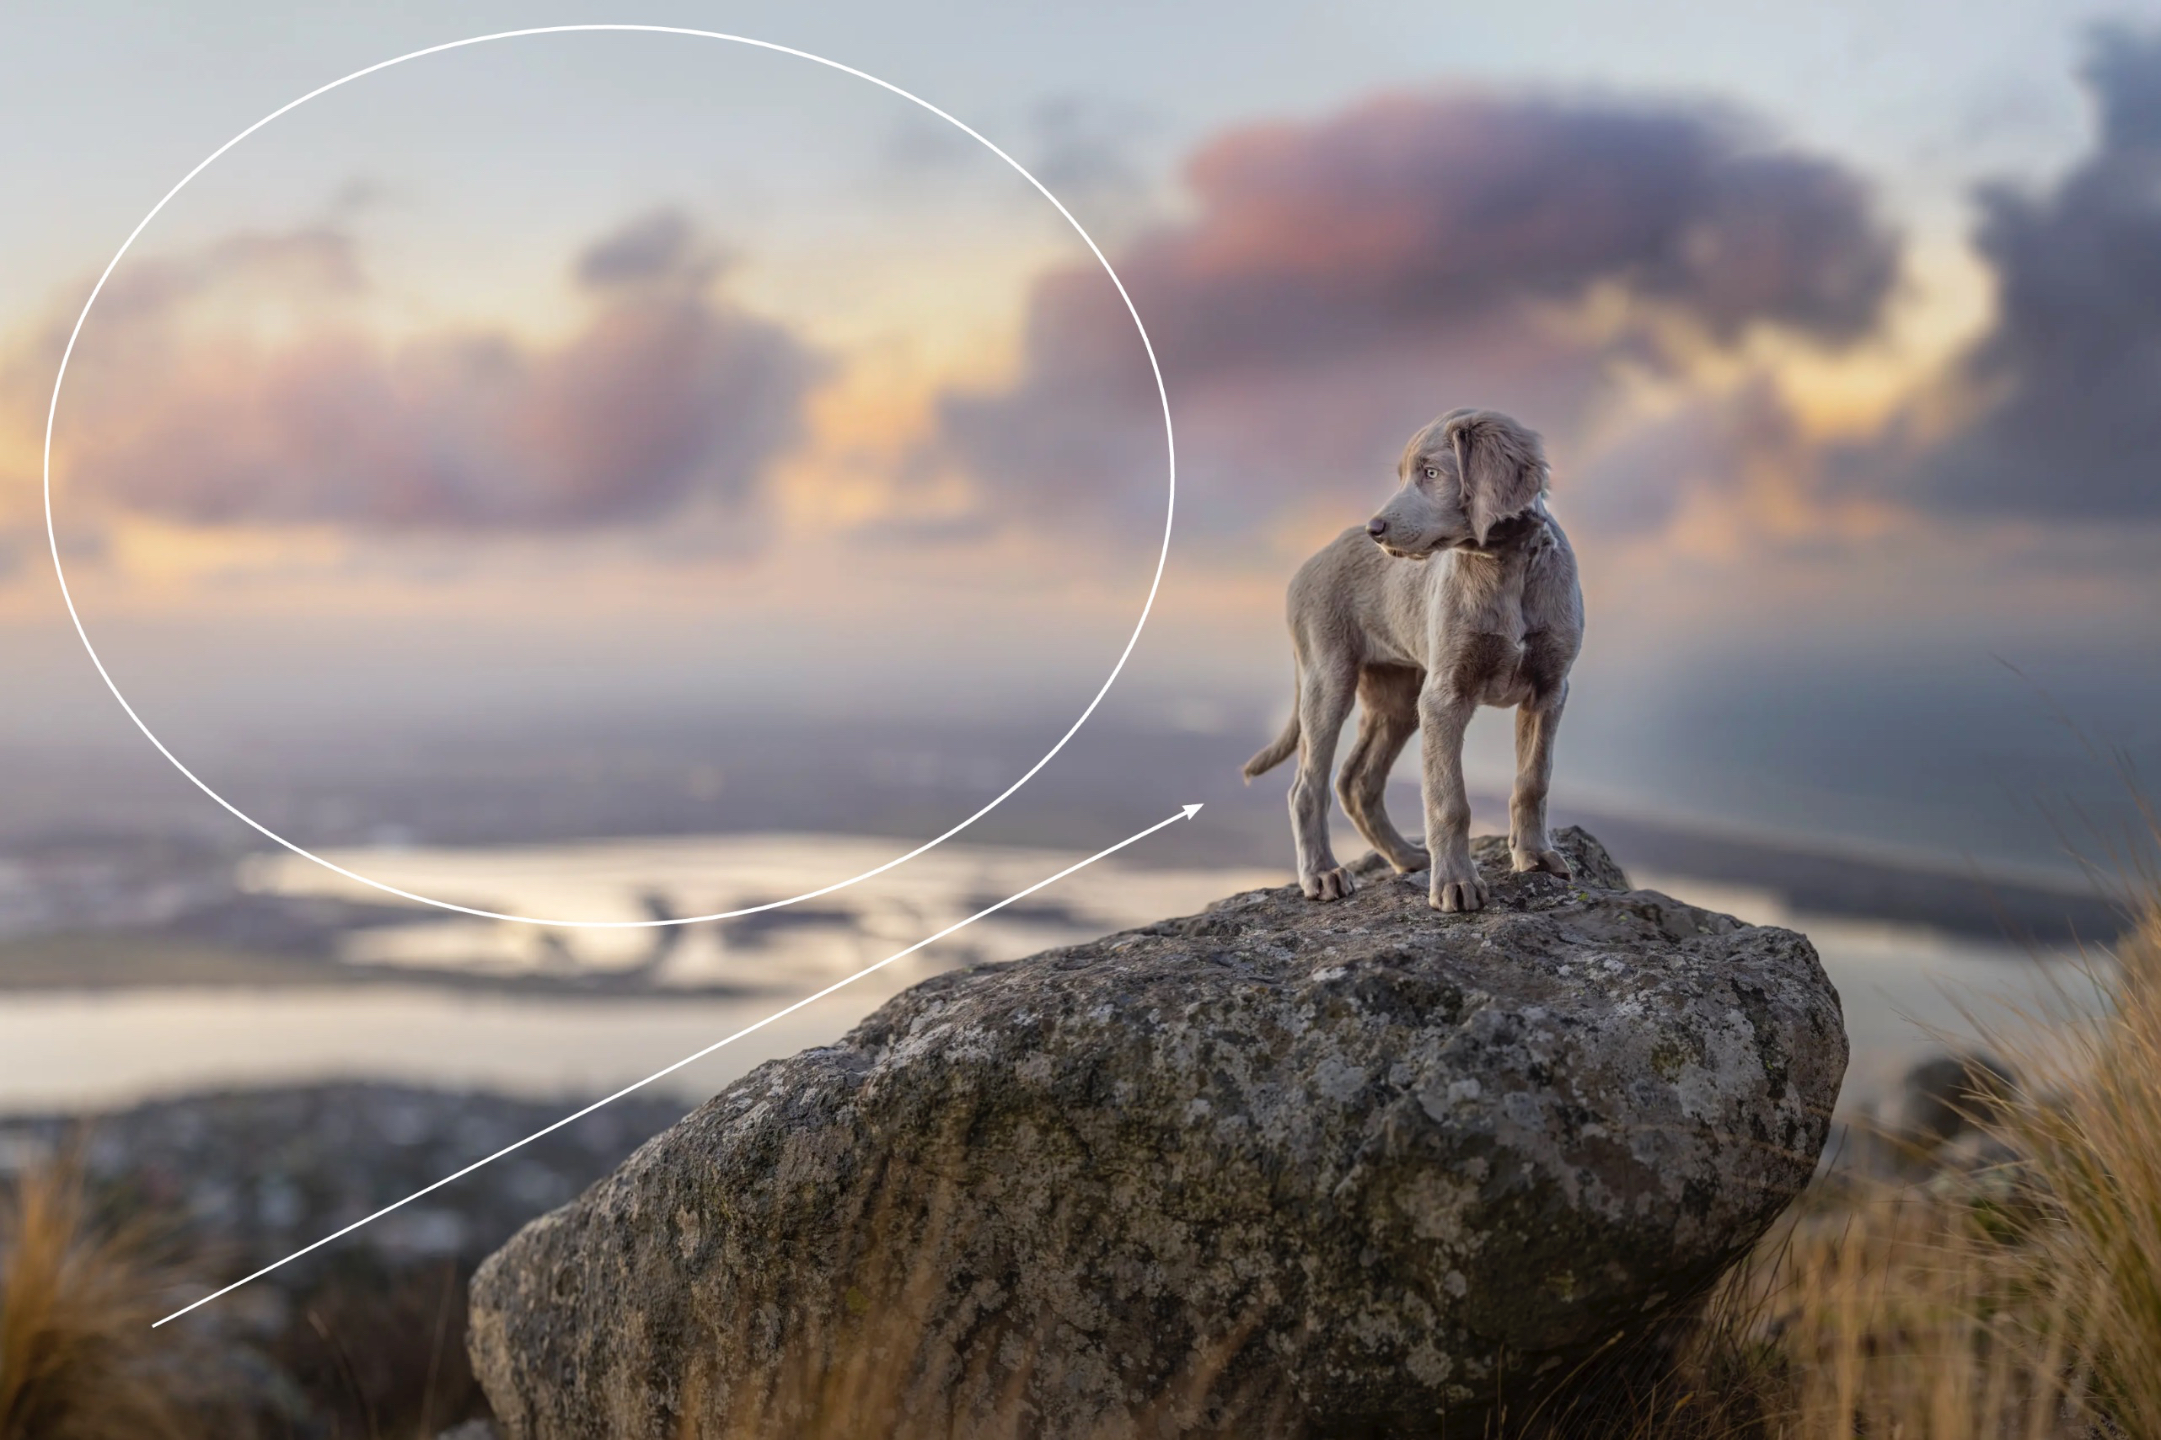
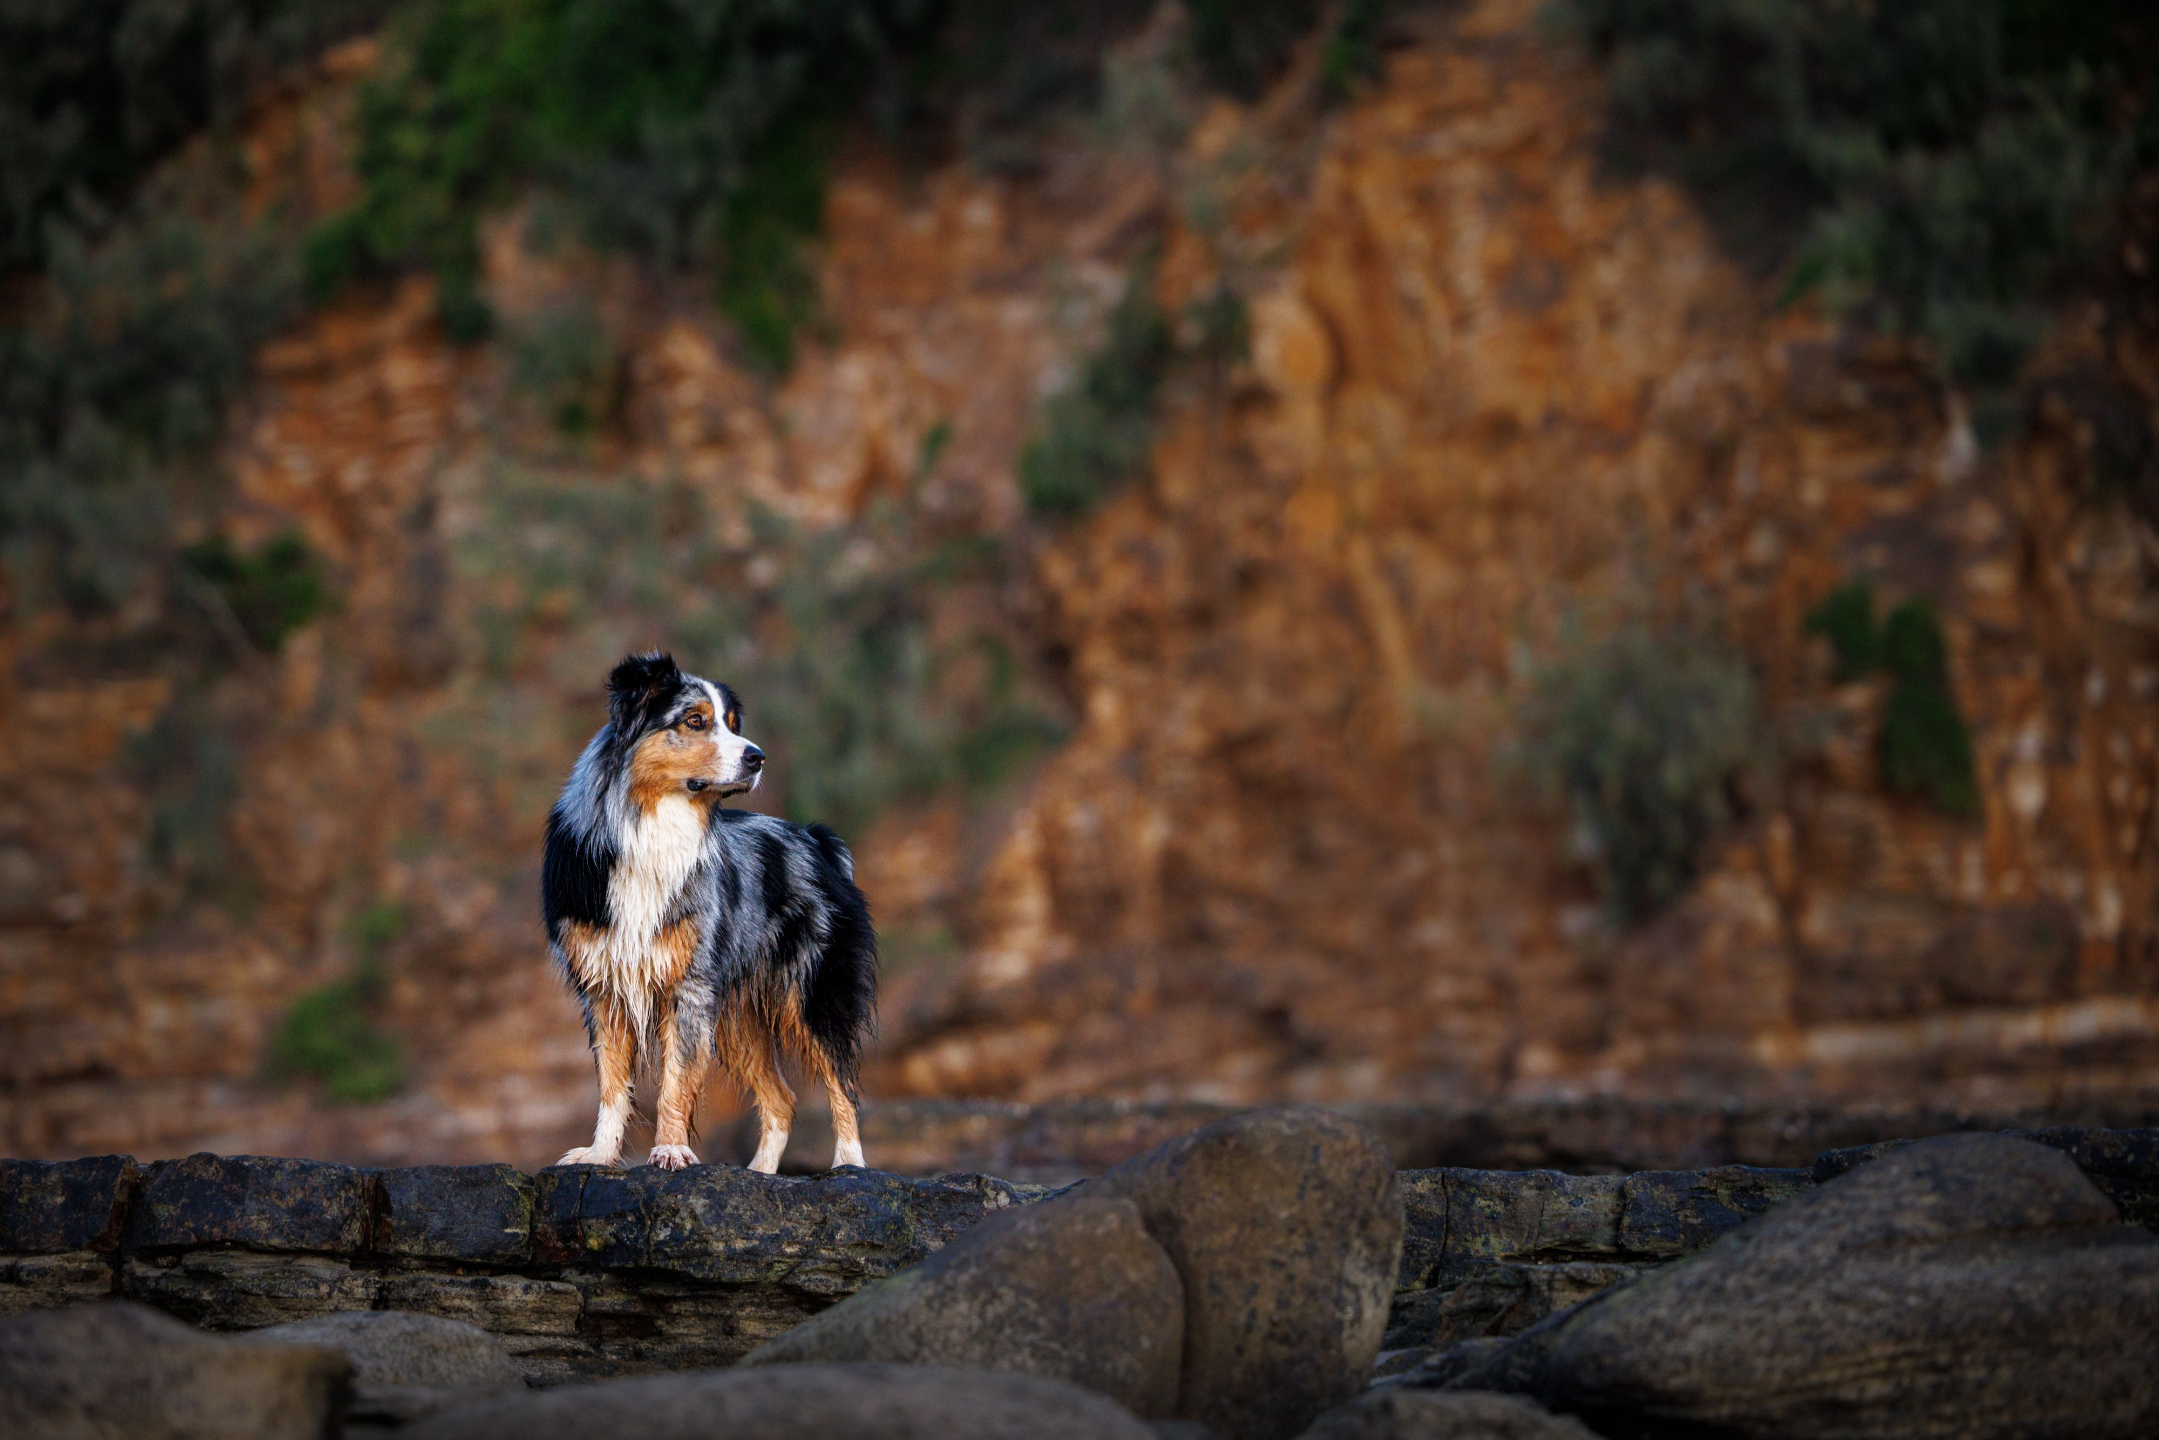
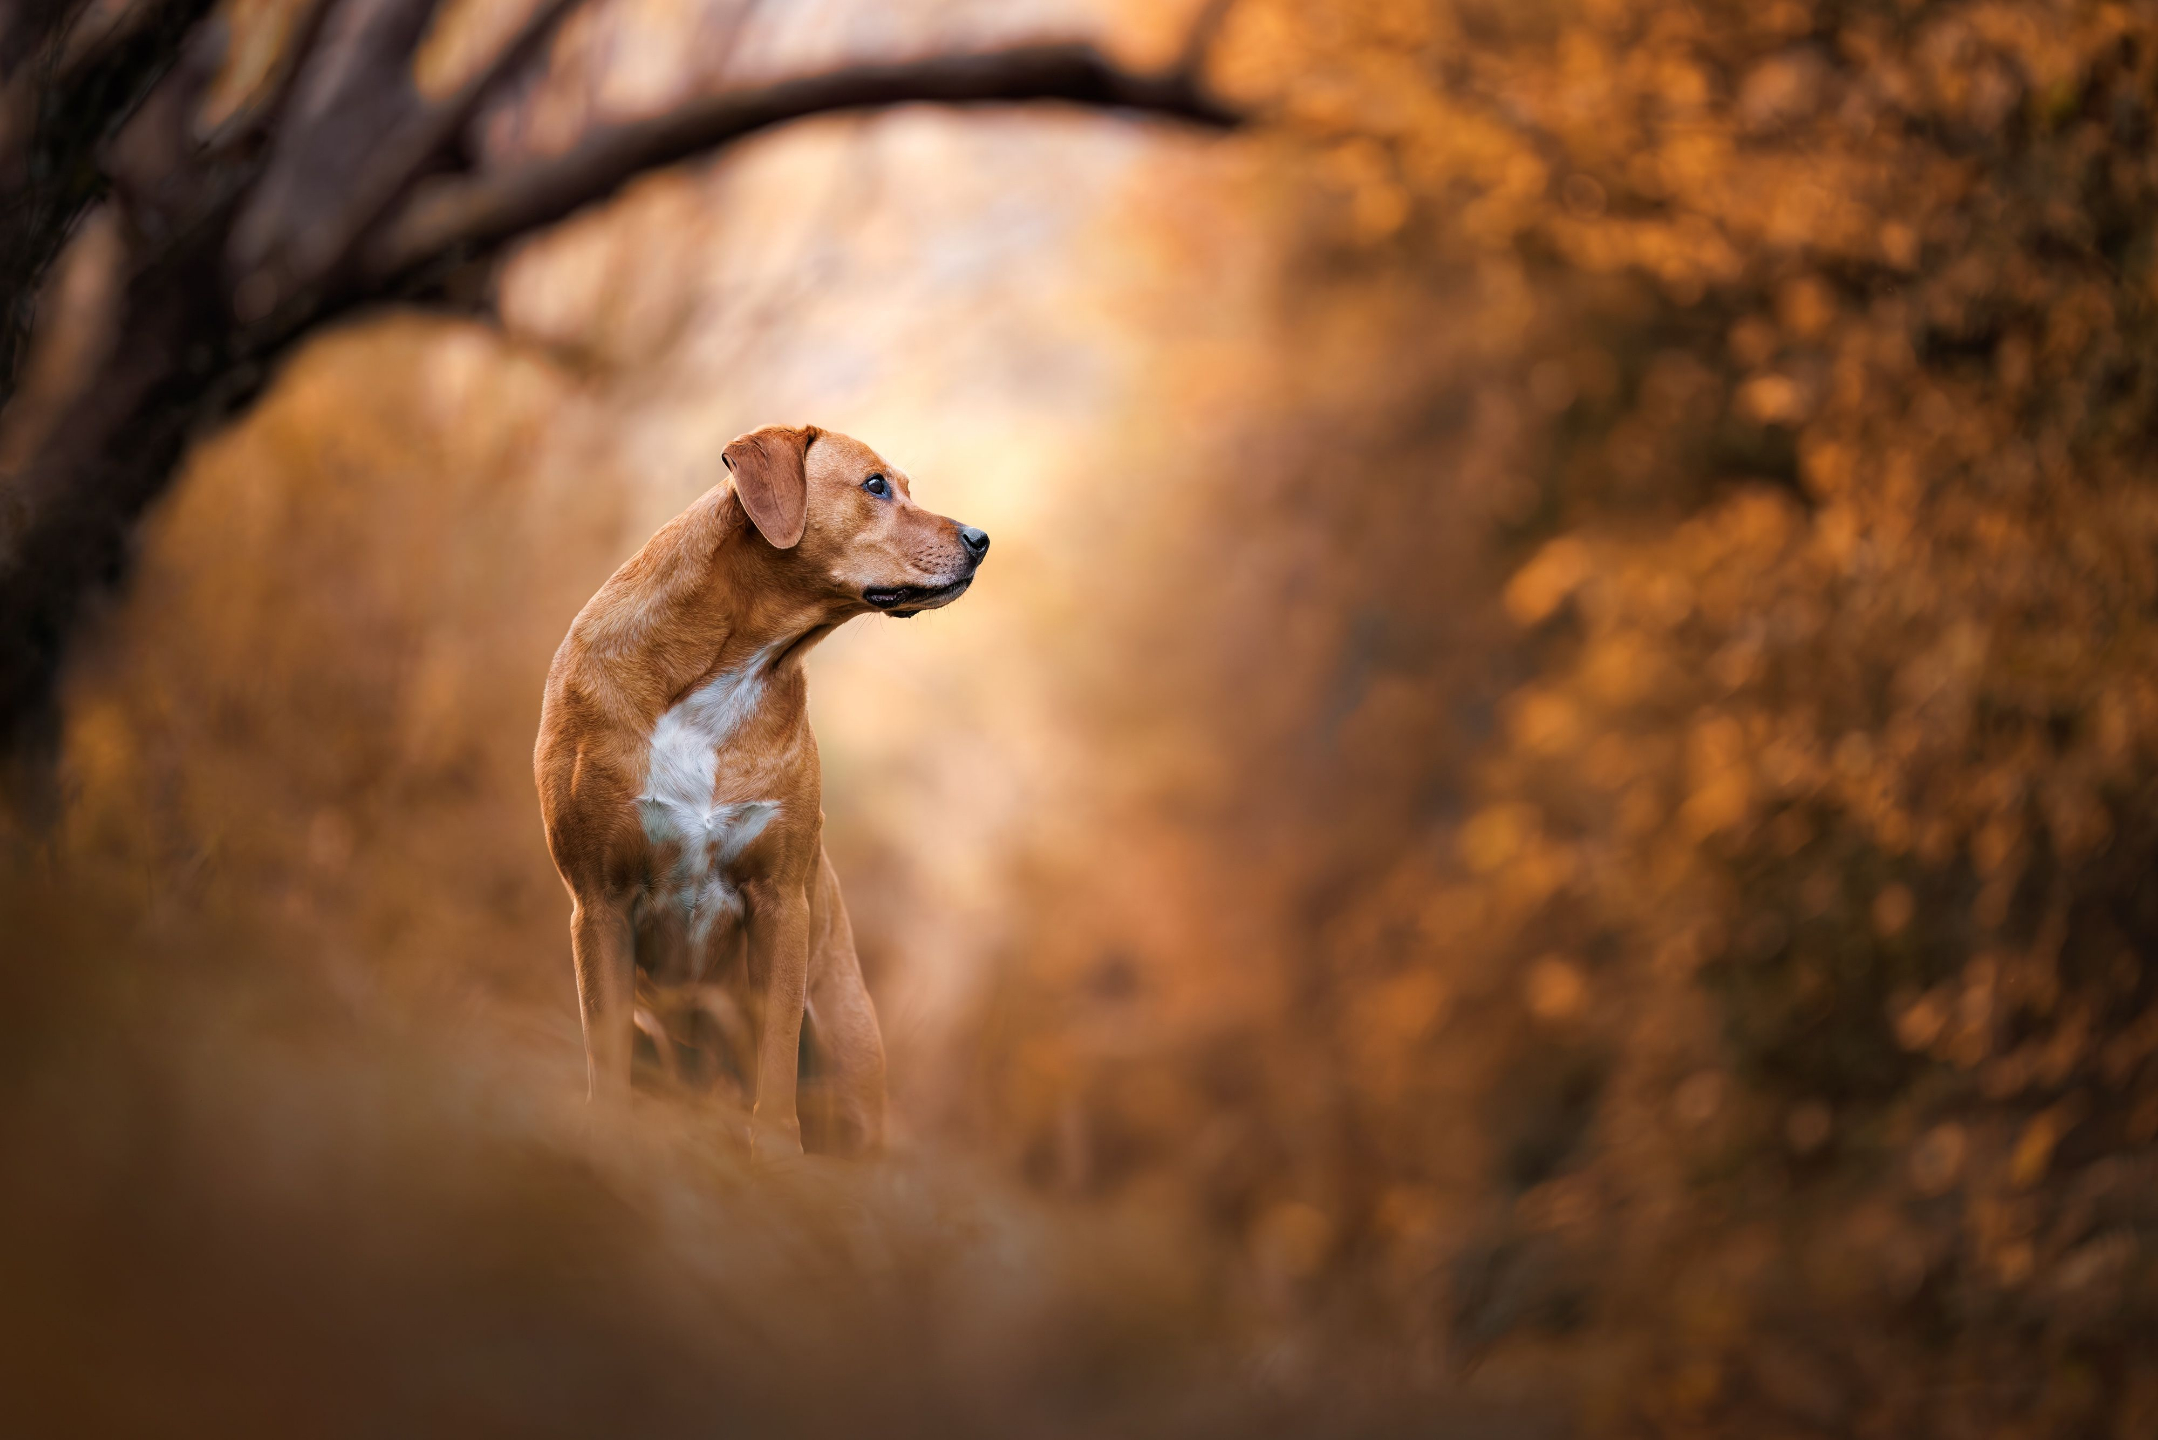
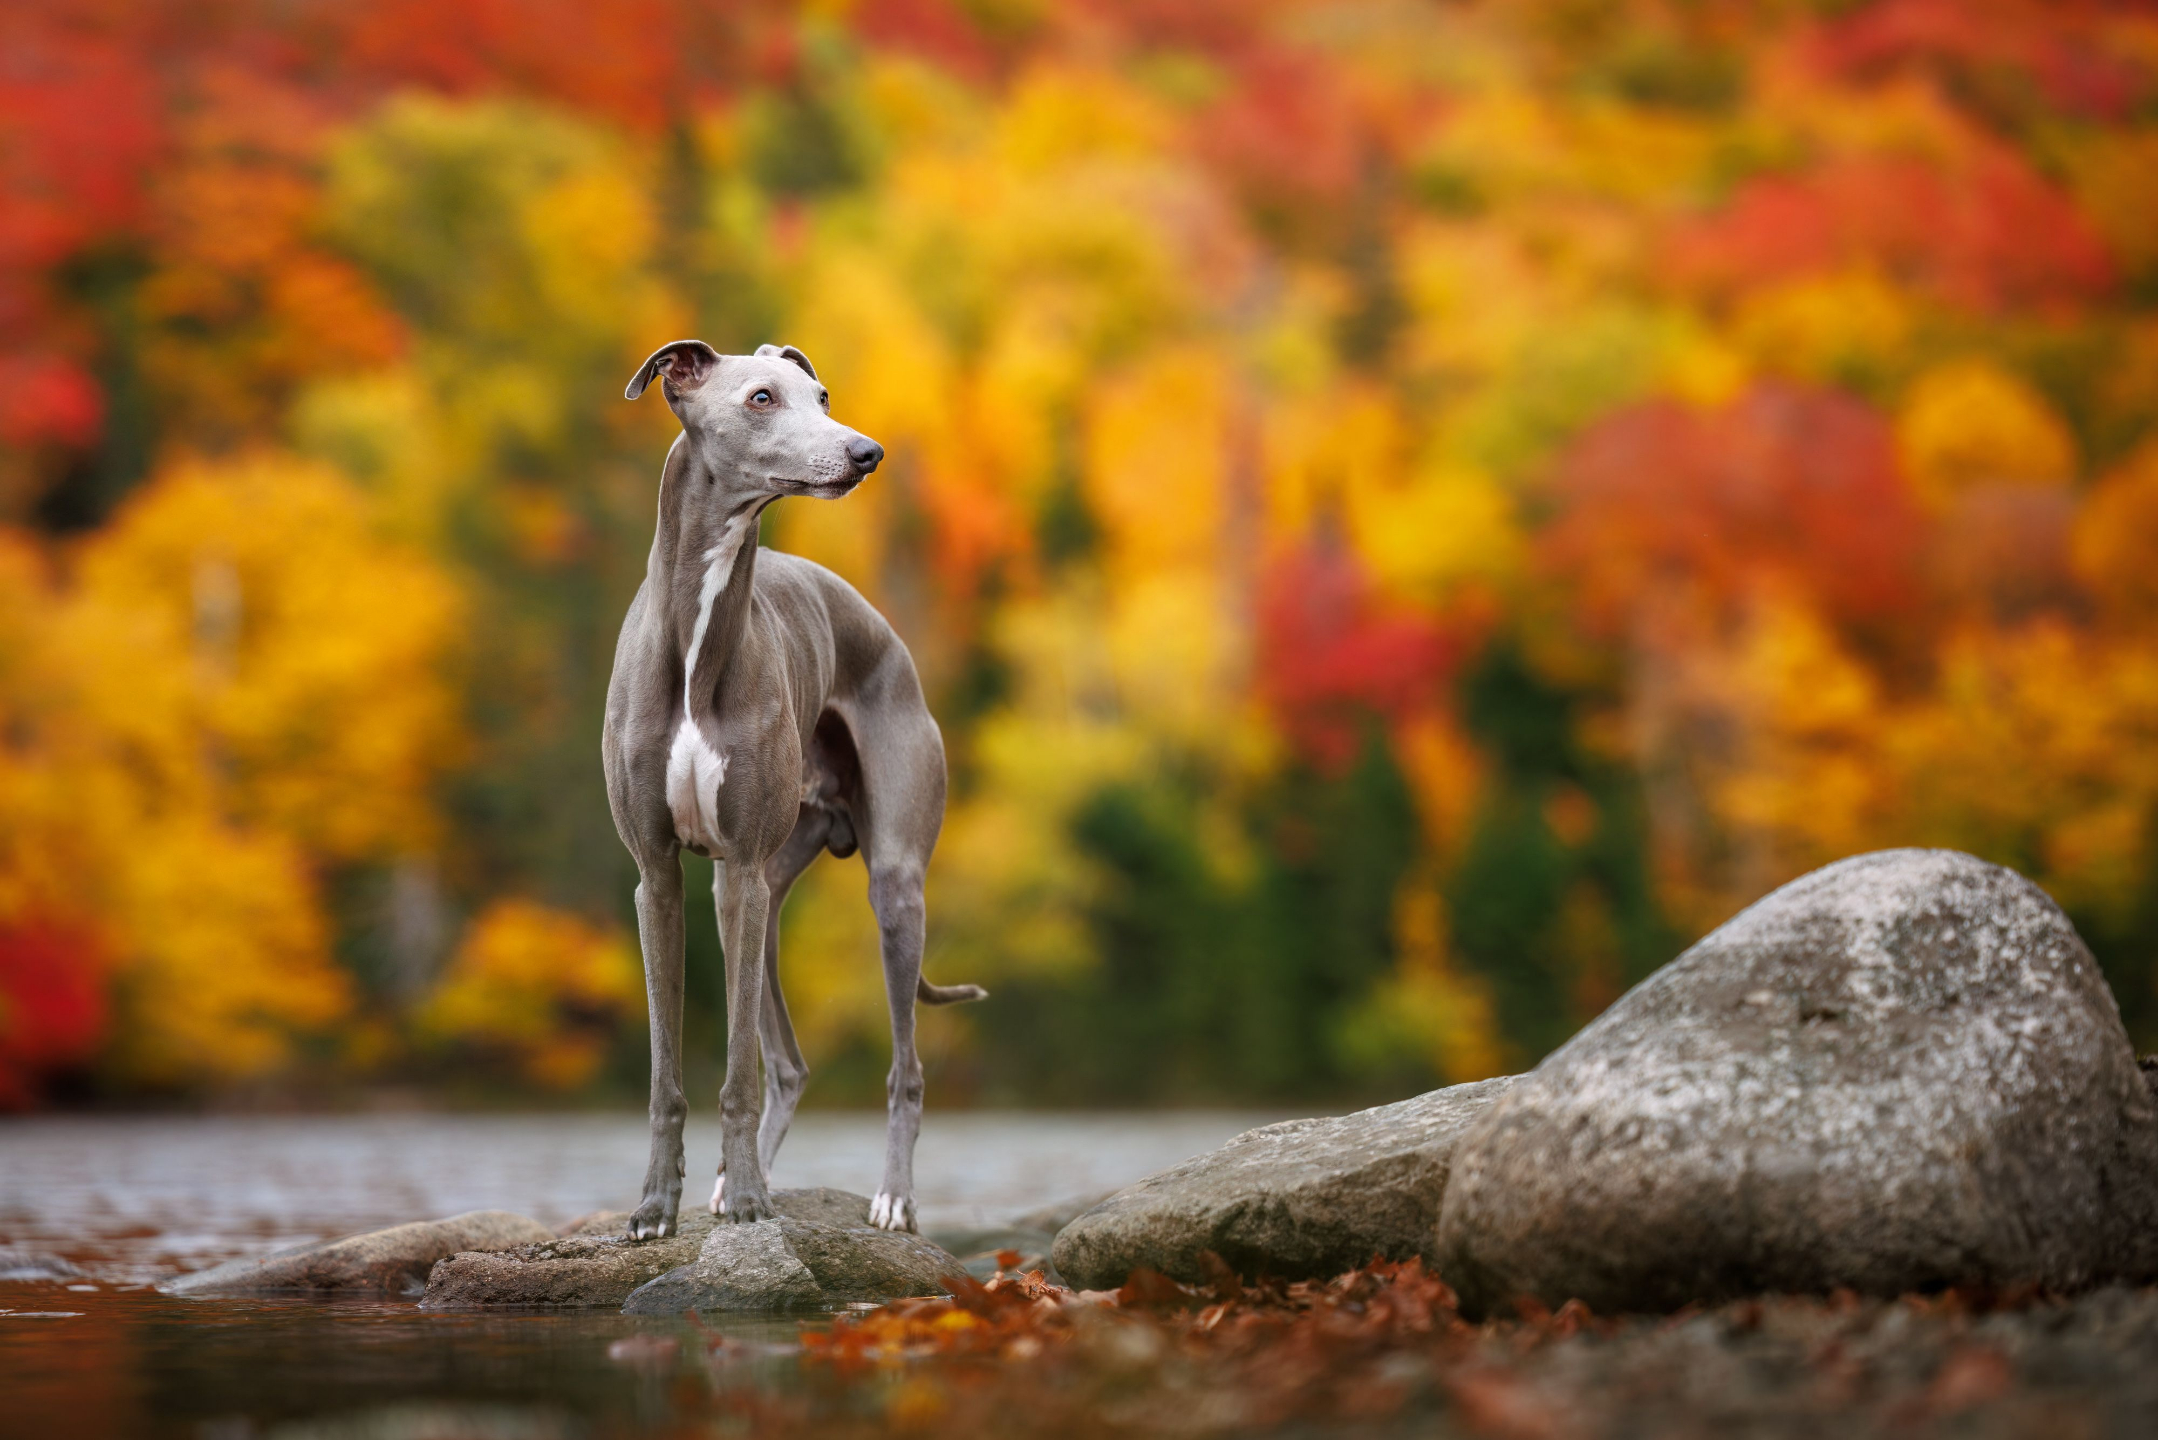
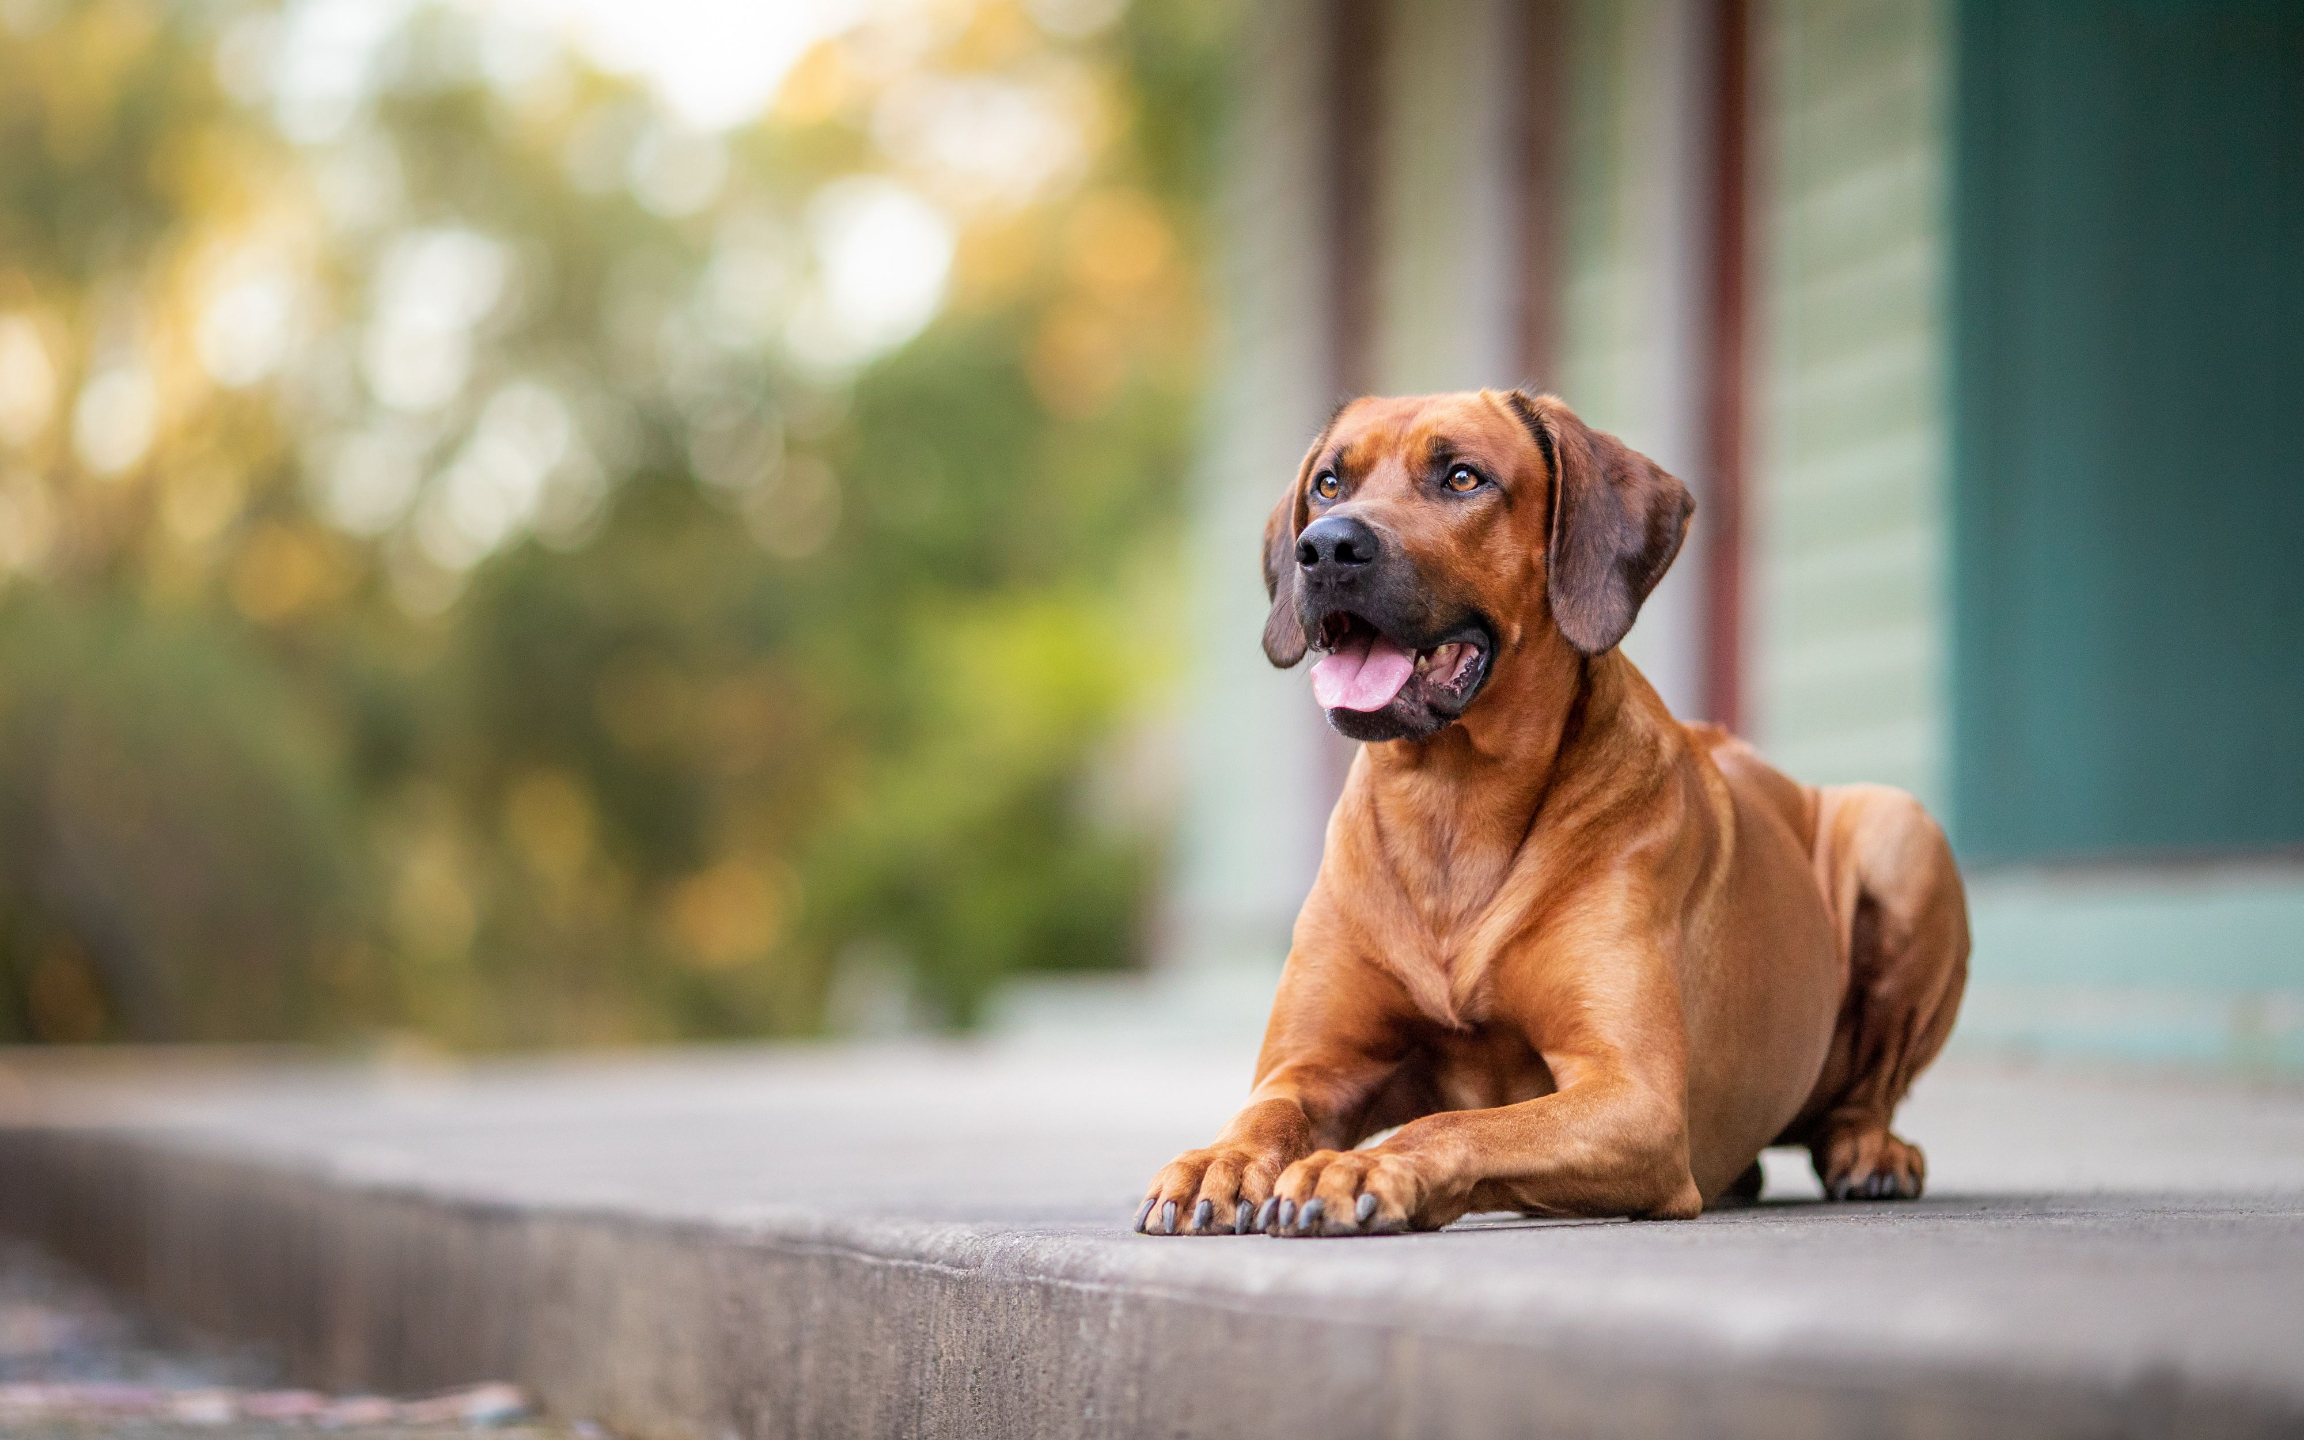
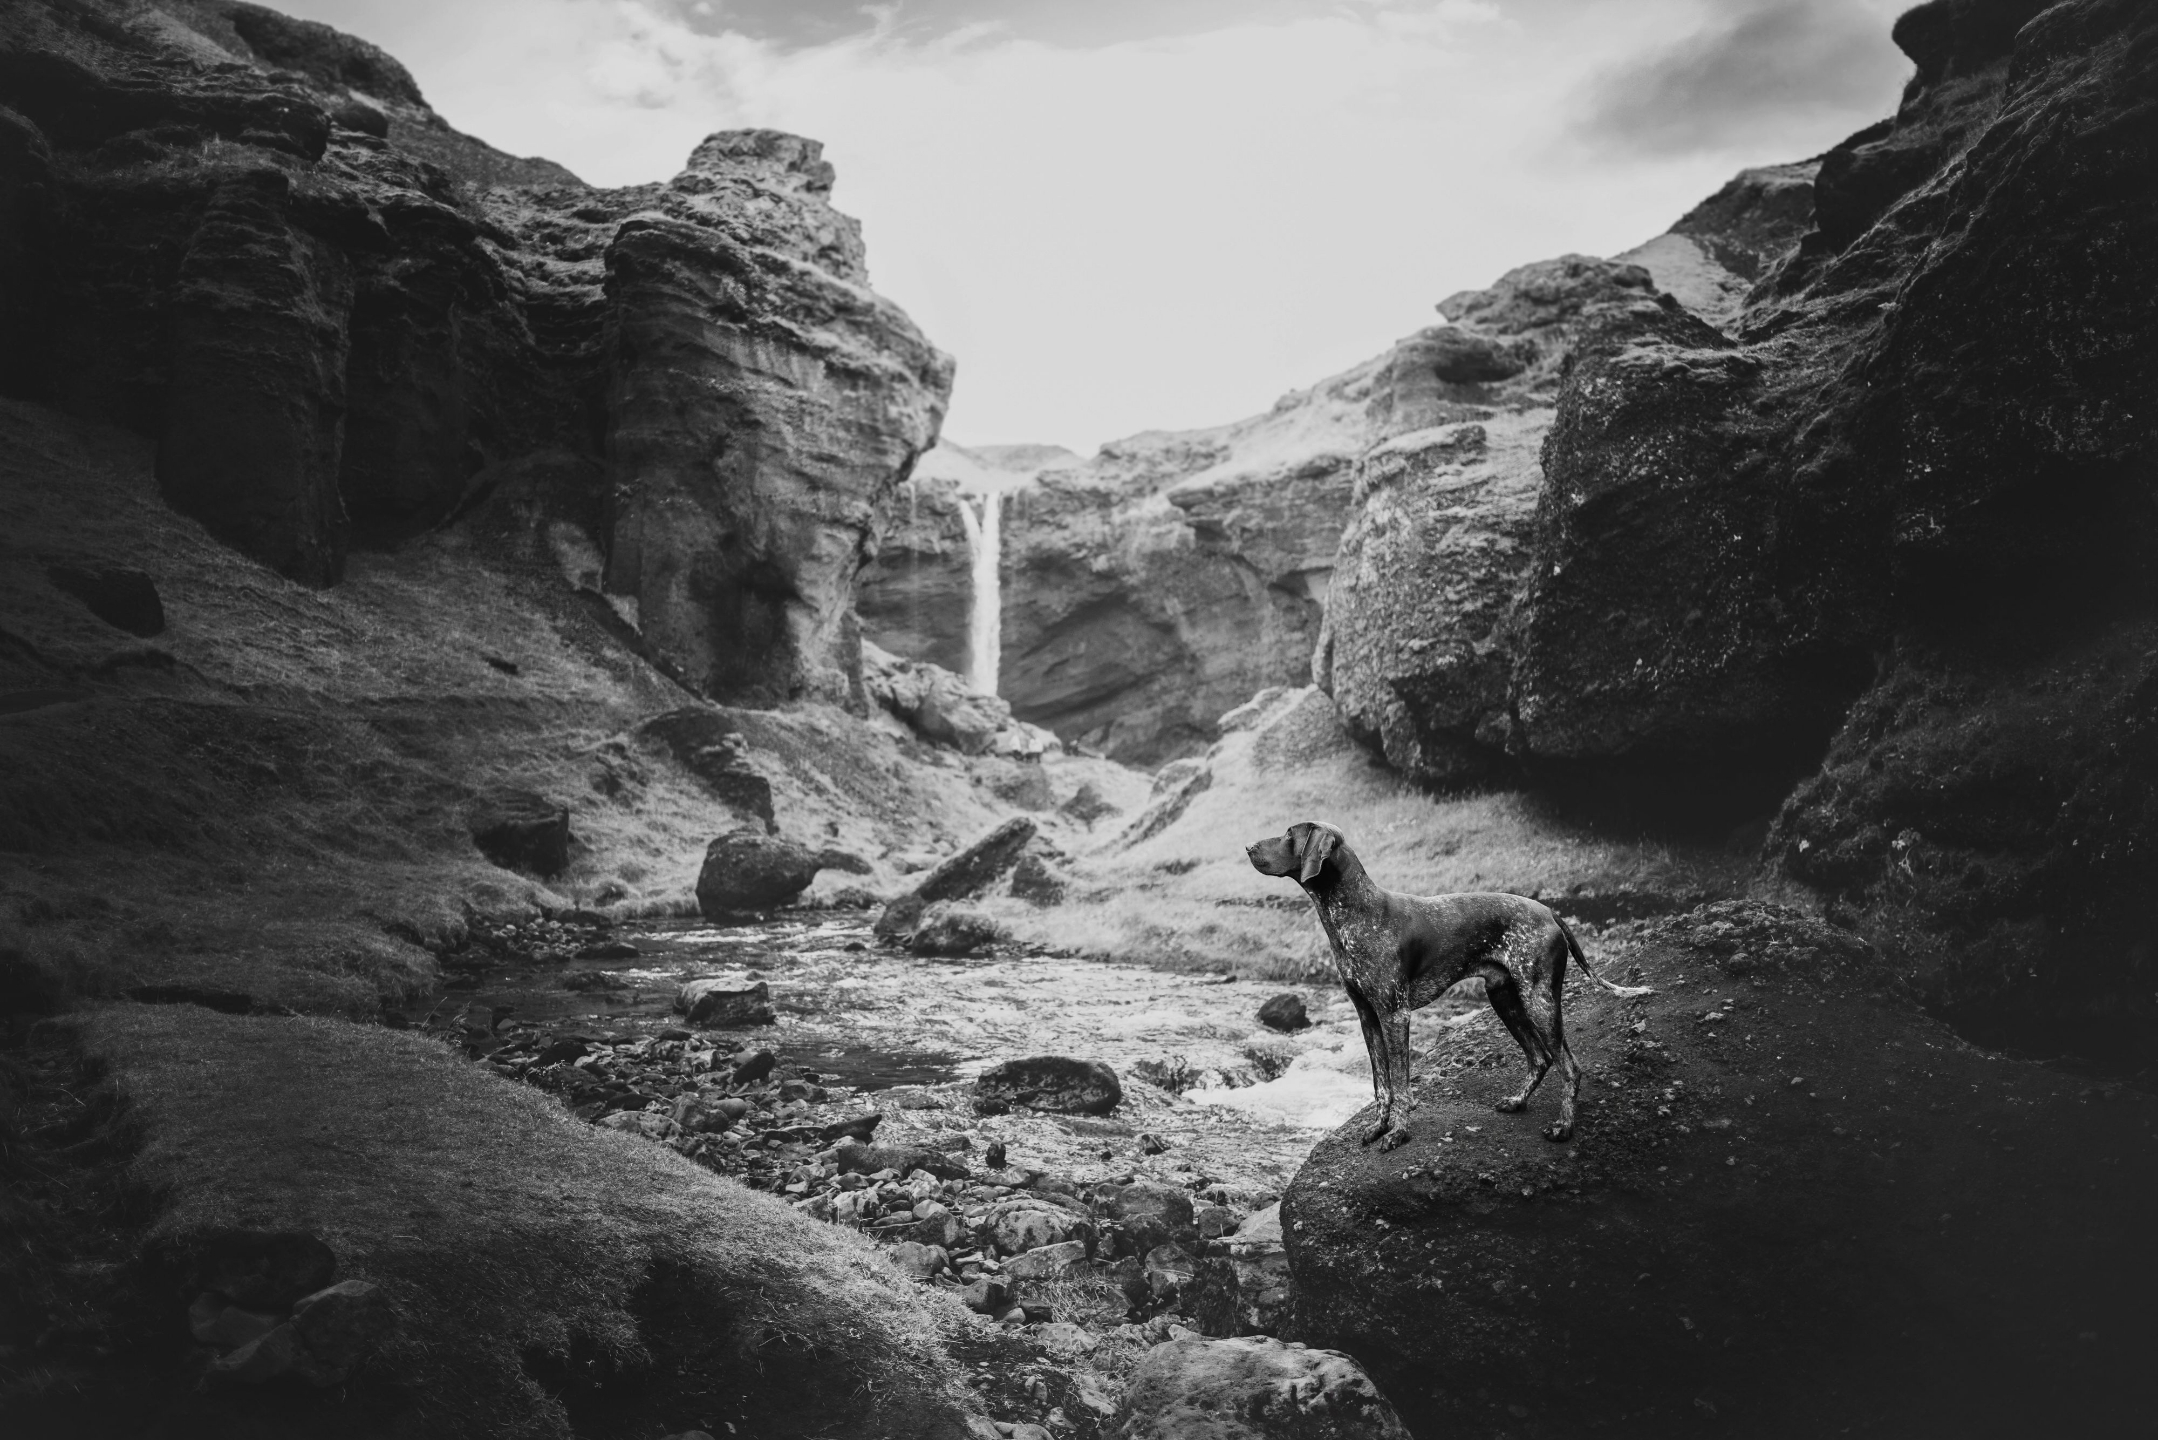
Full Body Placement
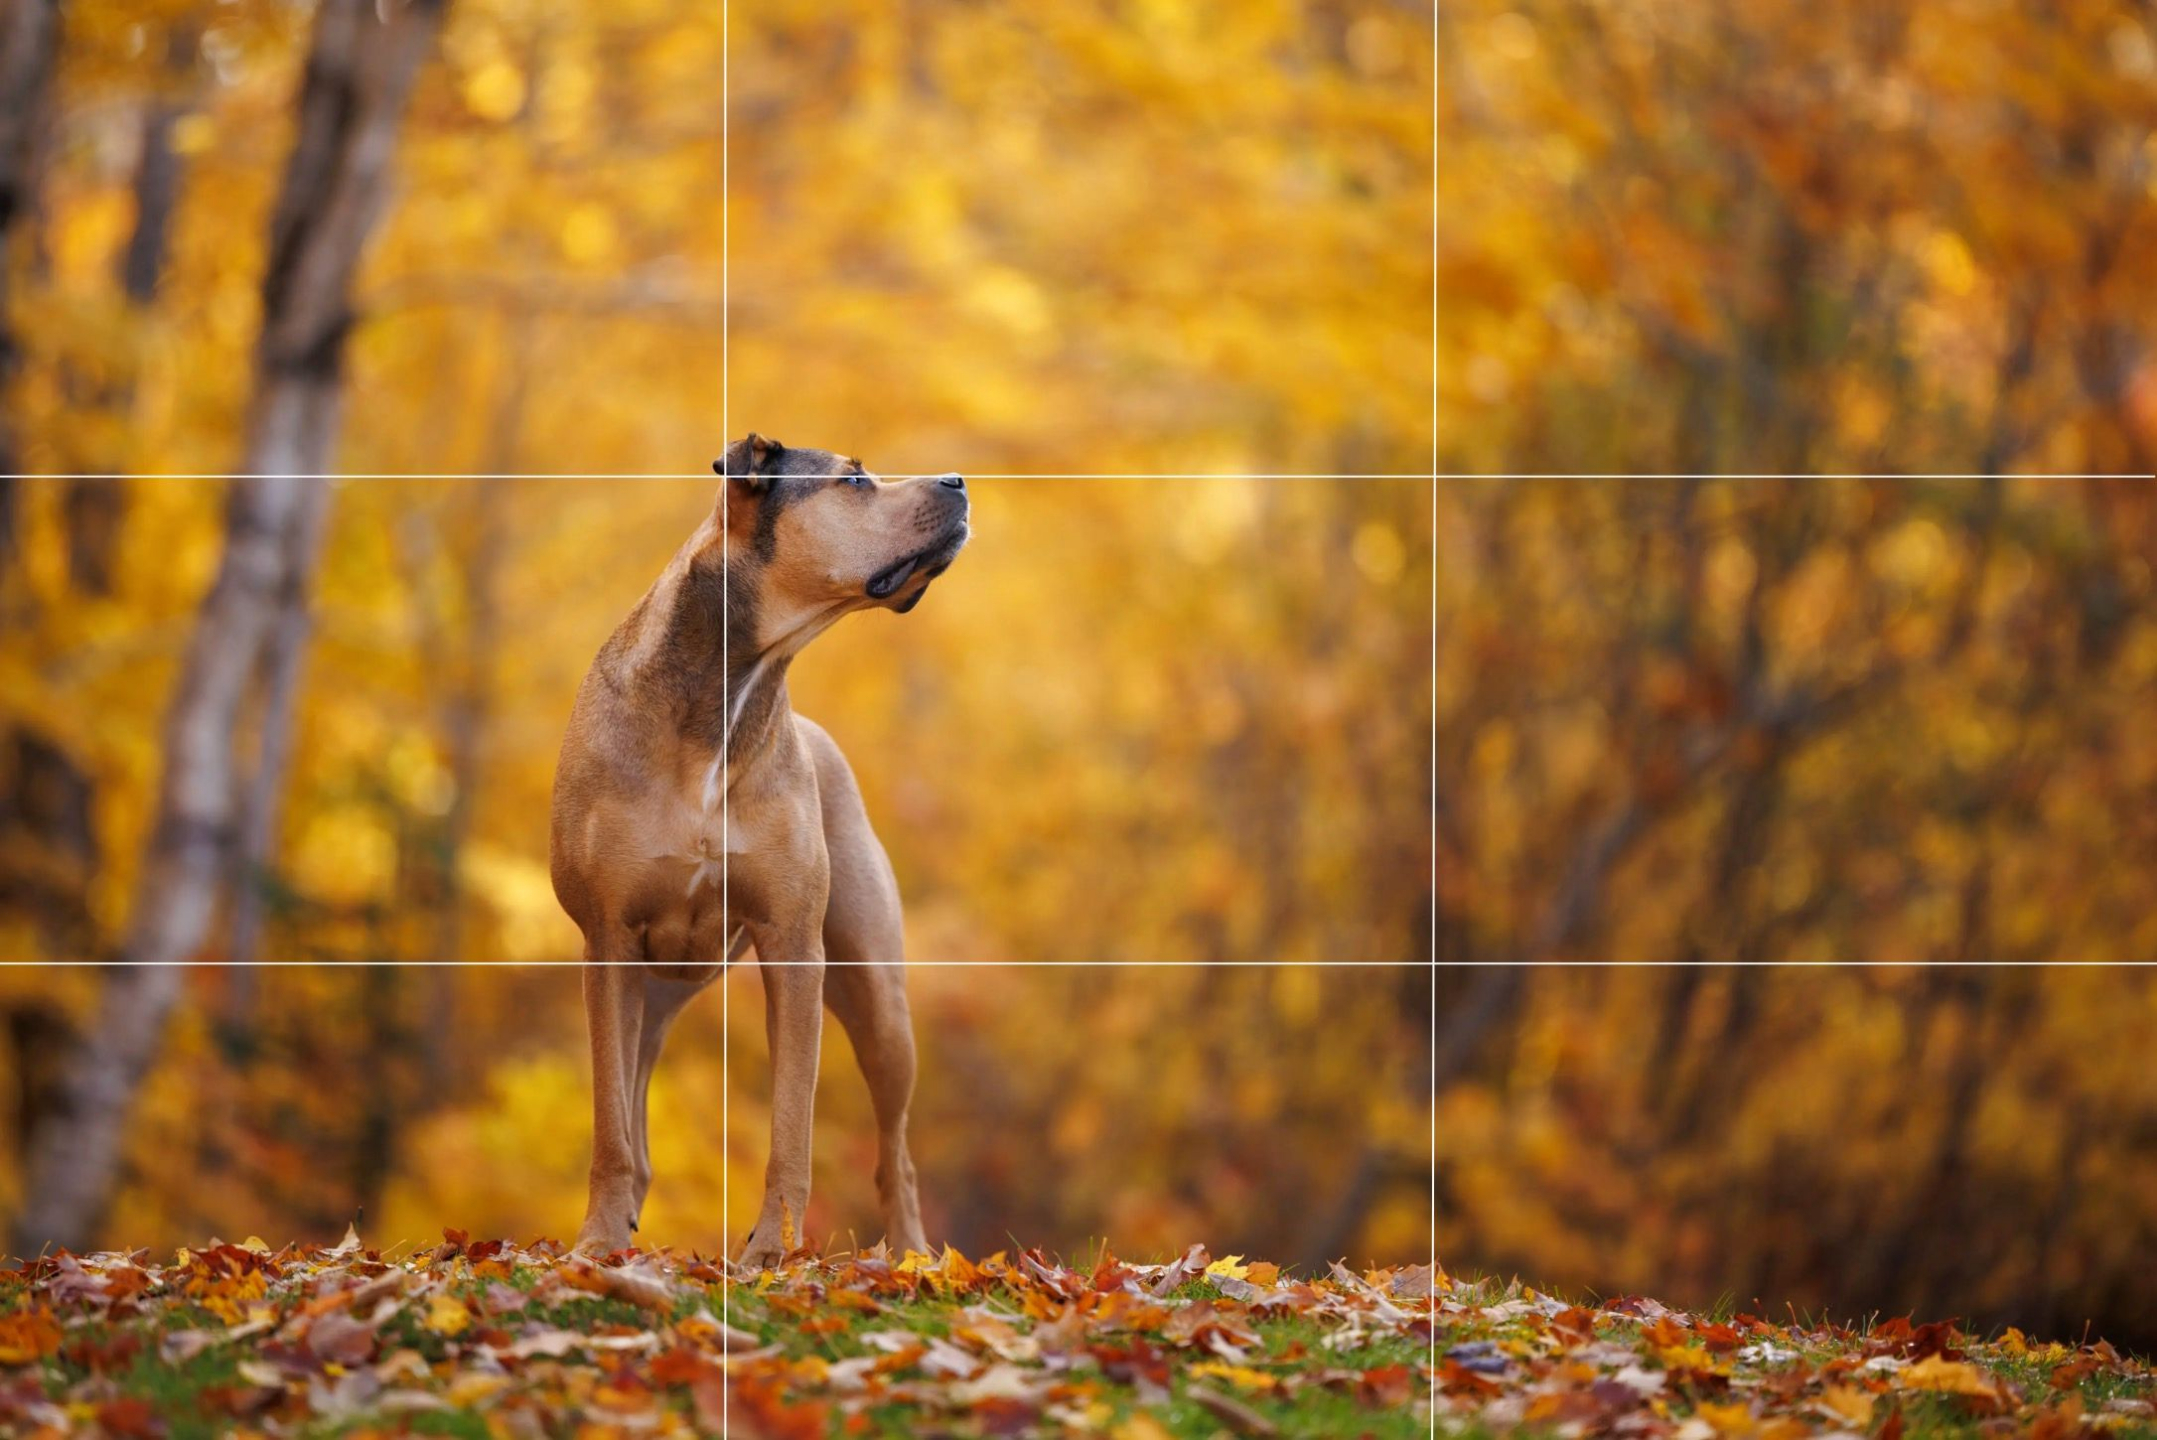
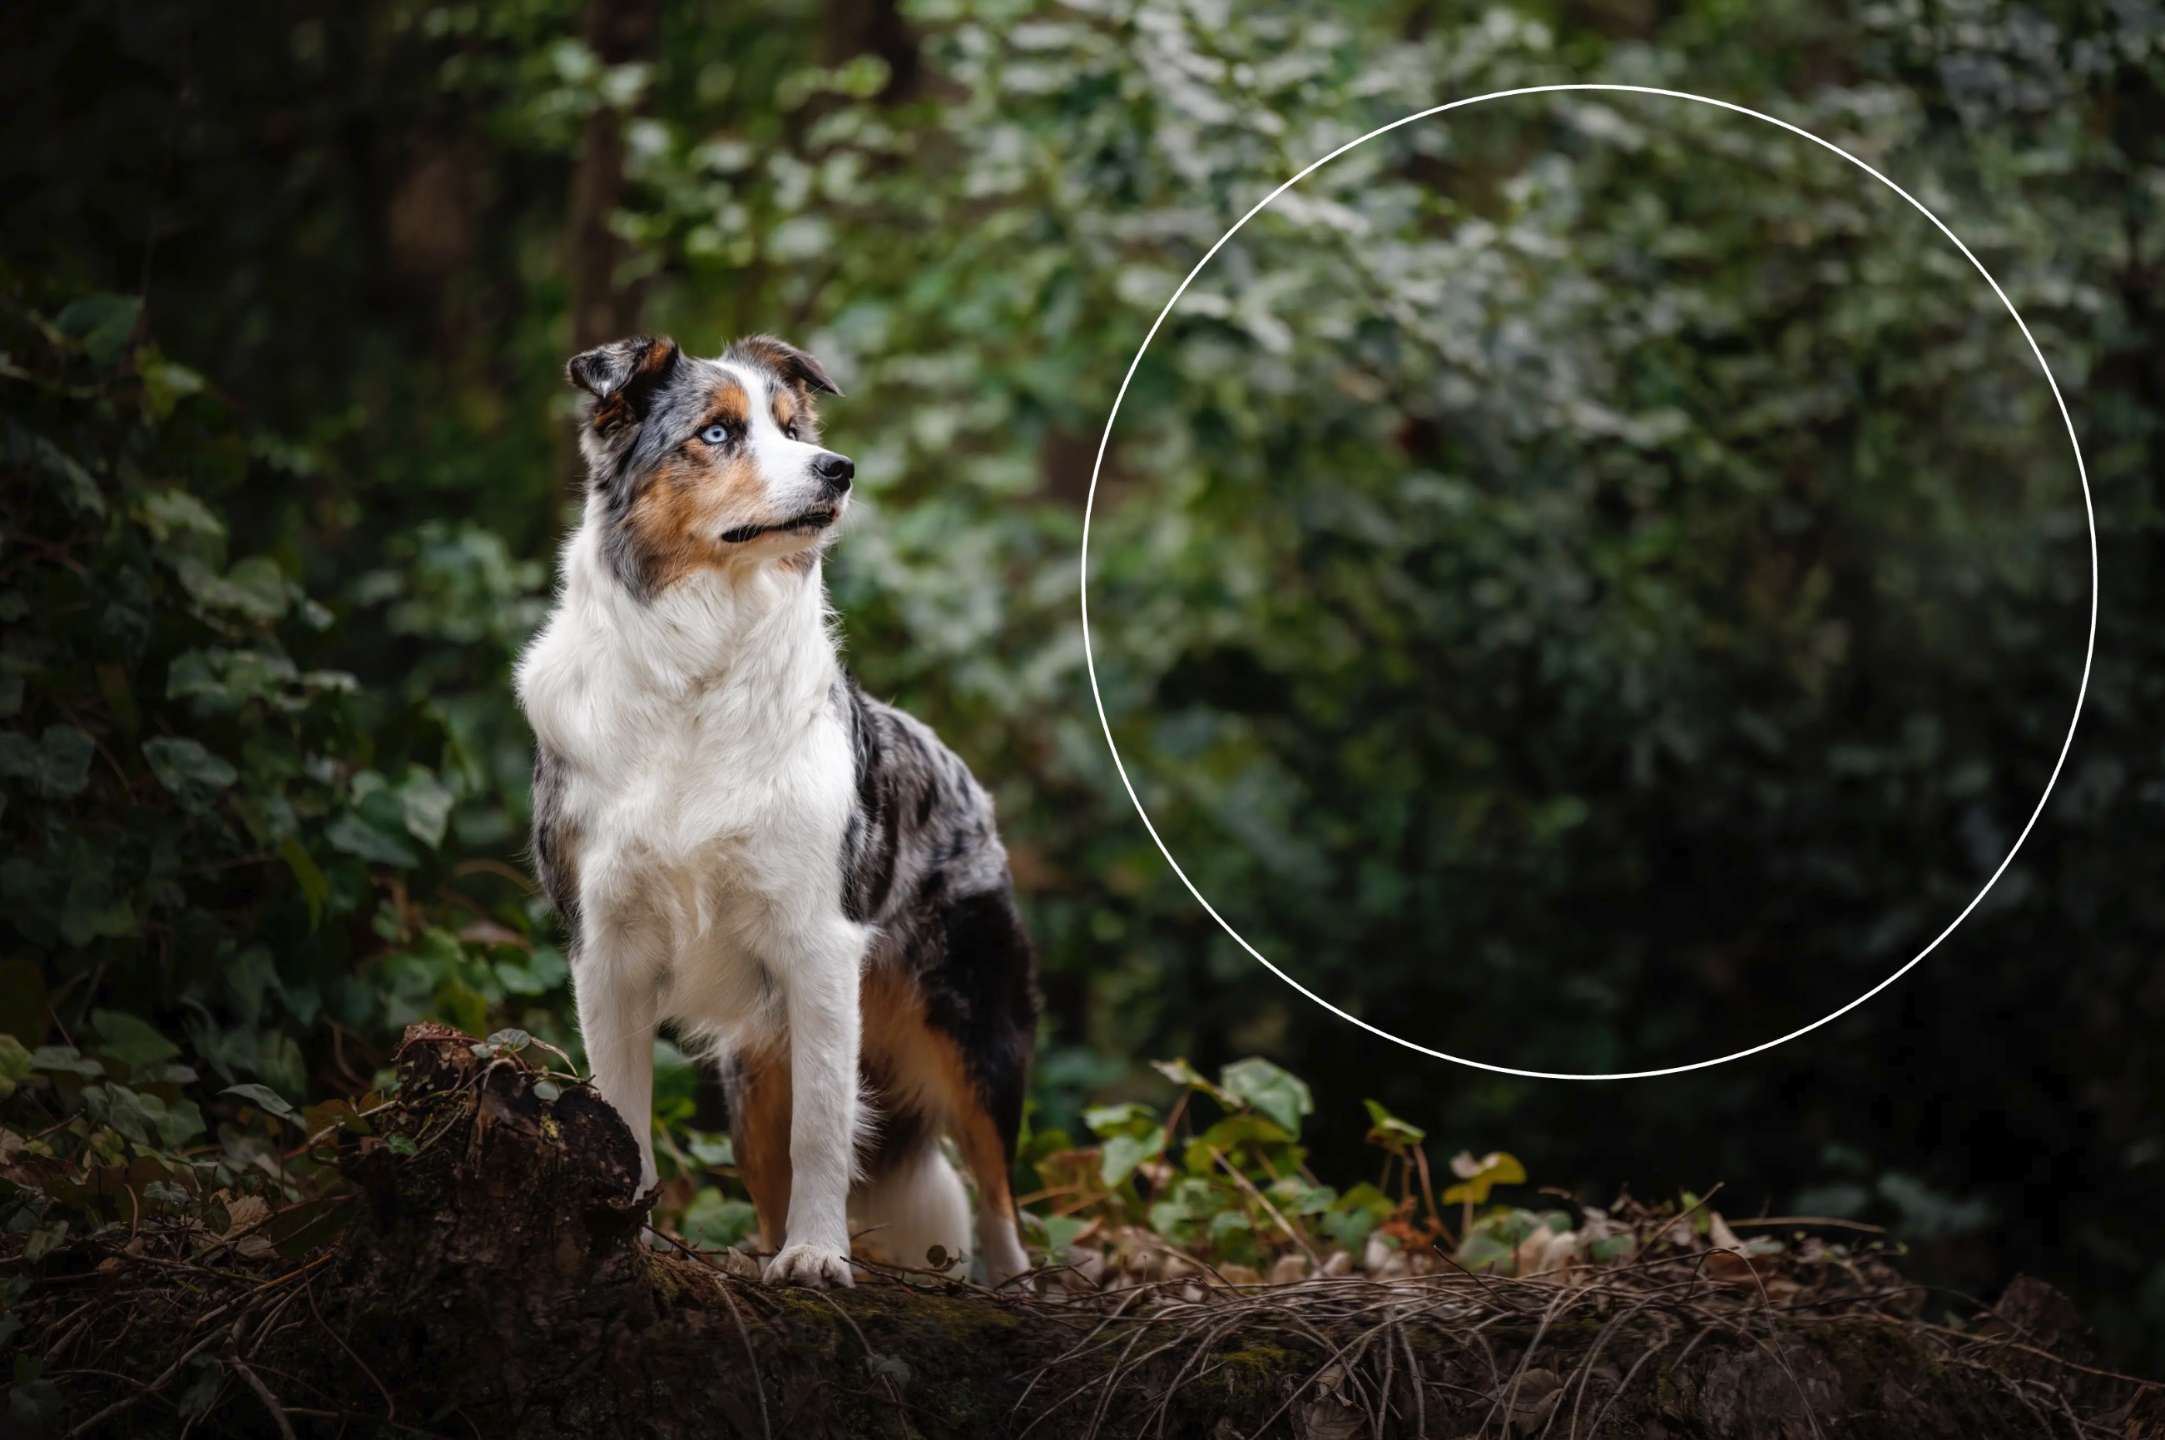
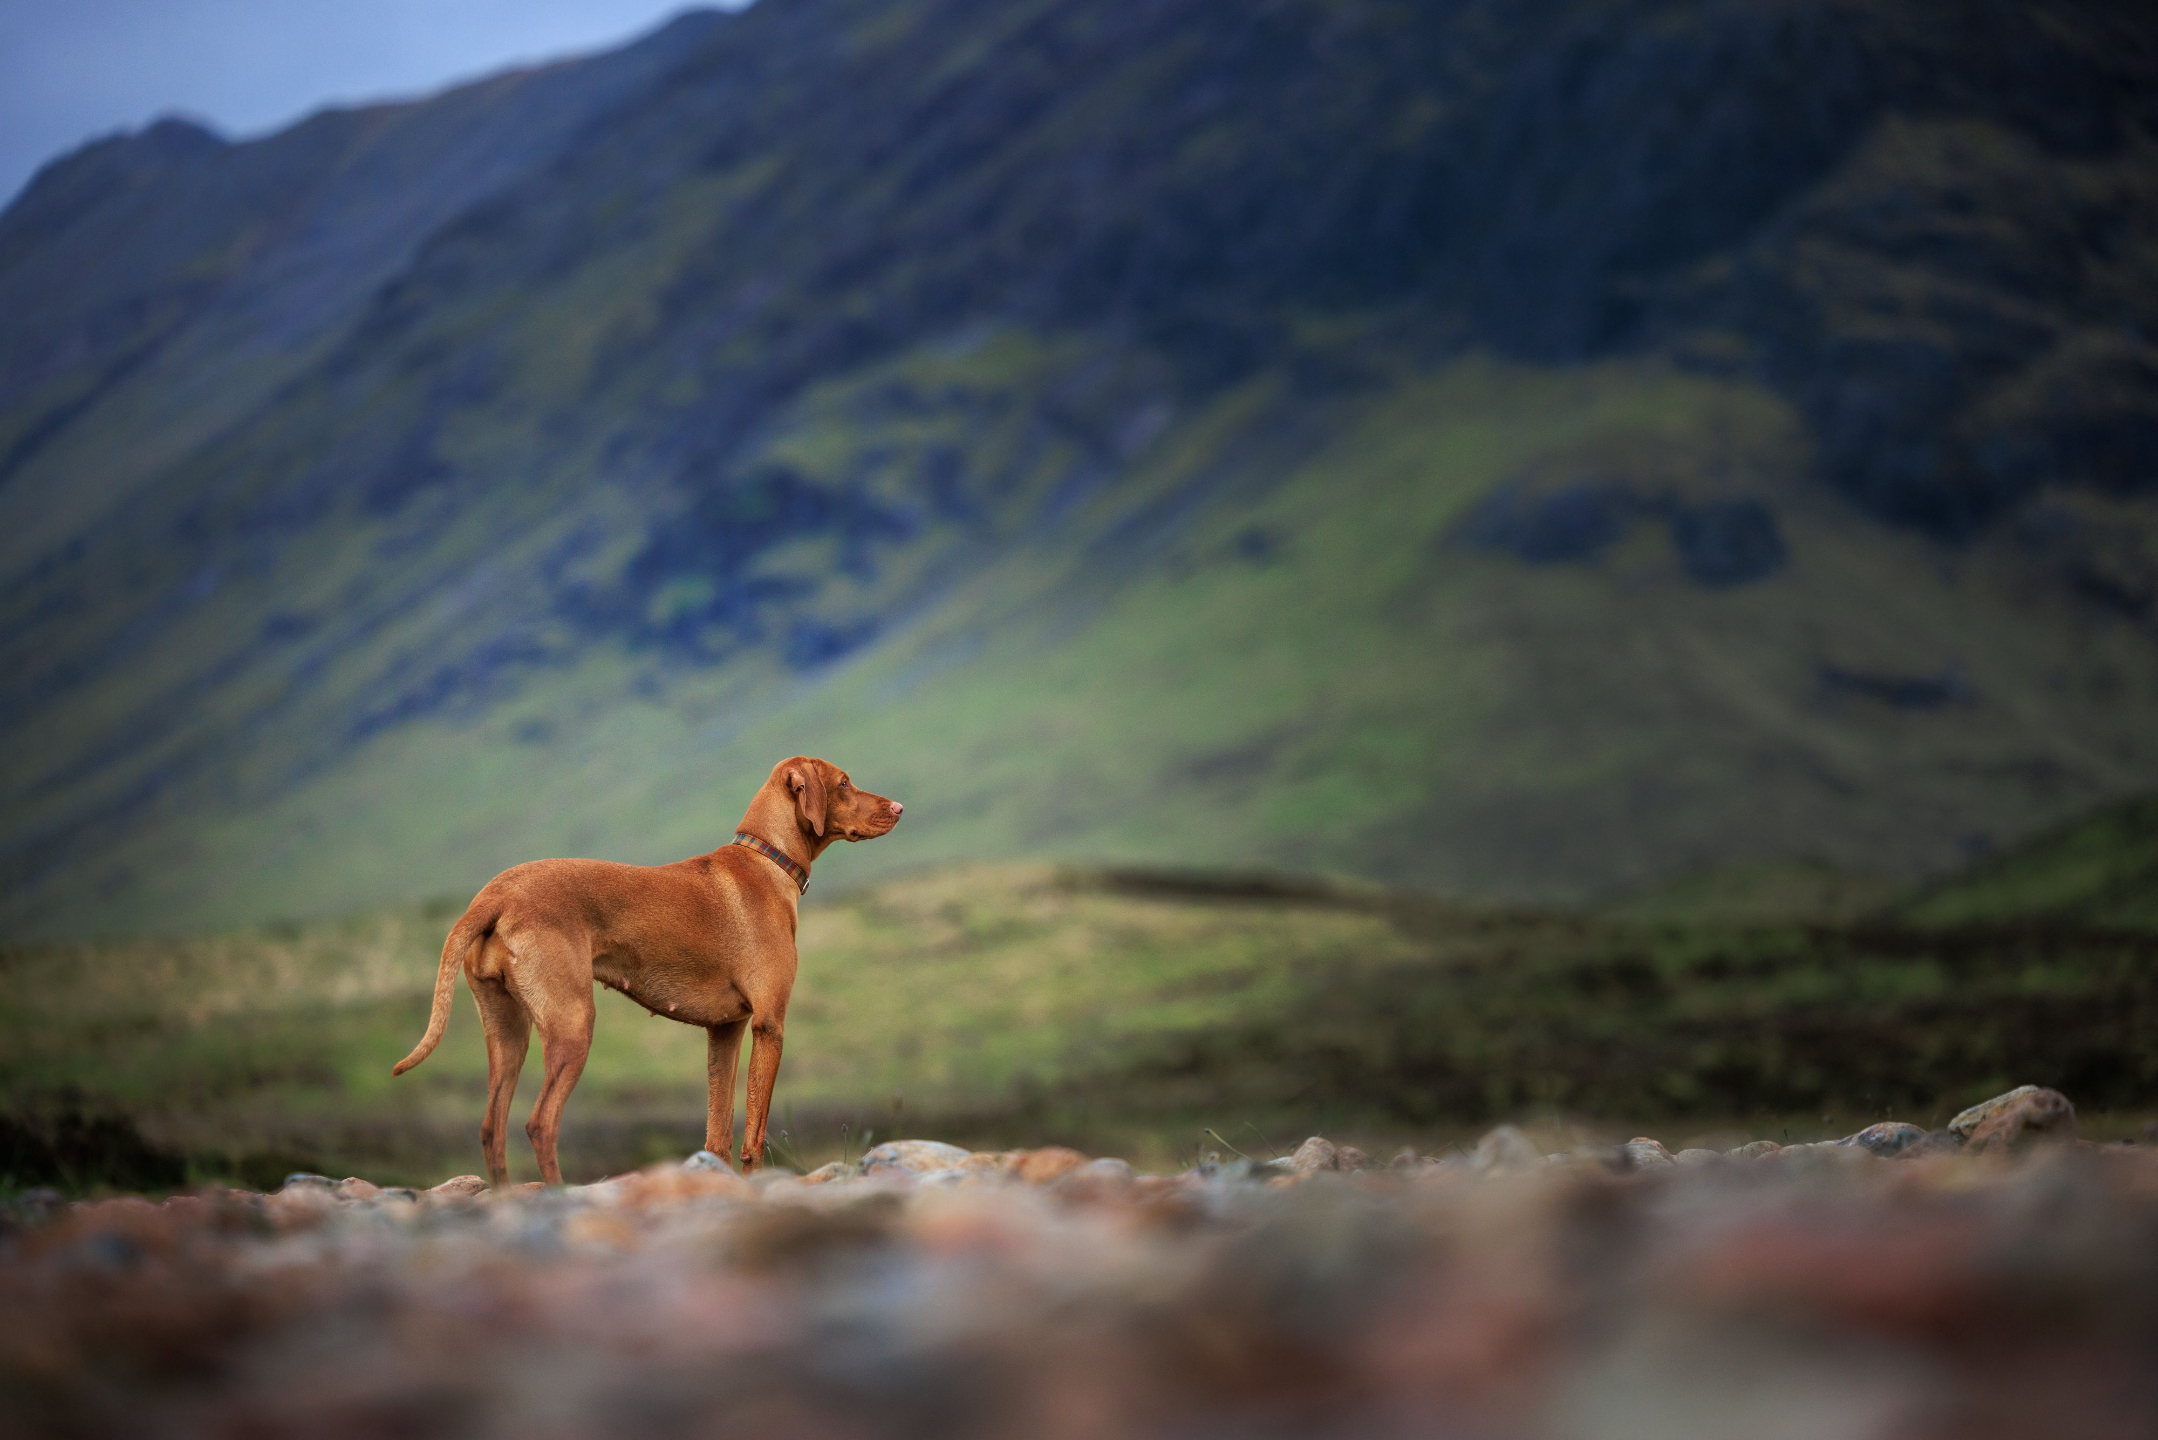
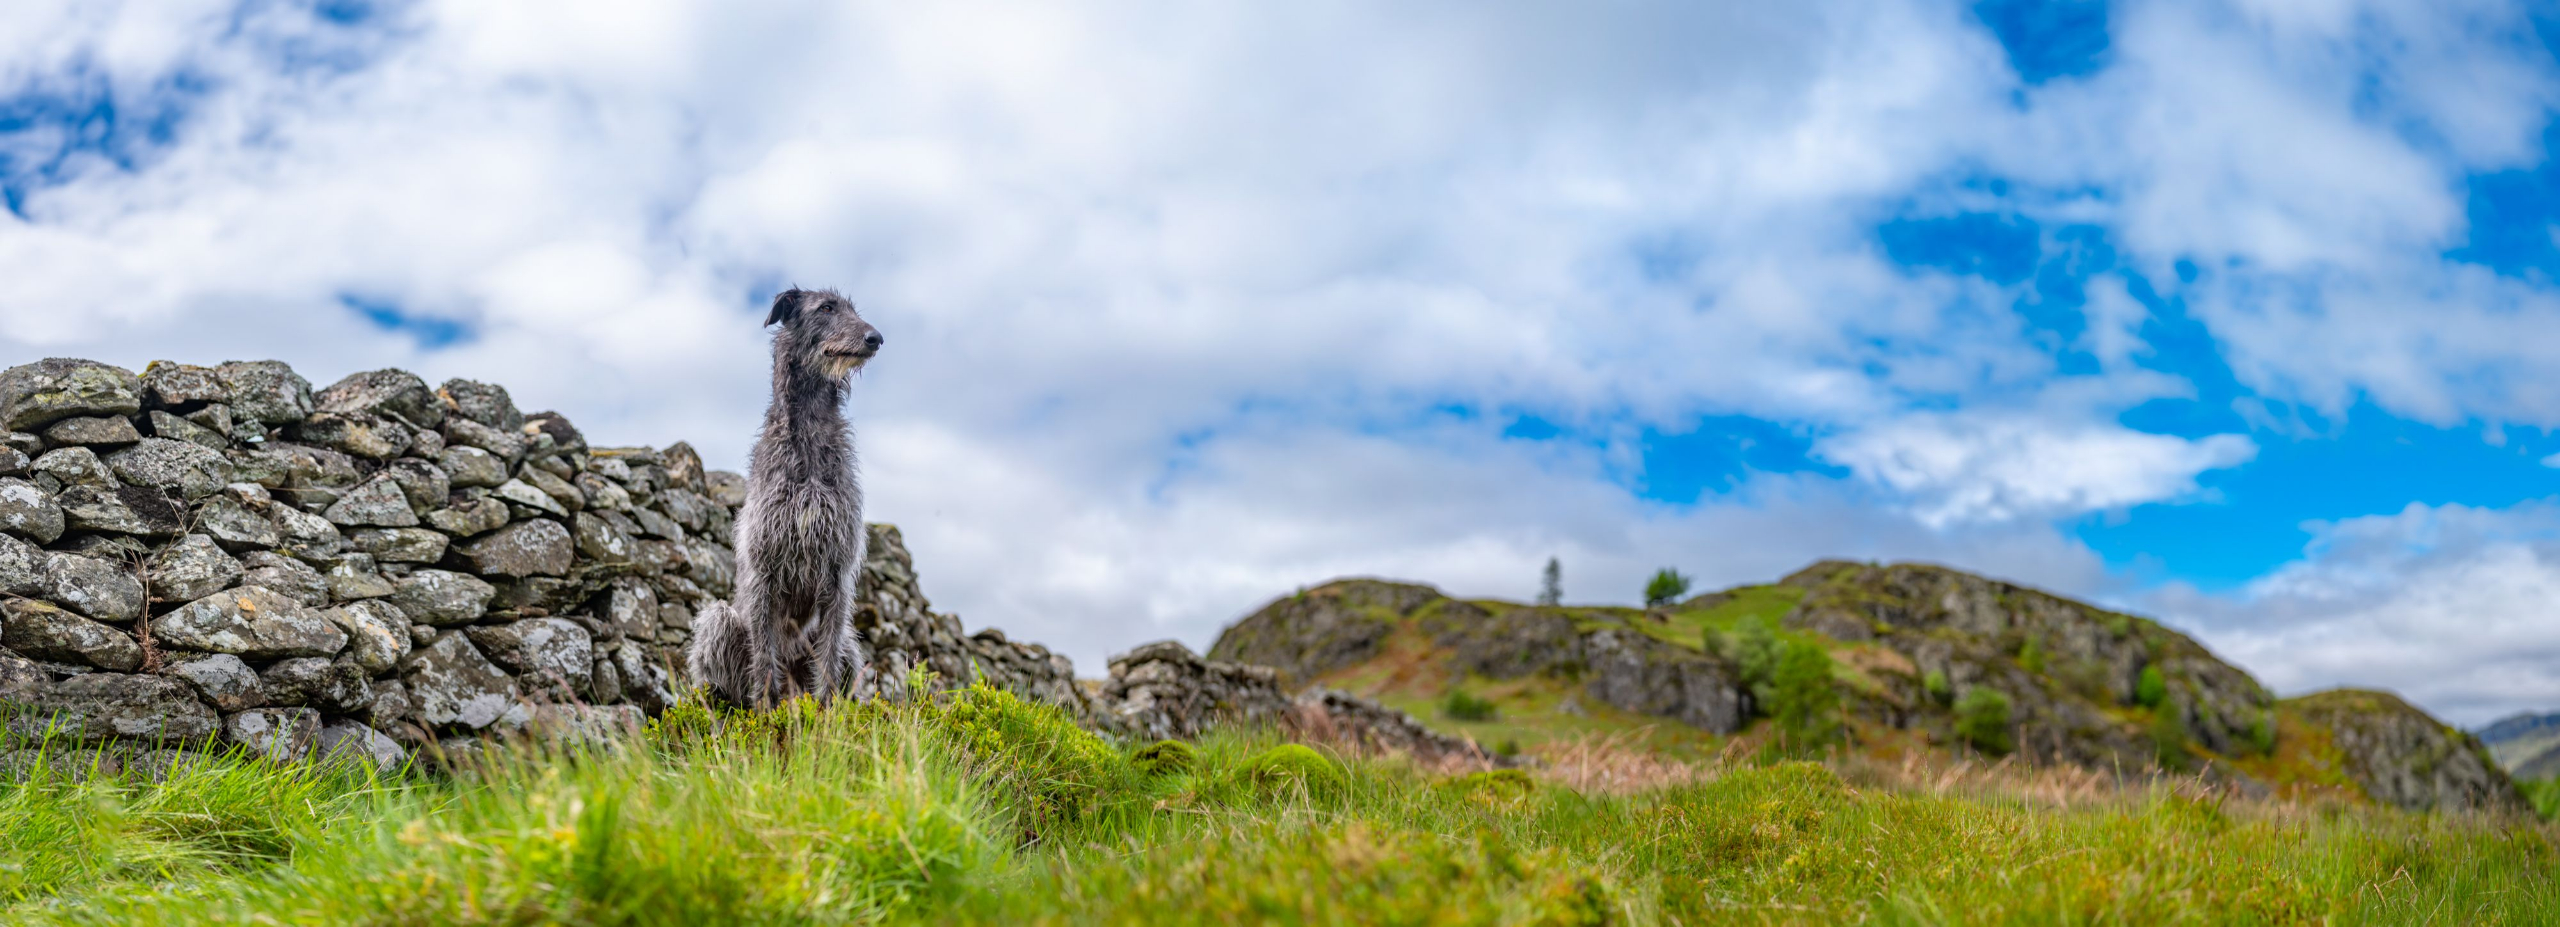
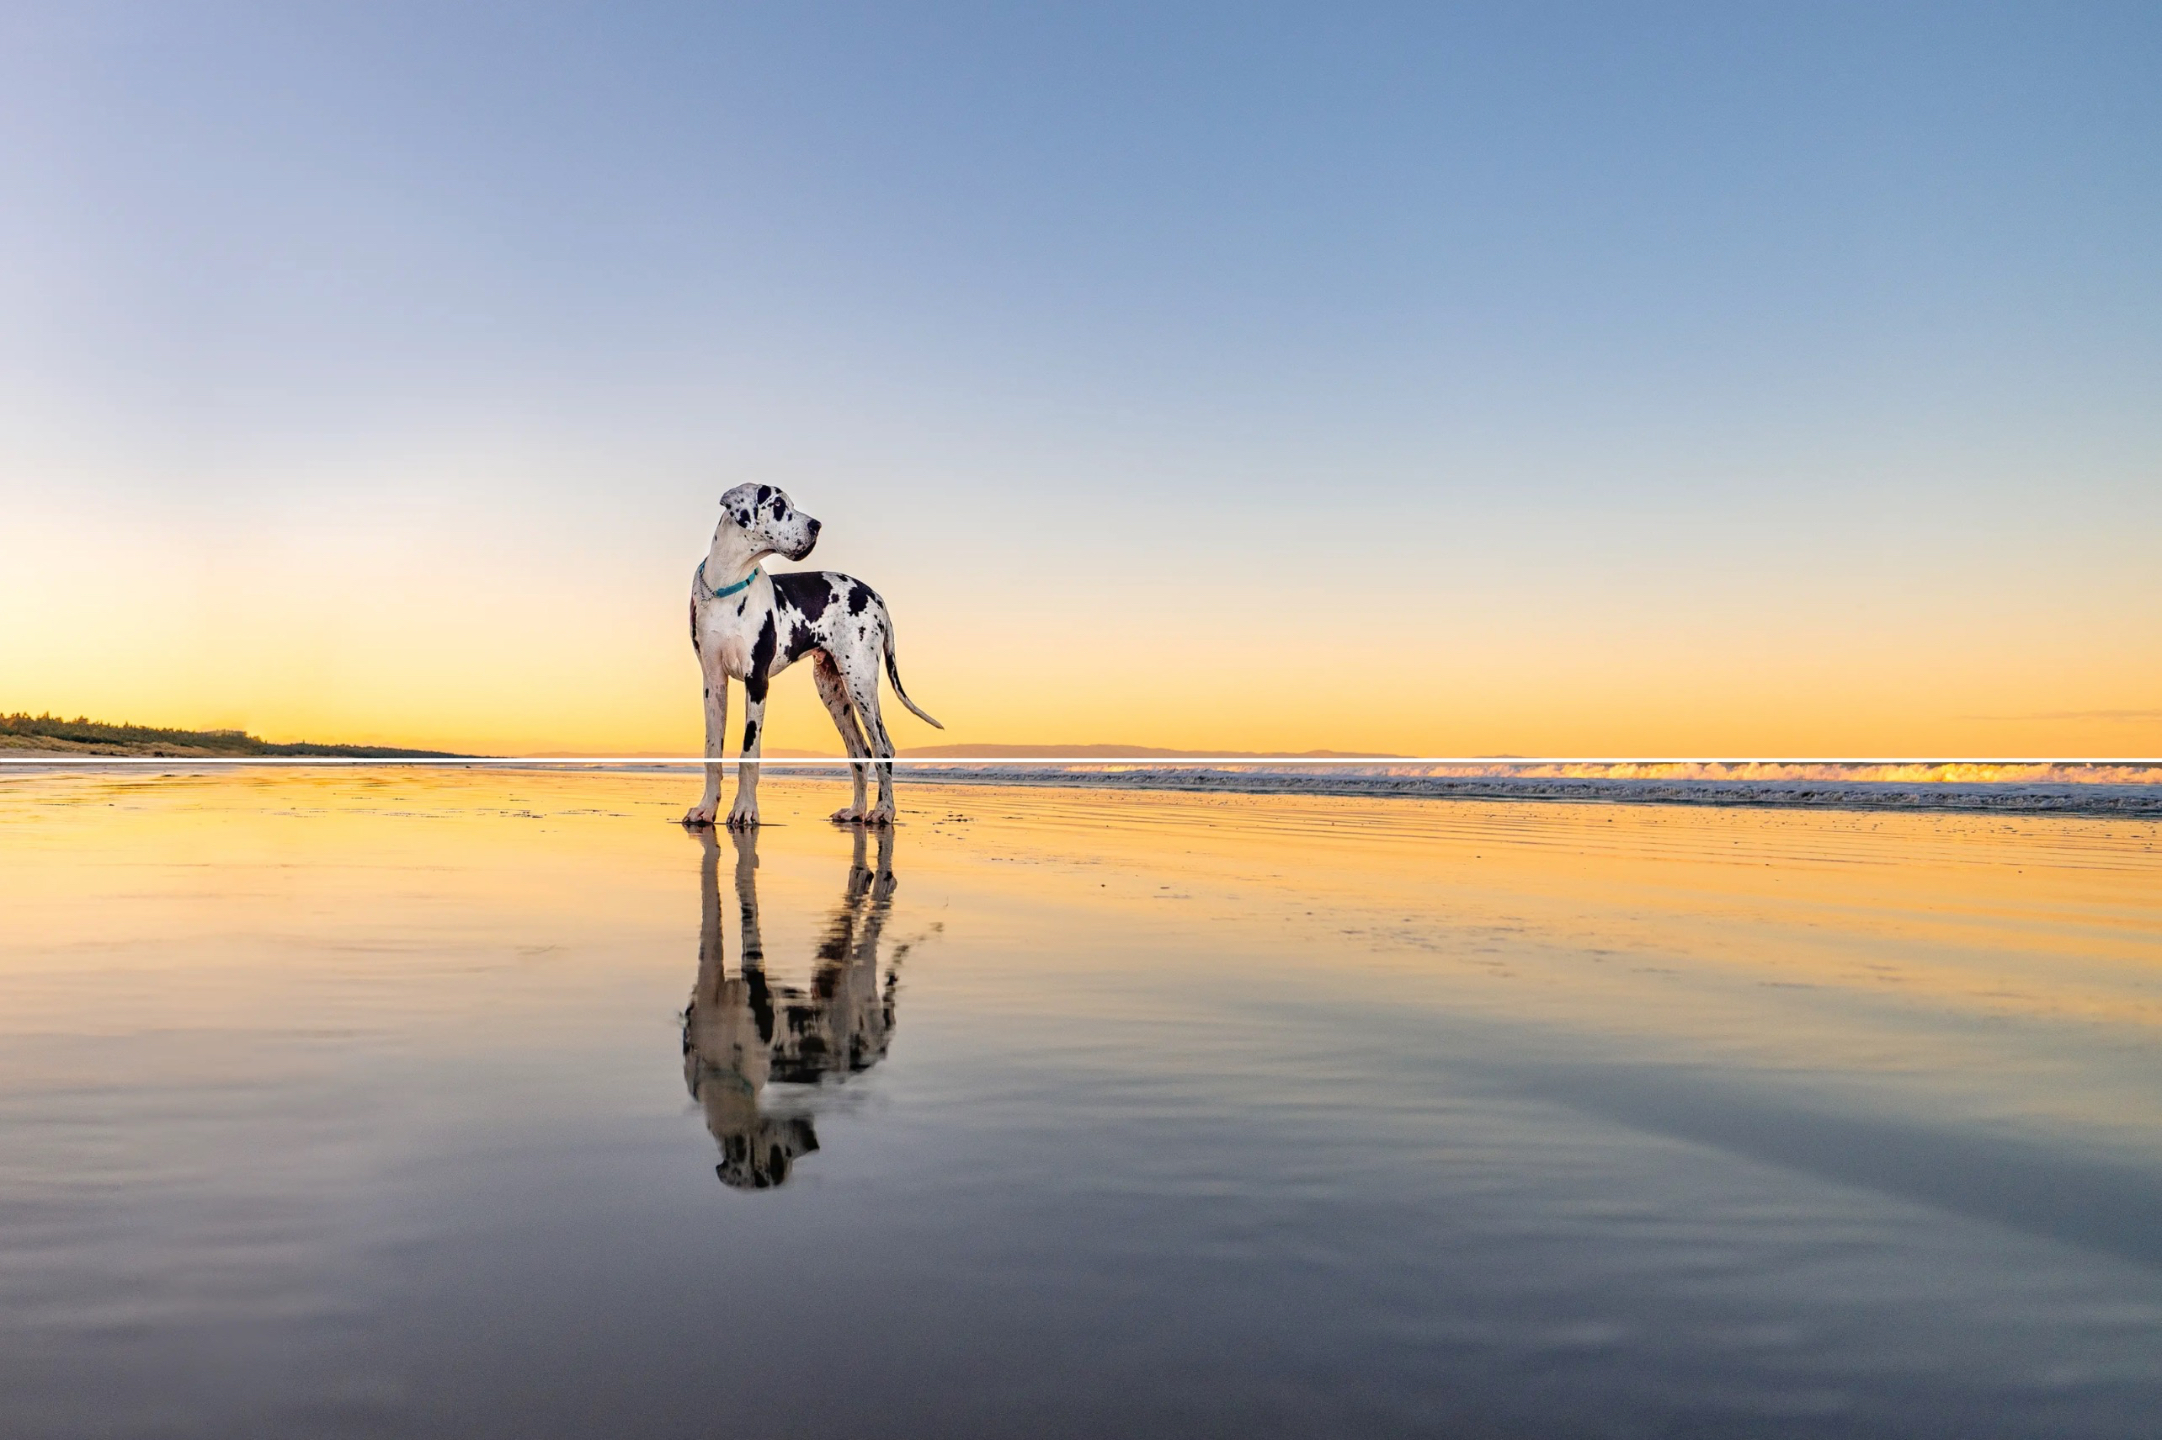
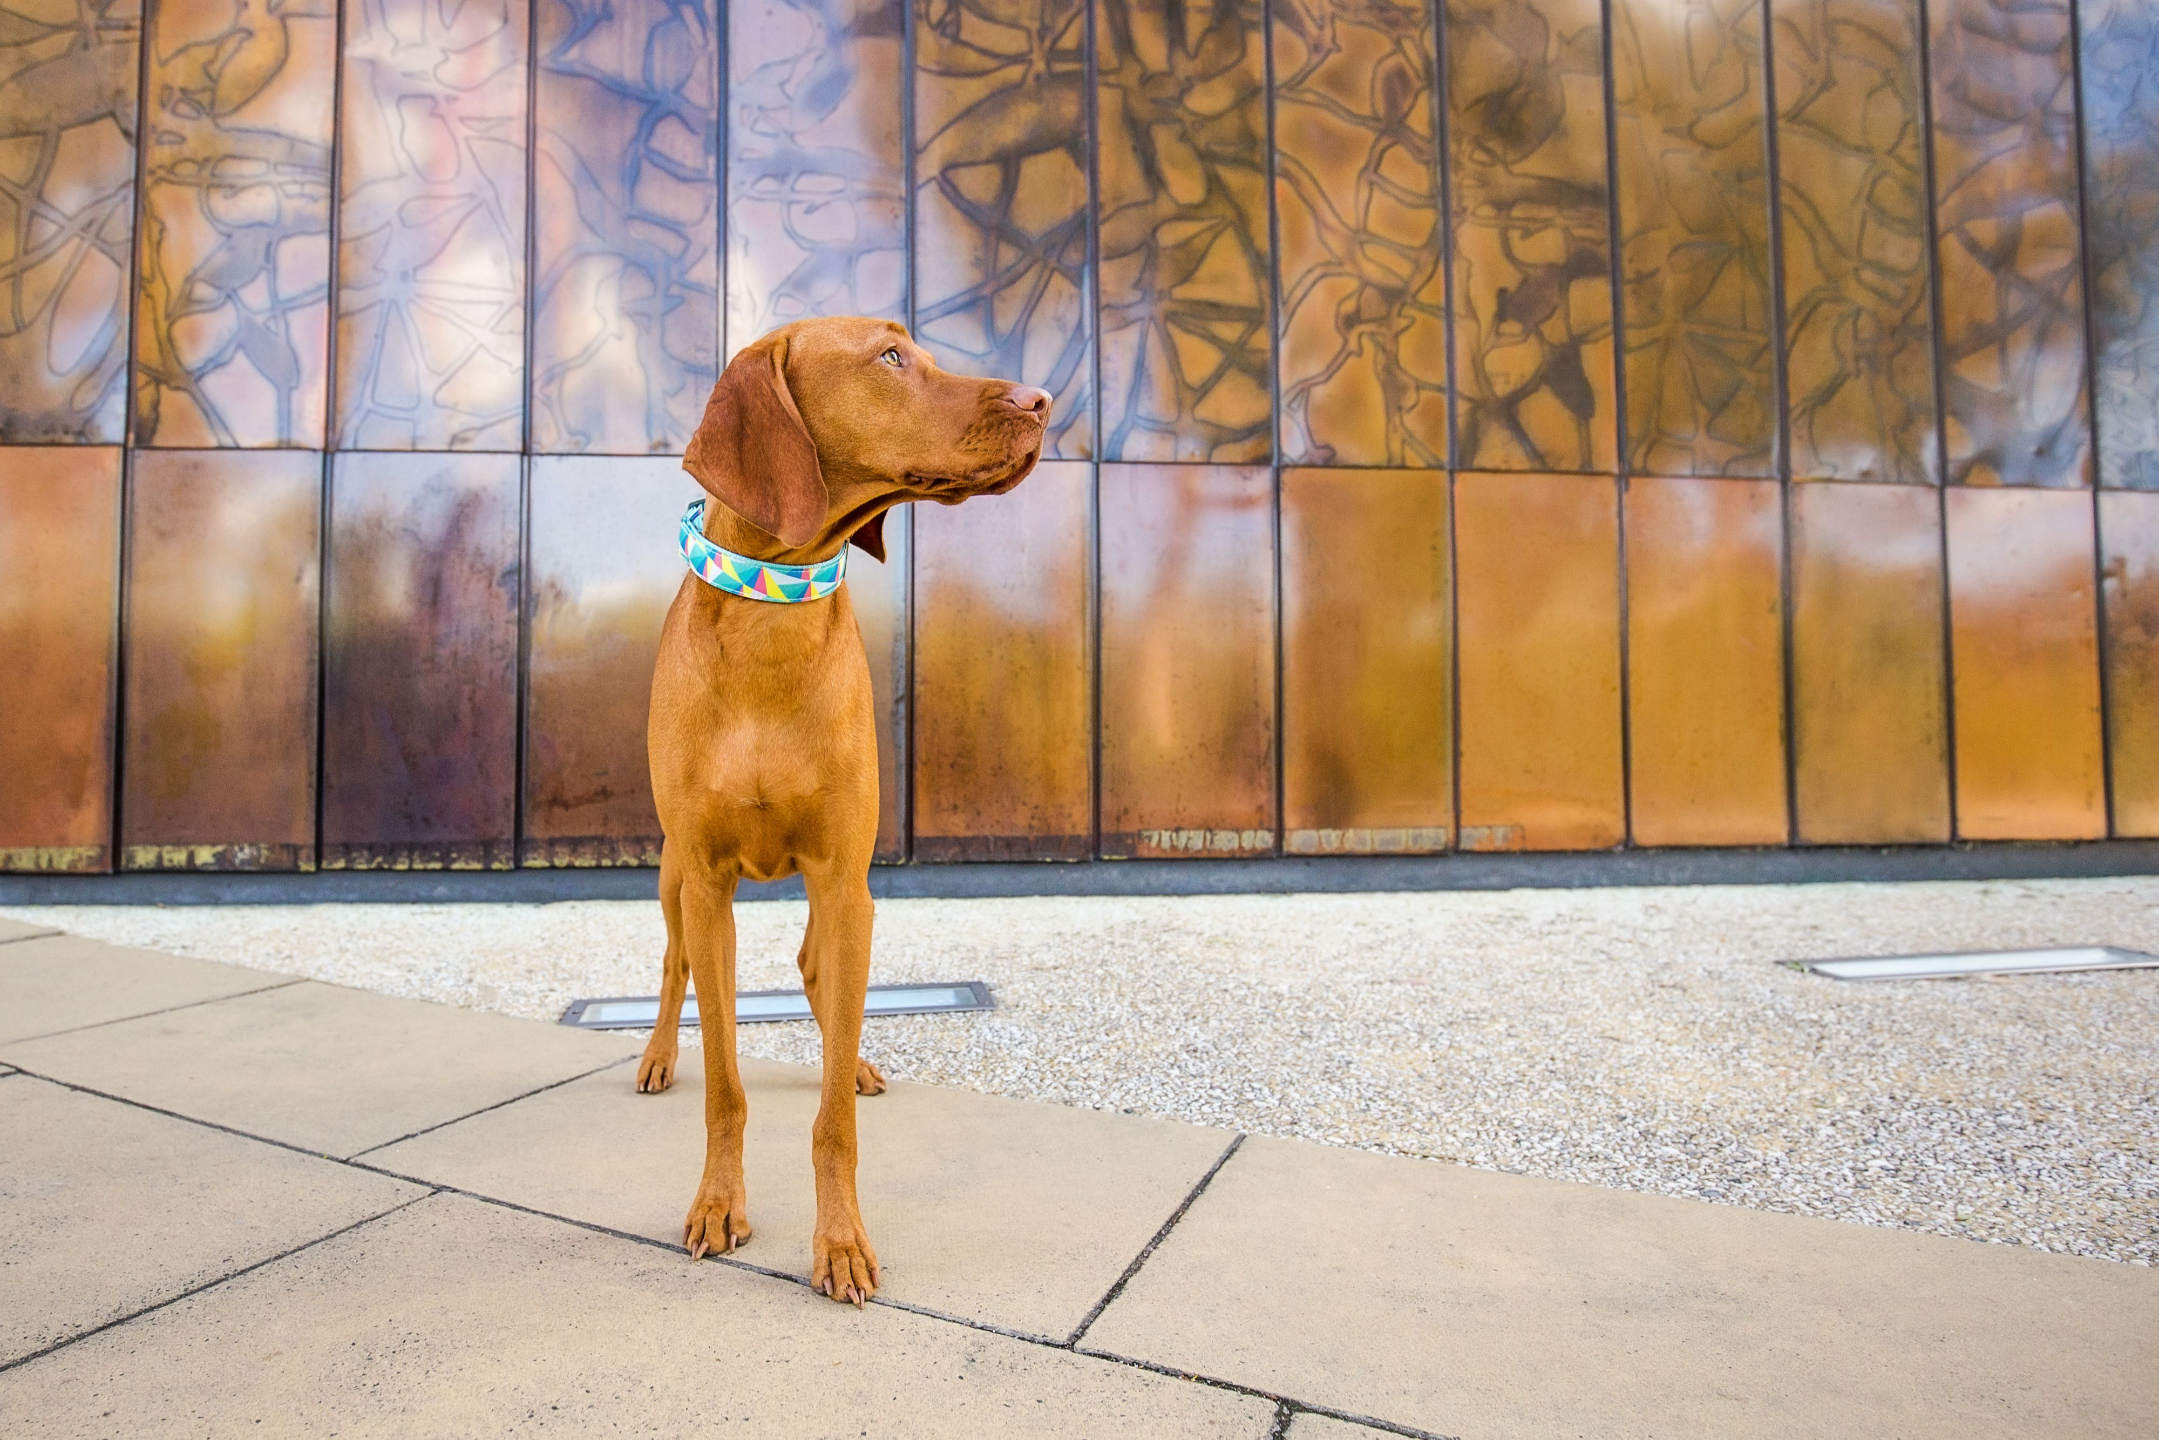
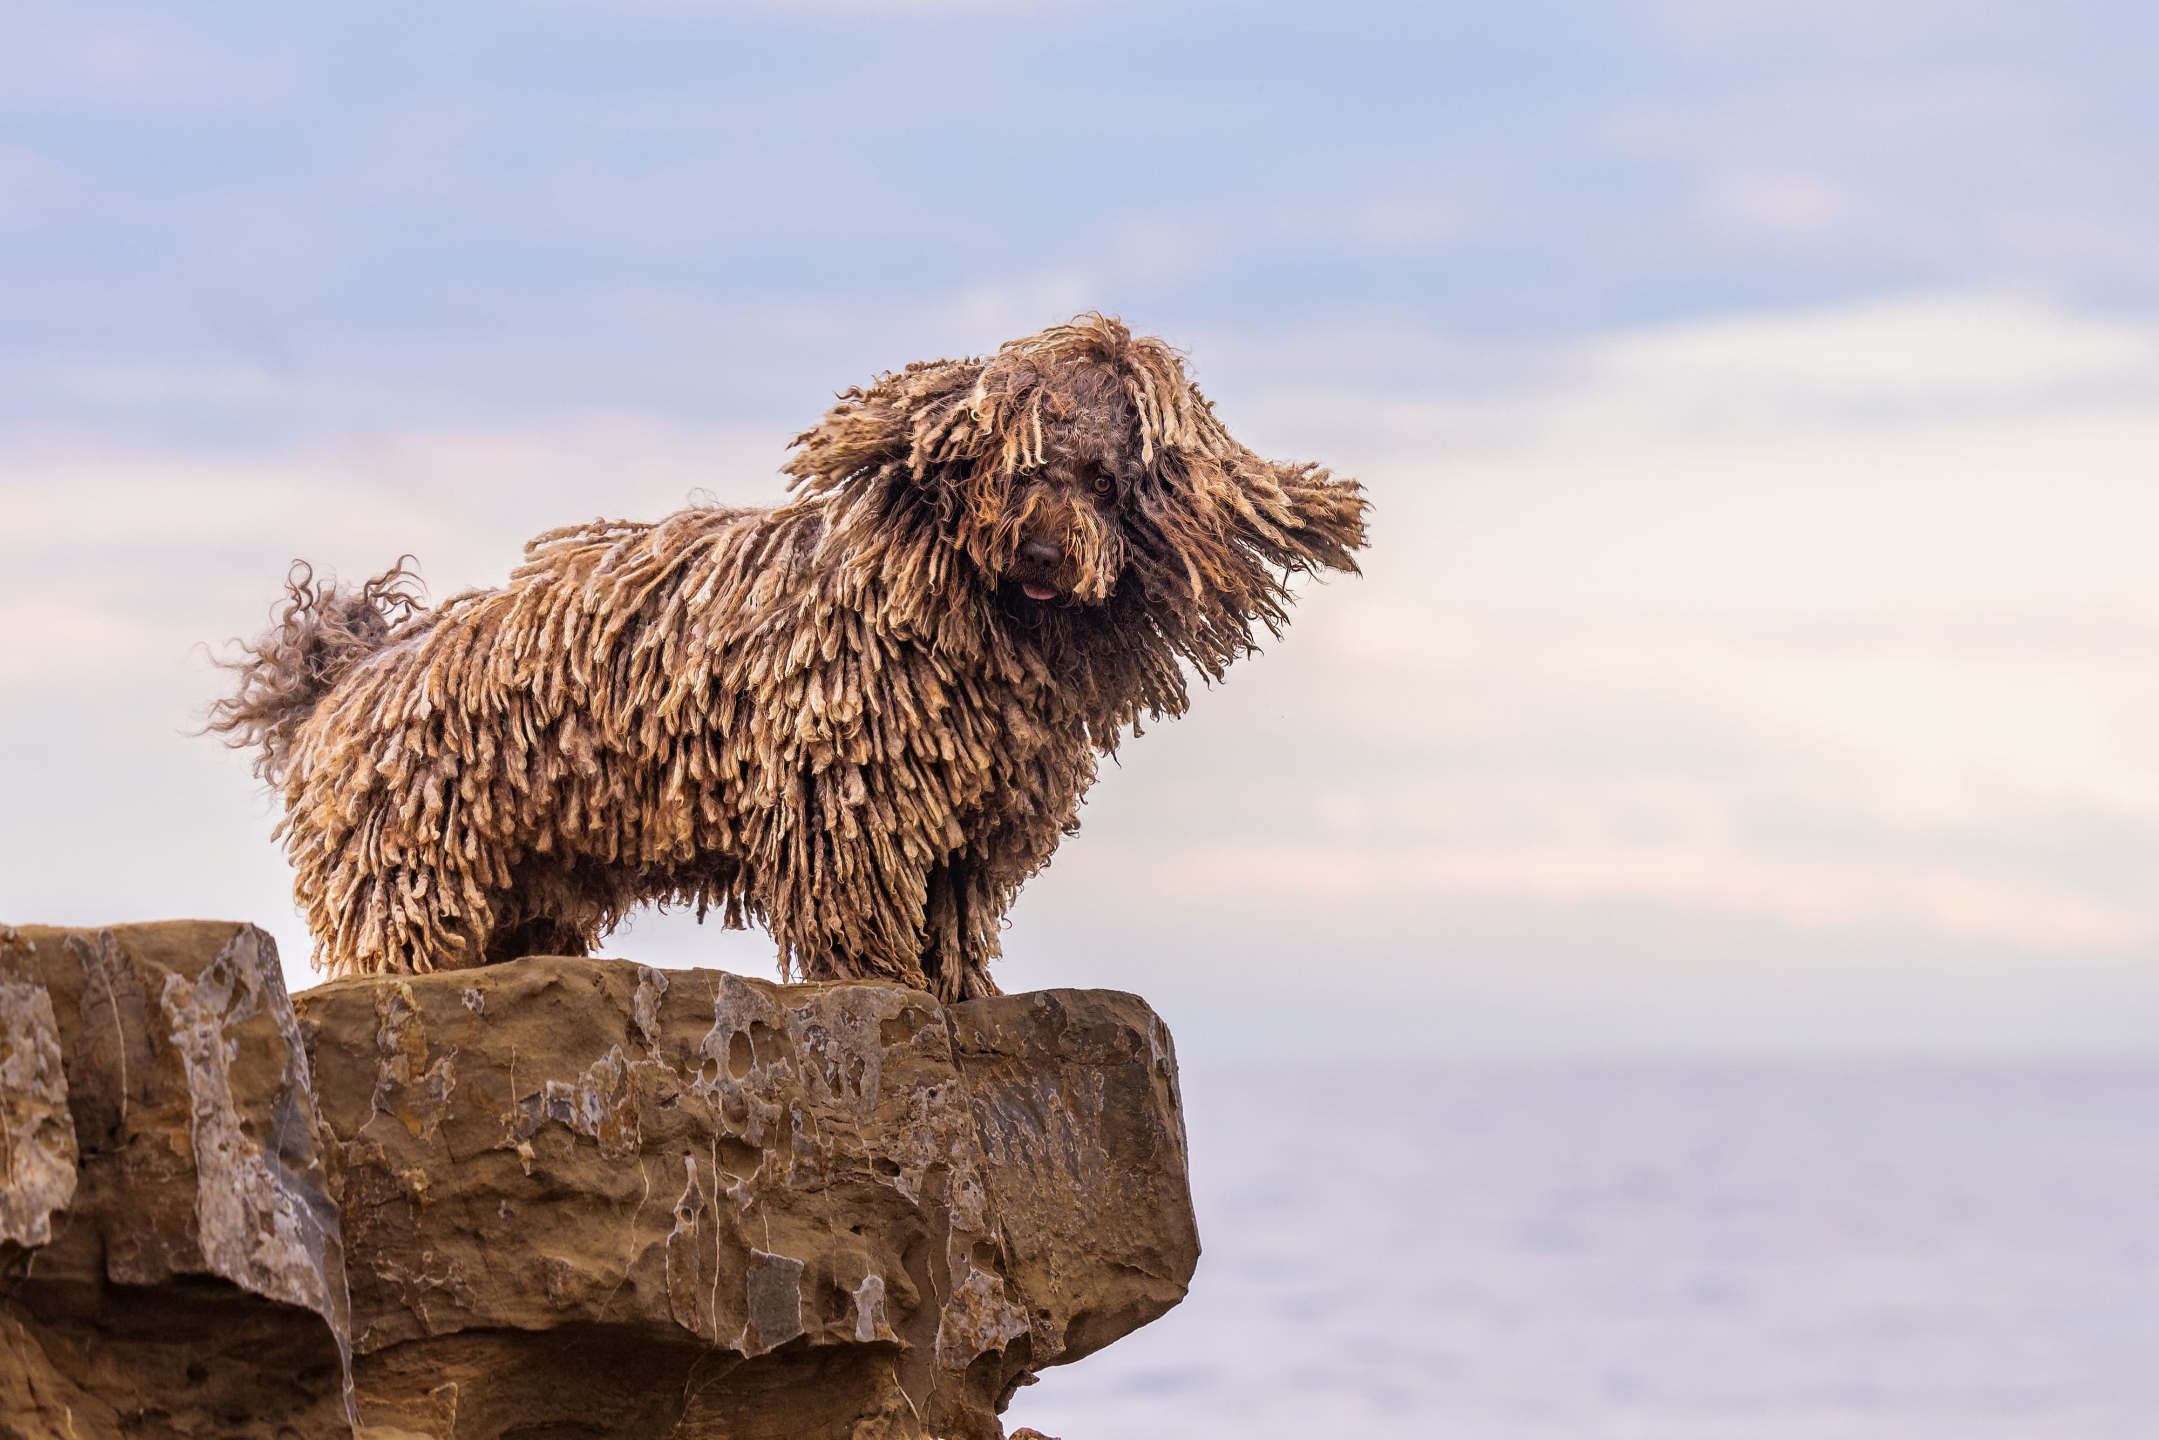
Positioning the pet on one of the vertical grid lines, rather than in the centre, adheres to the rule of thirds.
But how do you decide exactly which grid line to place them on? Left or right?
The cool thing about photographing pets, is you have a built-in set of indicators to tell you exactly where to place the subject in the scene, and how much negative space to leave - and it all comes back to their appearance in the image.
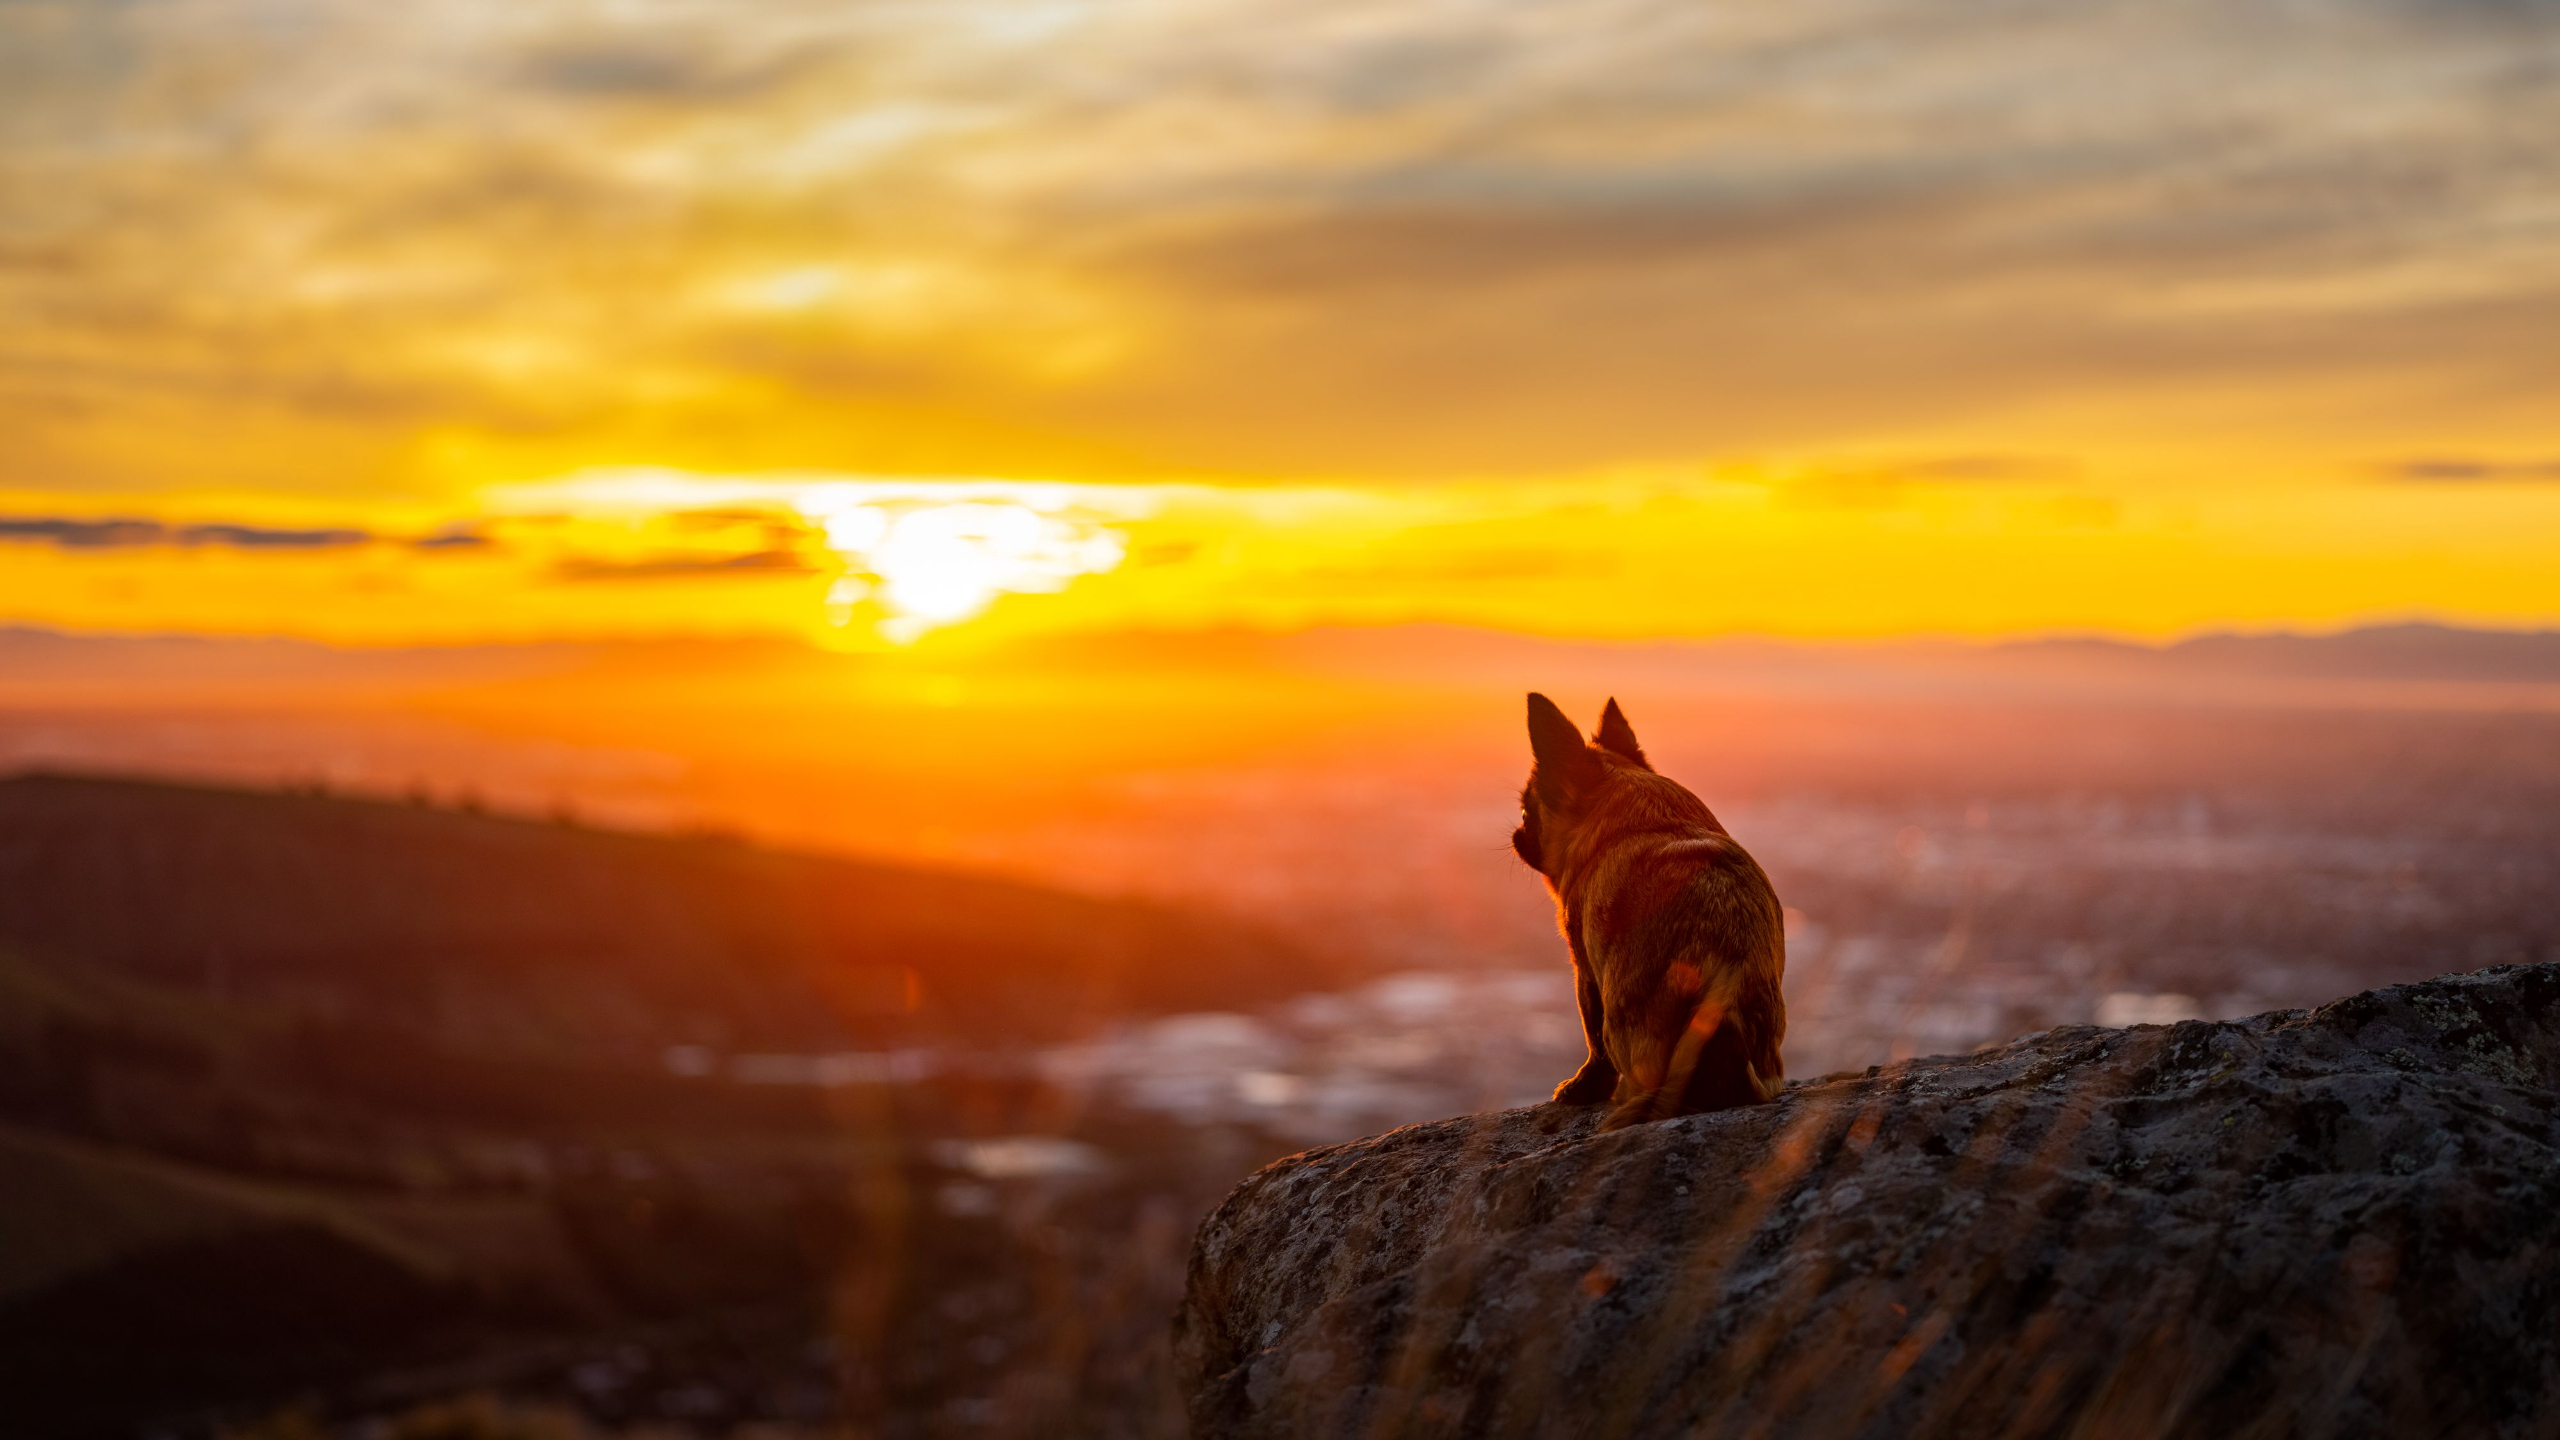
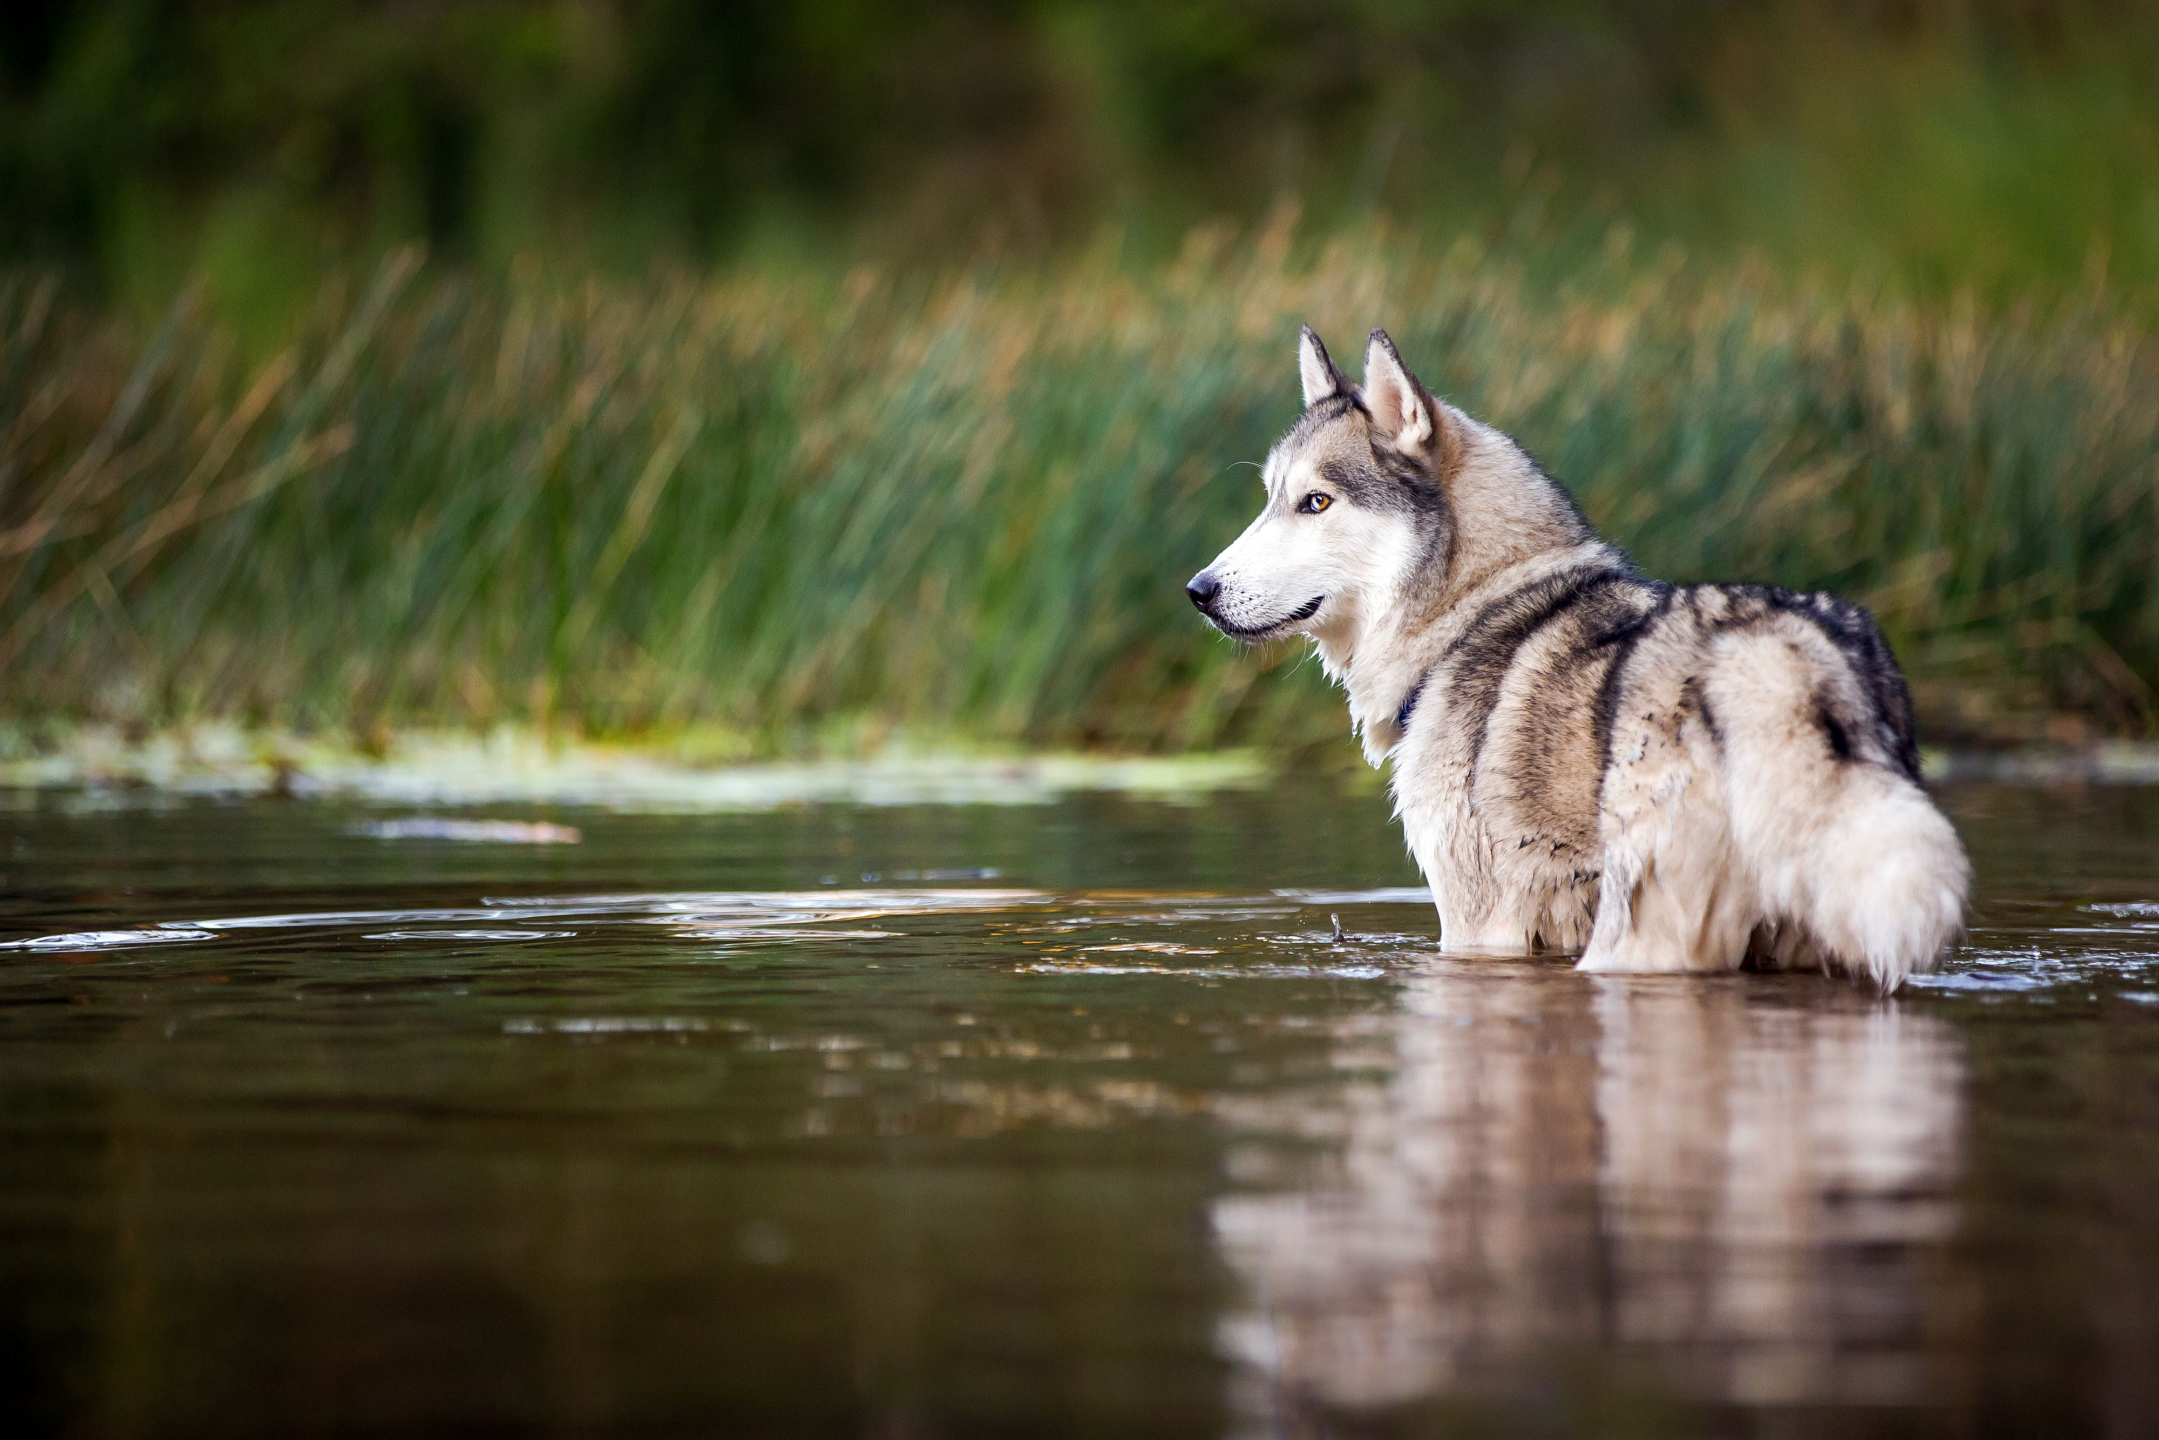
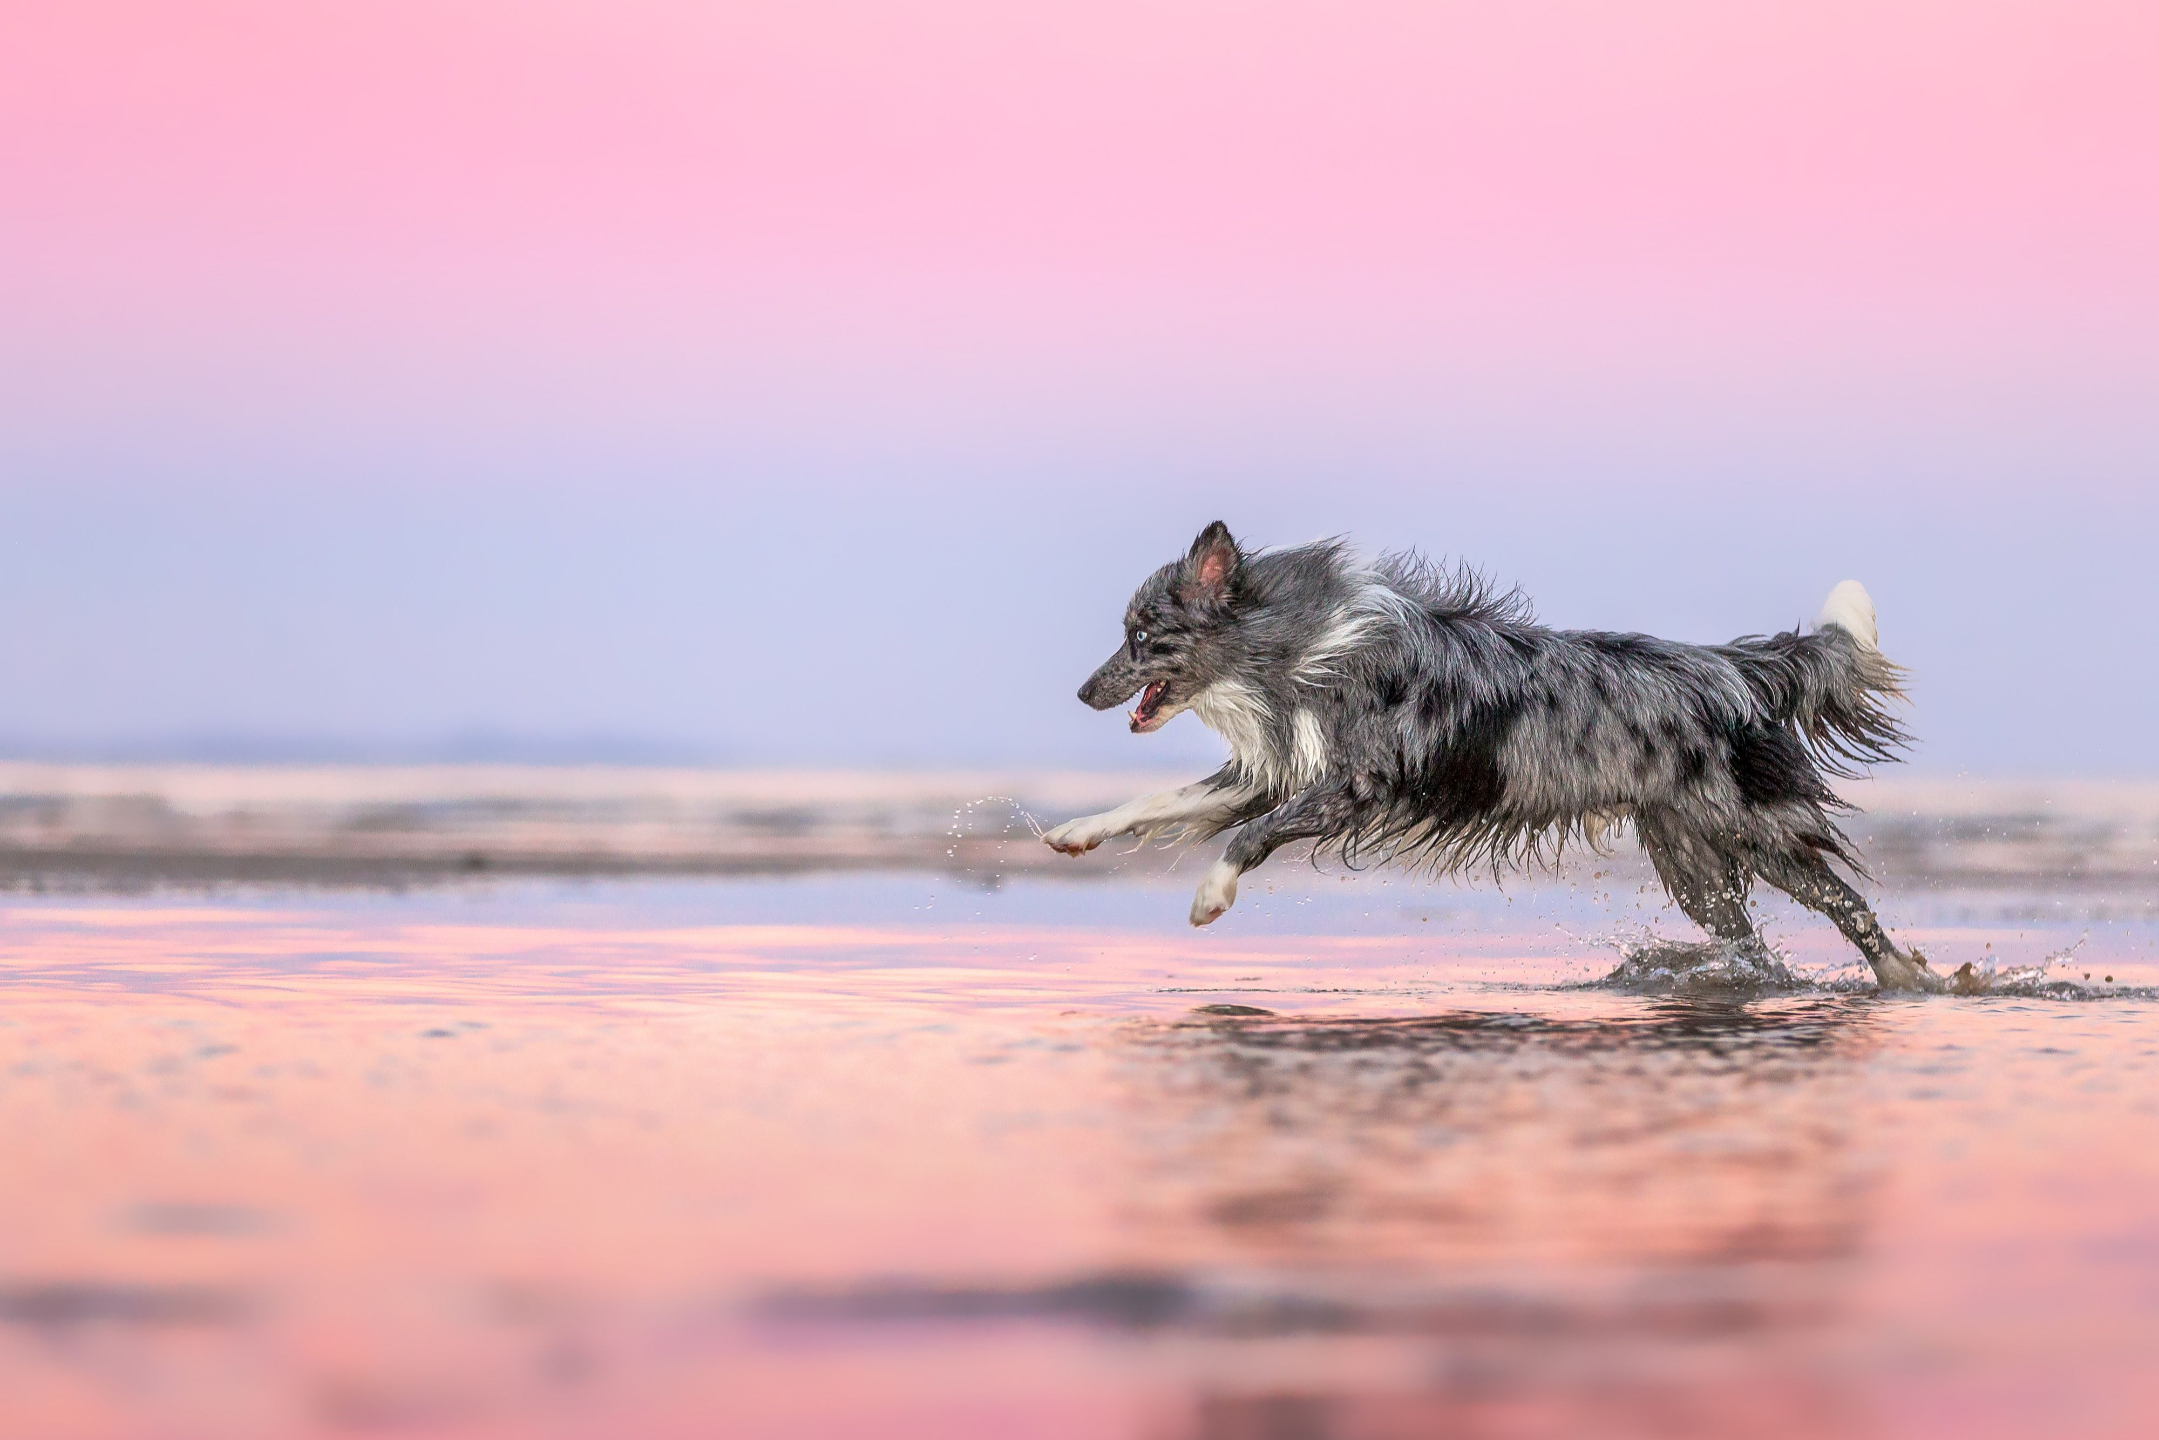
The direction they are looking, the direction they are facing, and the direction they are moving - are all indicators.
It can be helpful to think of it in terms of energy.
When the dog is looking in a particular direction, the energy flows out of their gaze towards that area, and you need to leave space in that direction to “absorb” the energy.
When their body is facing in a particular direction, the same thing applies. Space must be left in that direction.
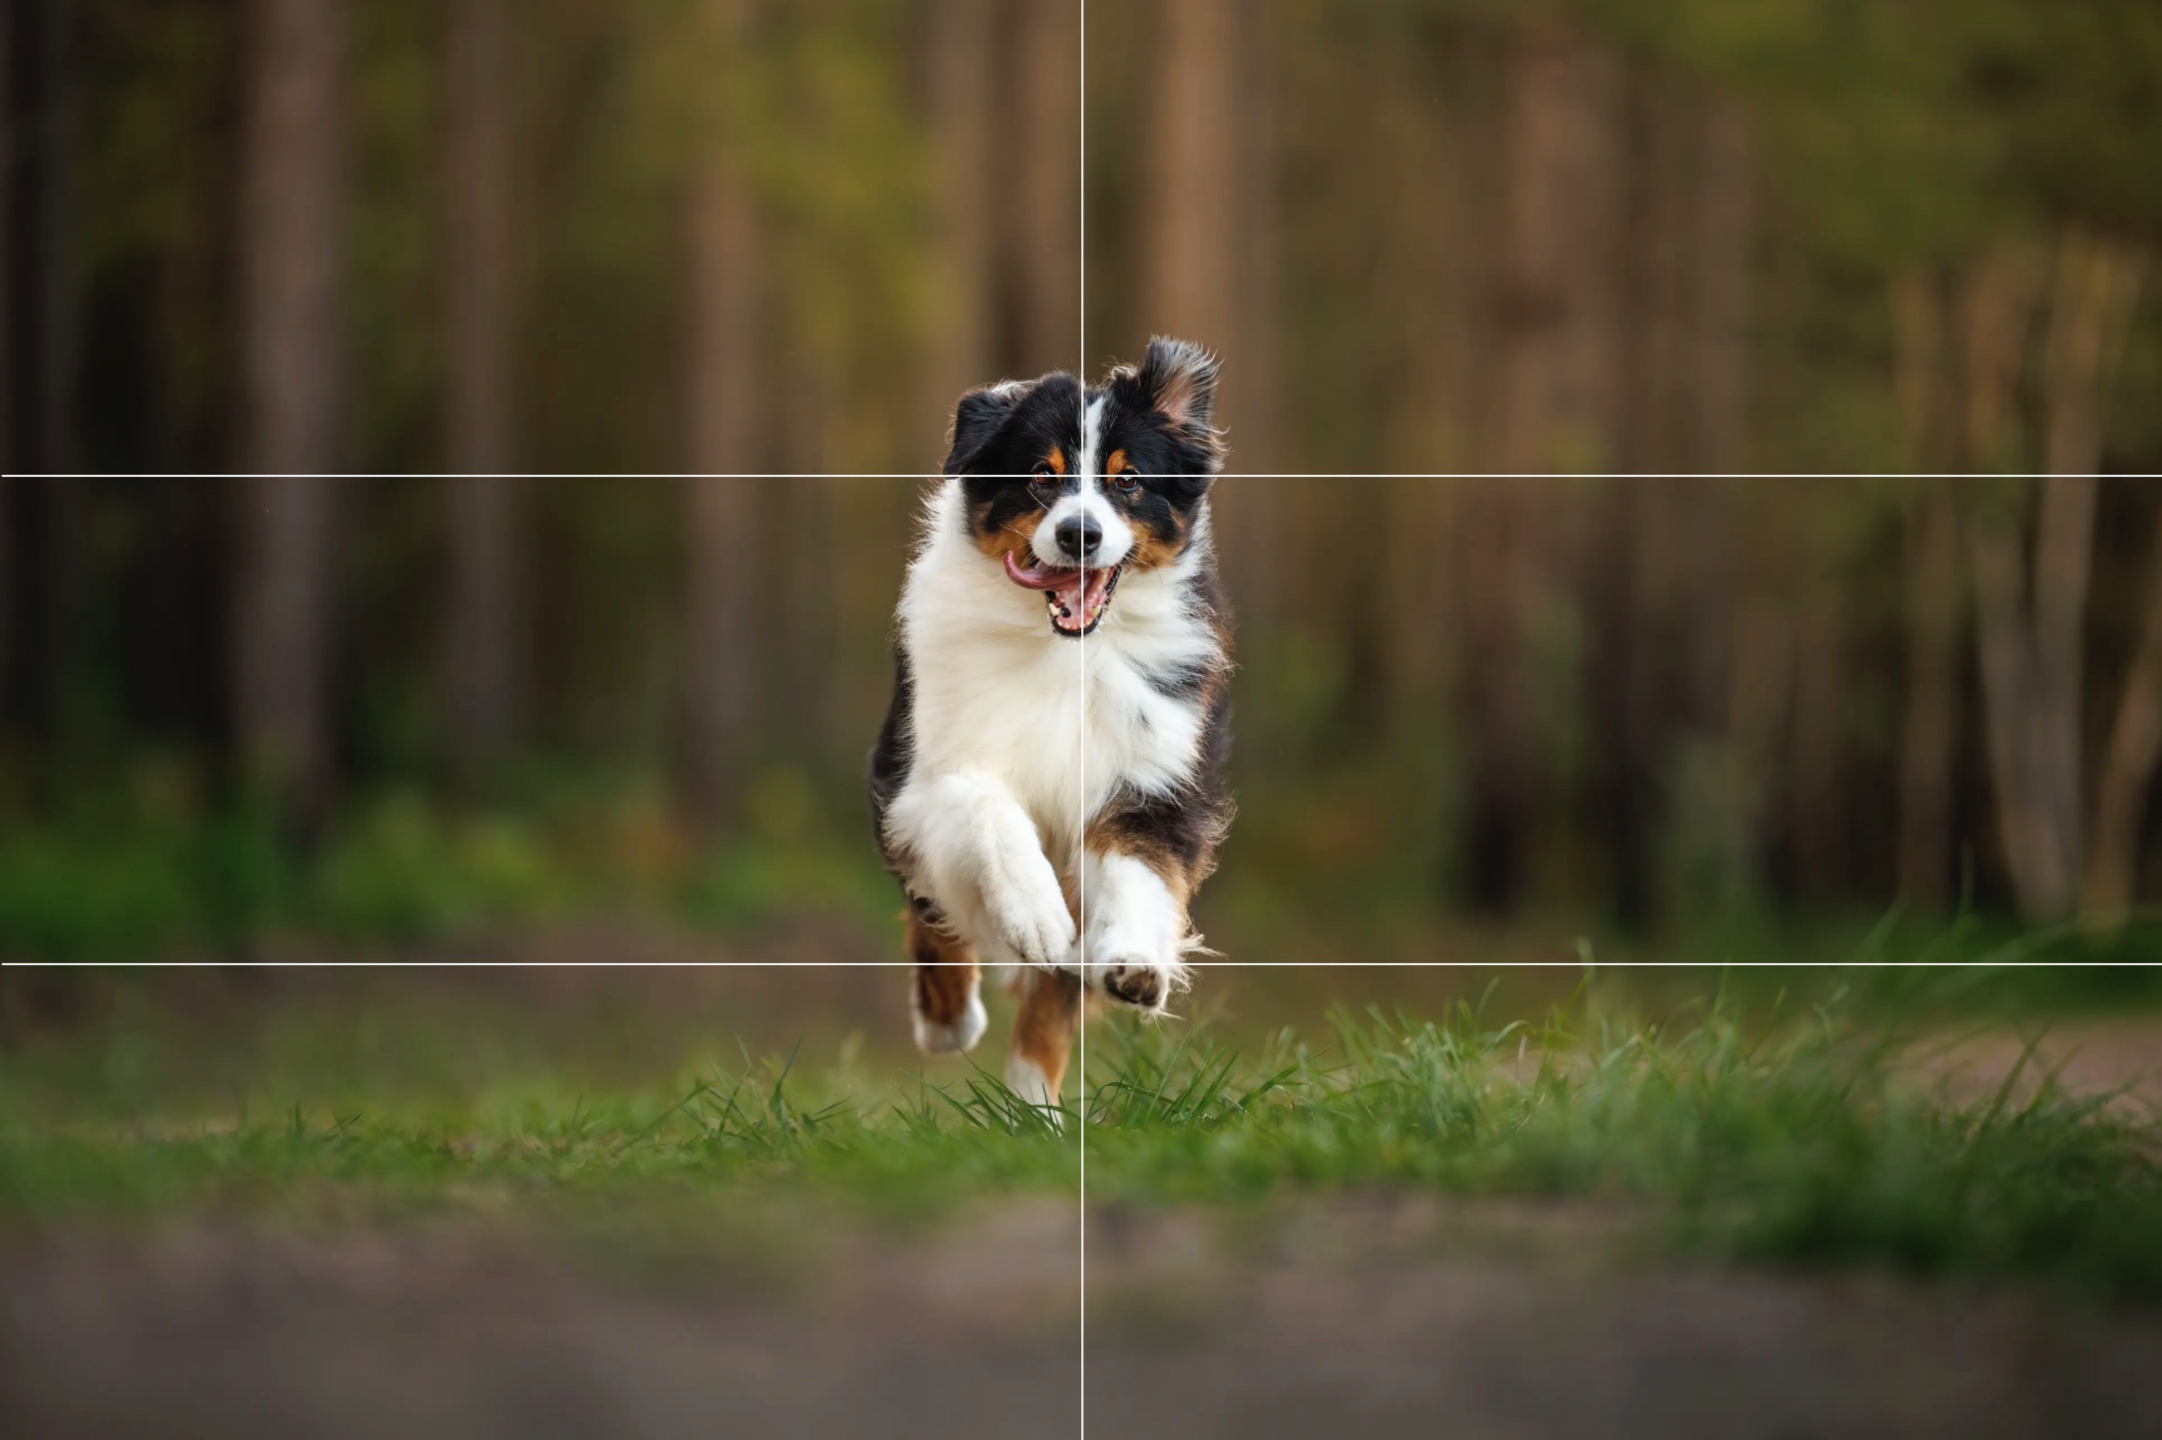
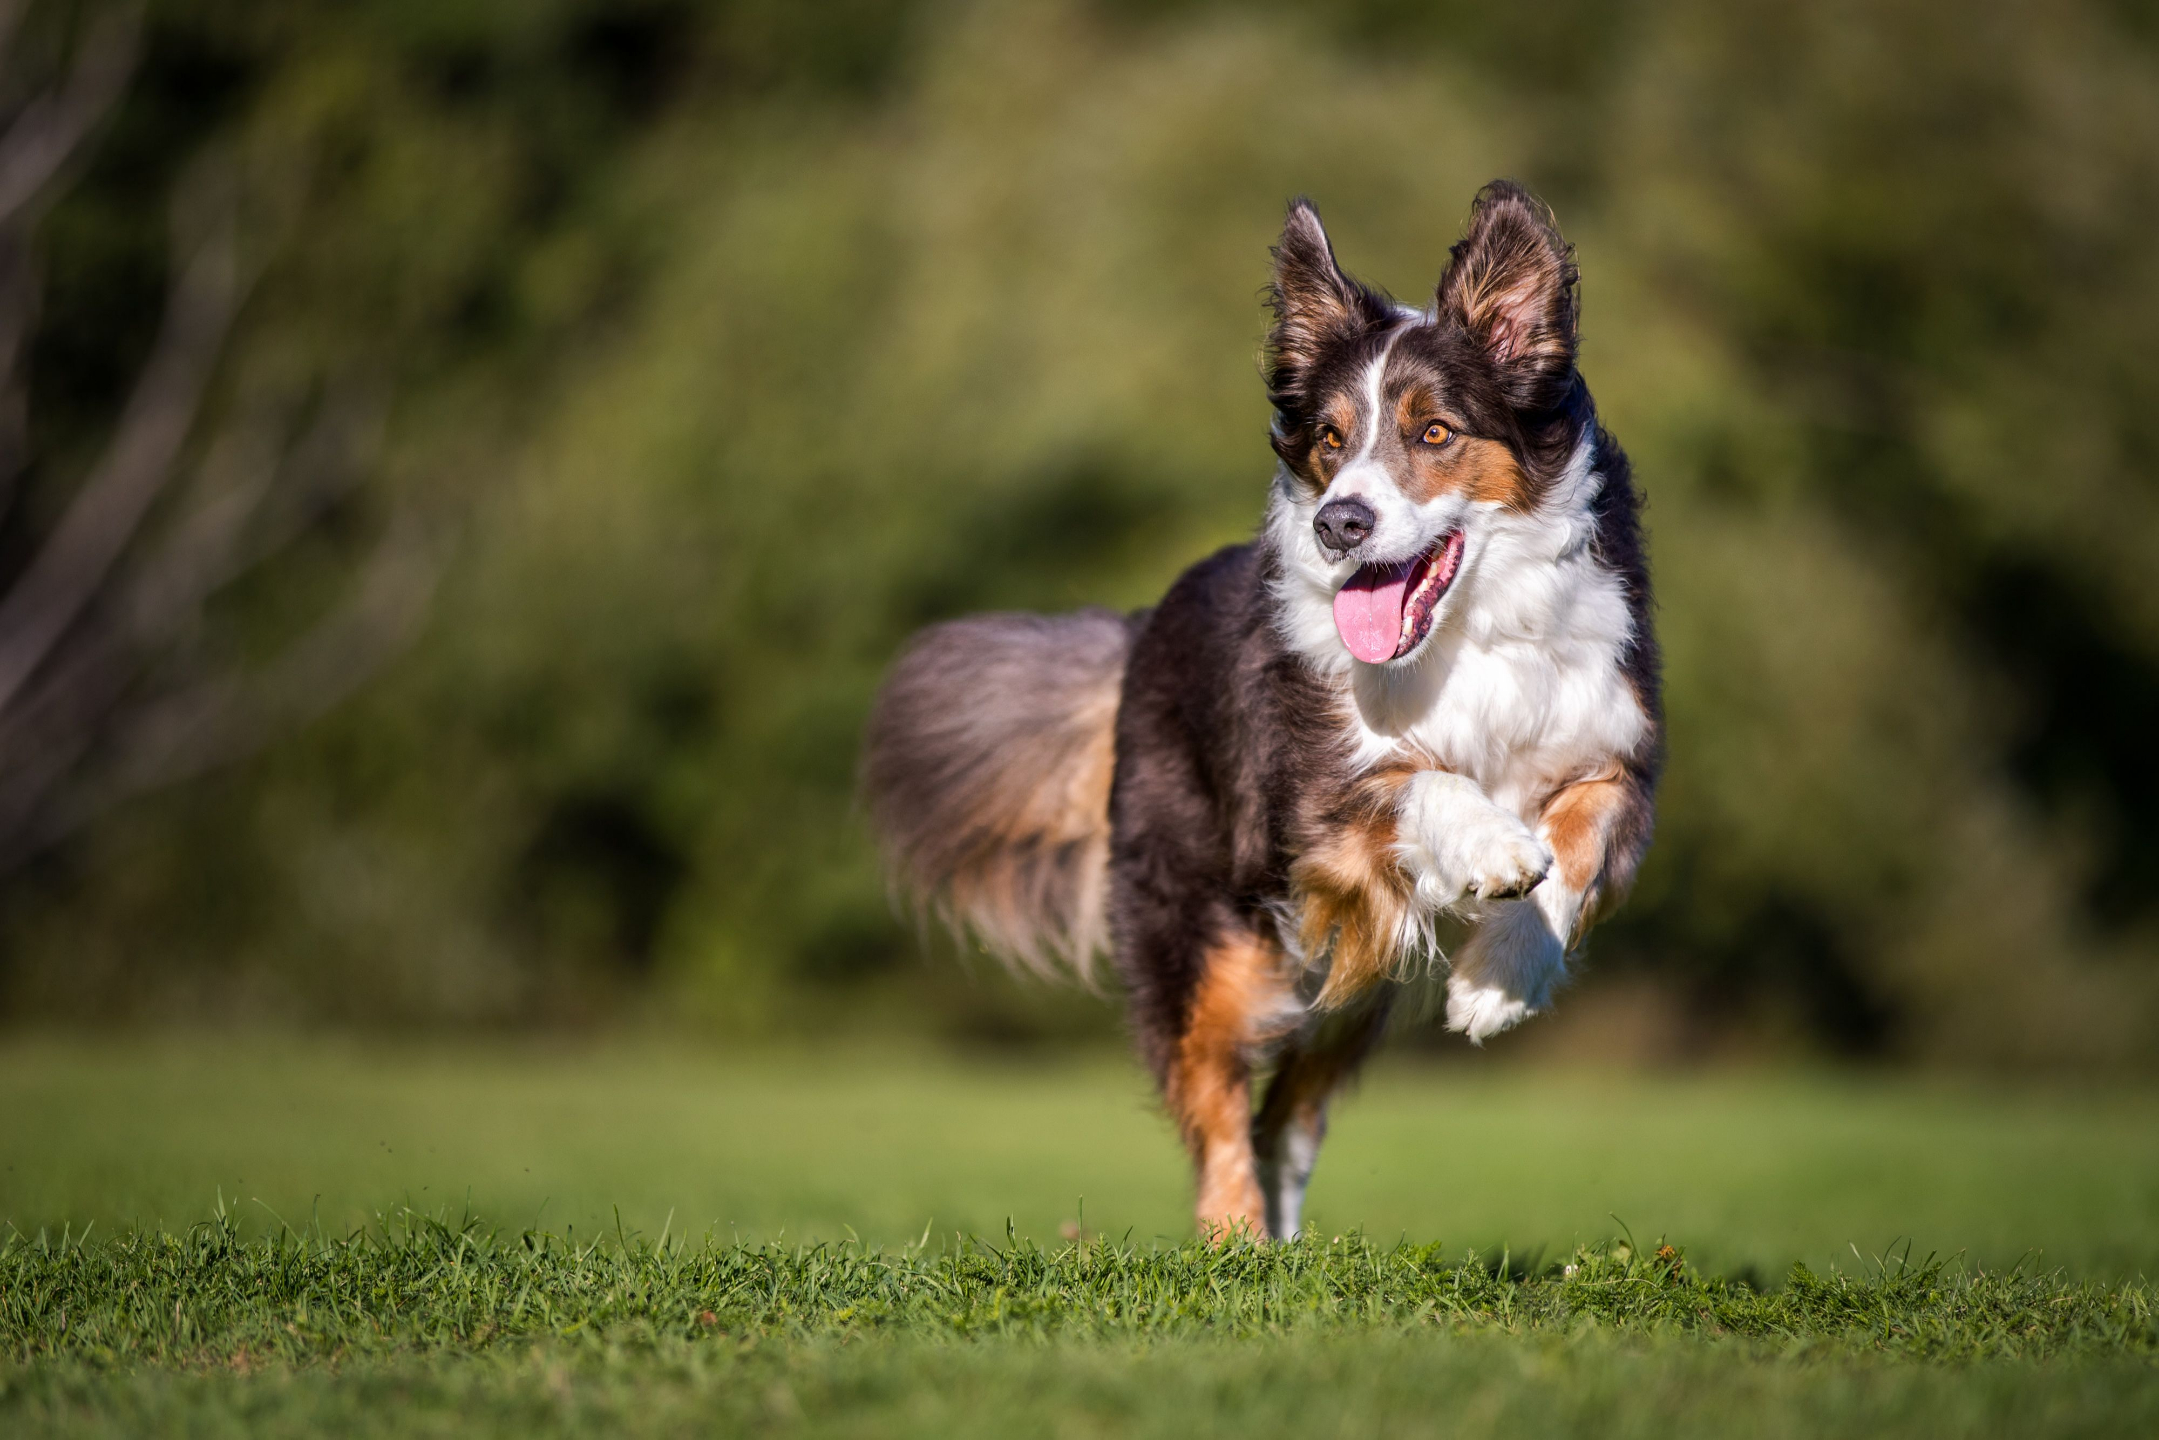
If they are moving, you’ll also need to leave space in the direction of their movement. The faster the movement, the more space.
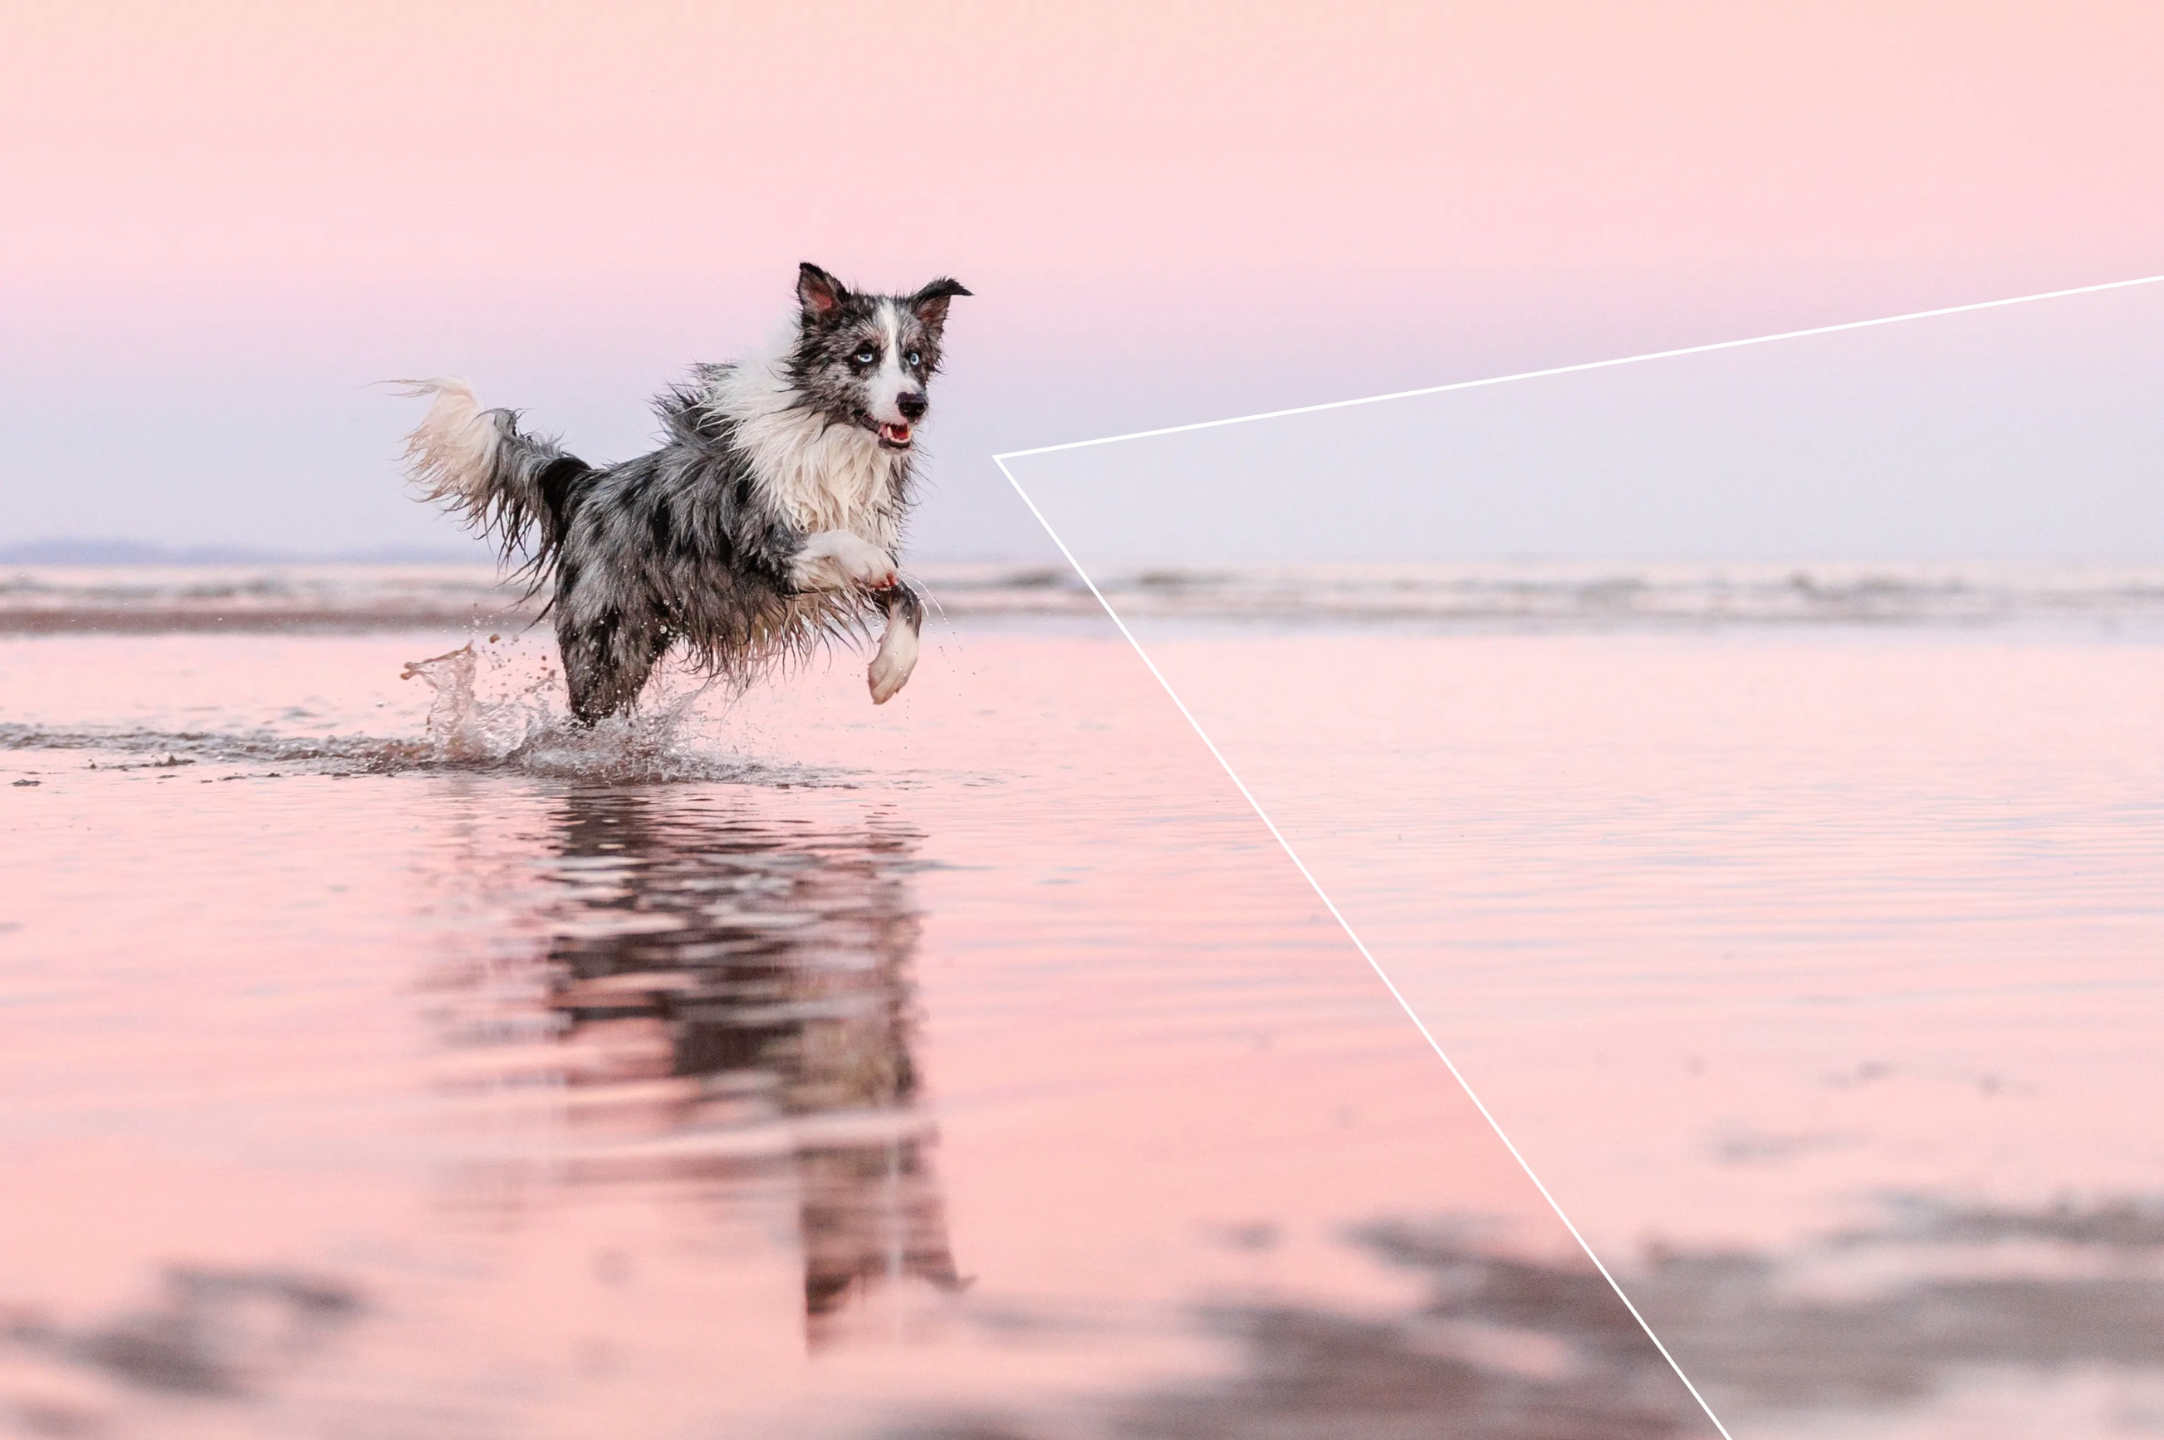
If there are multiple indicators in the pet’s pose, for example if they’re looking and facing in the same direction, these can compound, making it necessary for you to leave even more space in that direction.
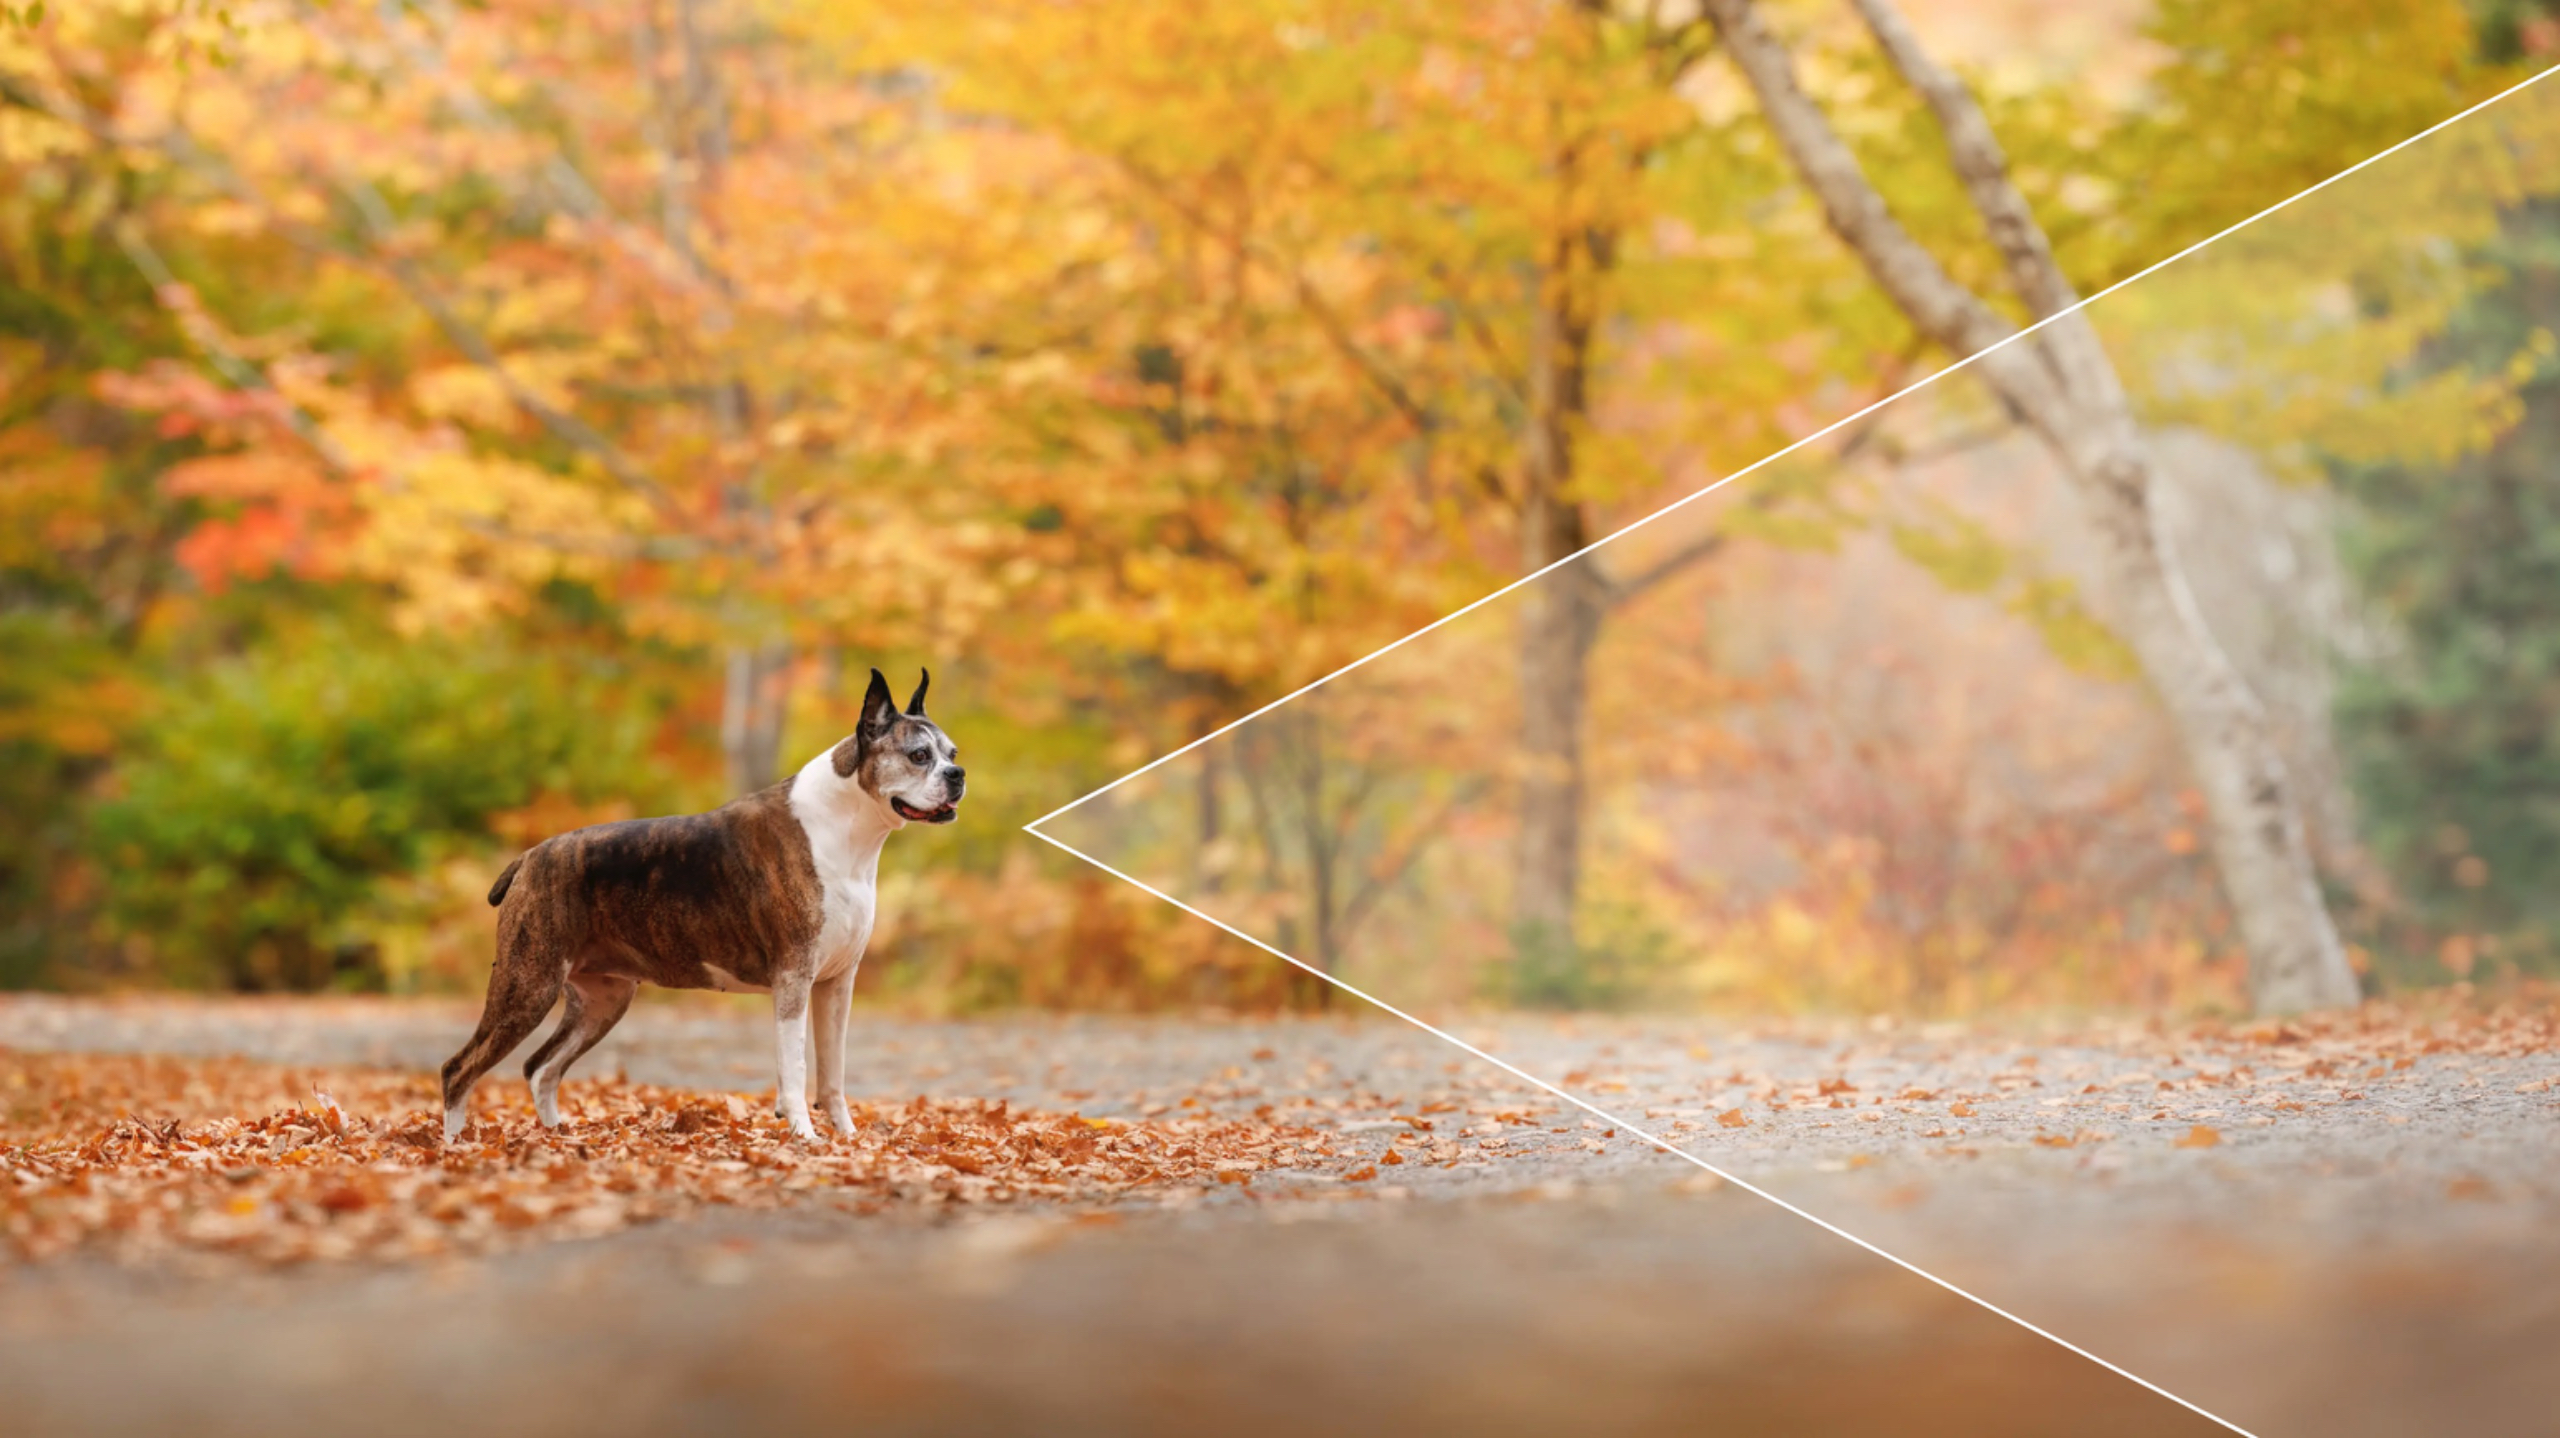
This also works when deciding where to place important parts of the image on the horizontal third lines.
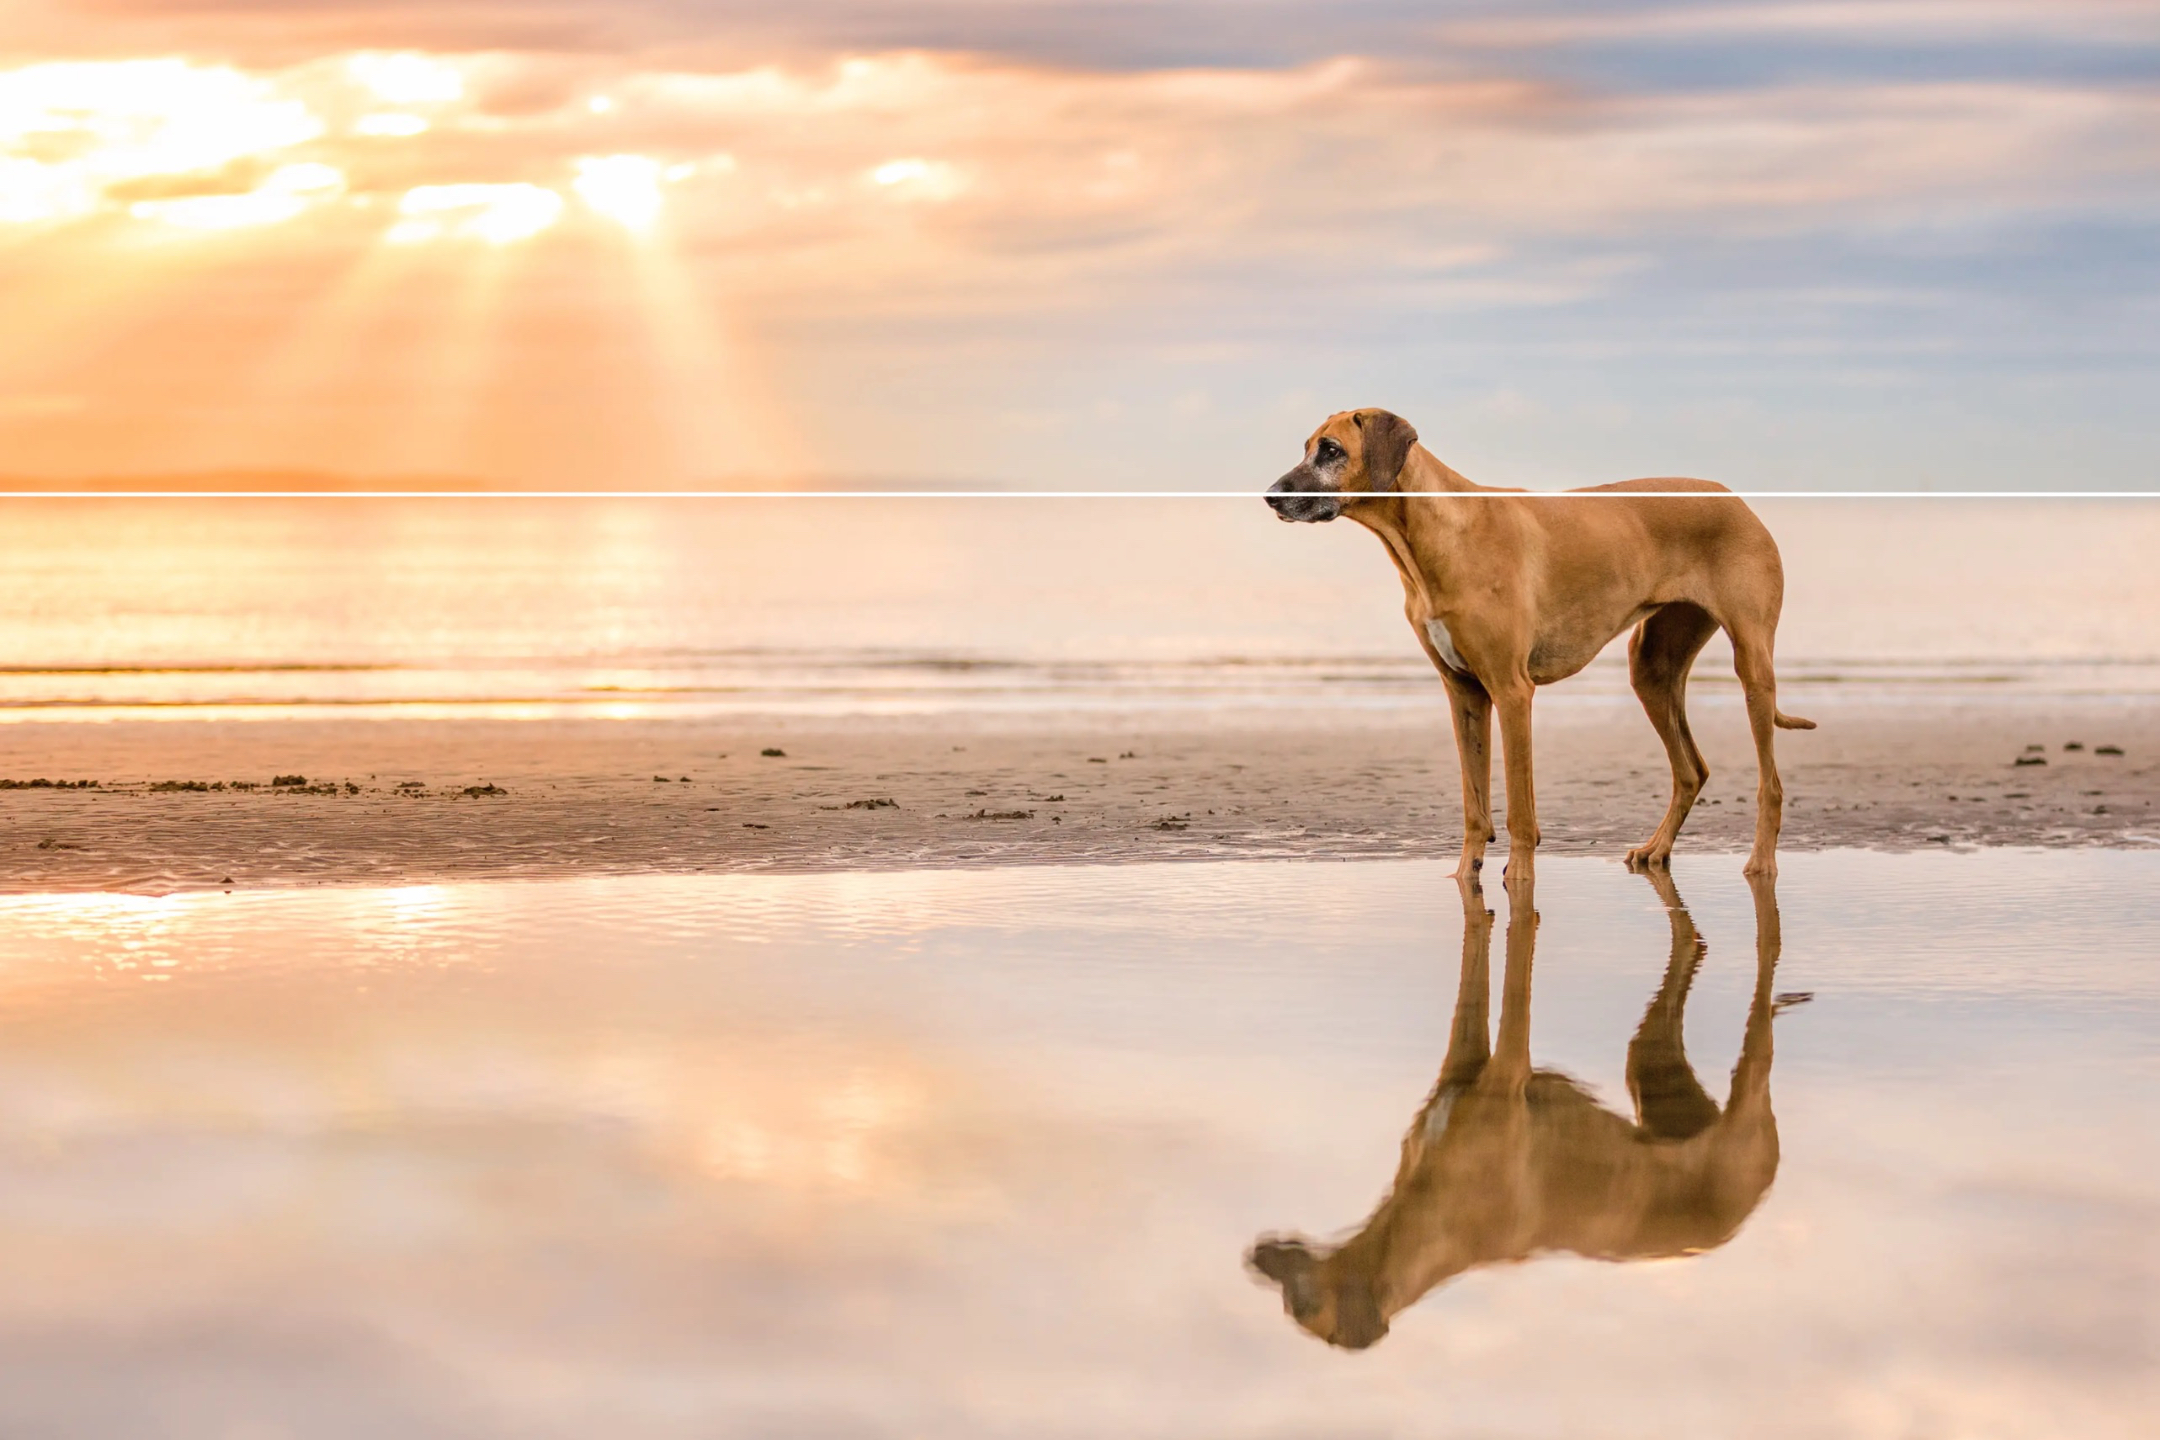
These posing indicators can also work in opposition.
If the subject is looking and facing in opposite directions, the energy from those two different directions can often be cancelled out. This is why centering them in the frame makes more sense.
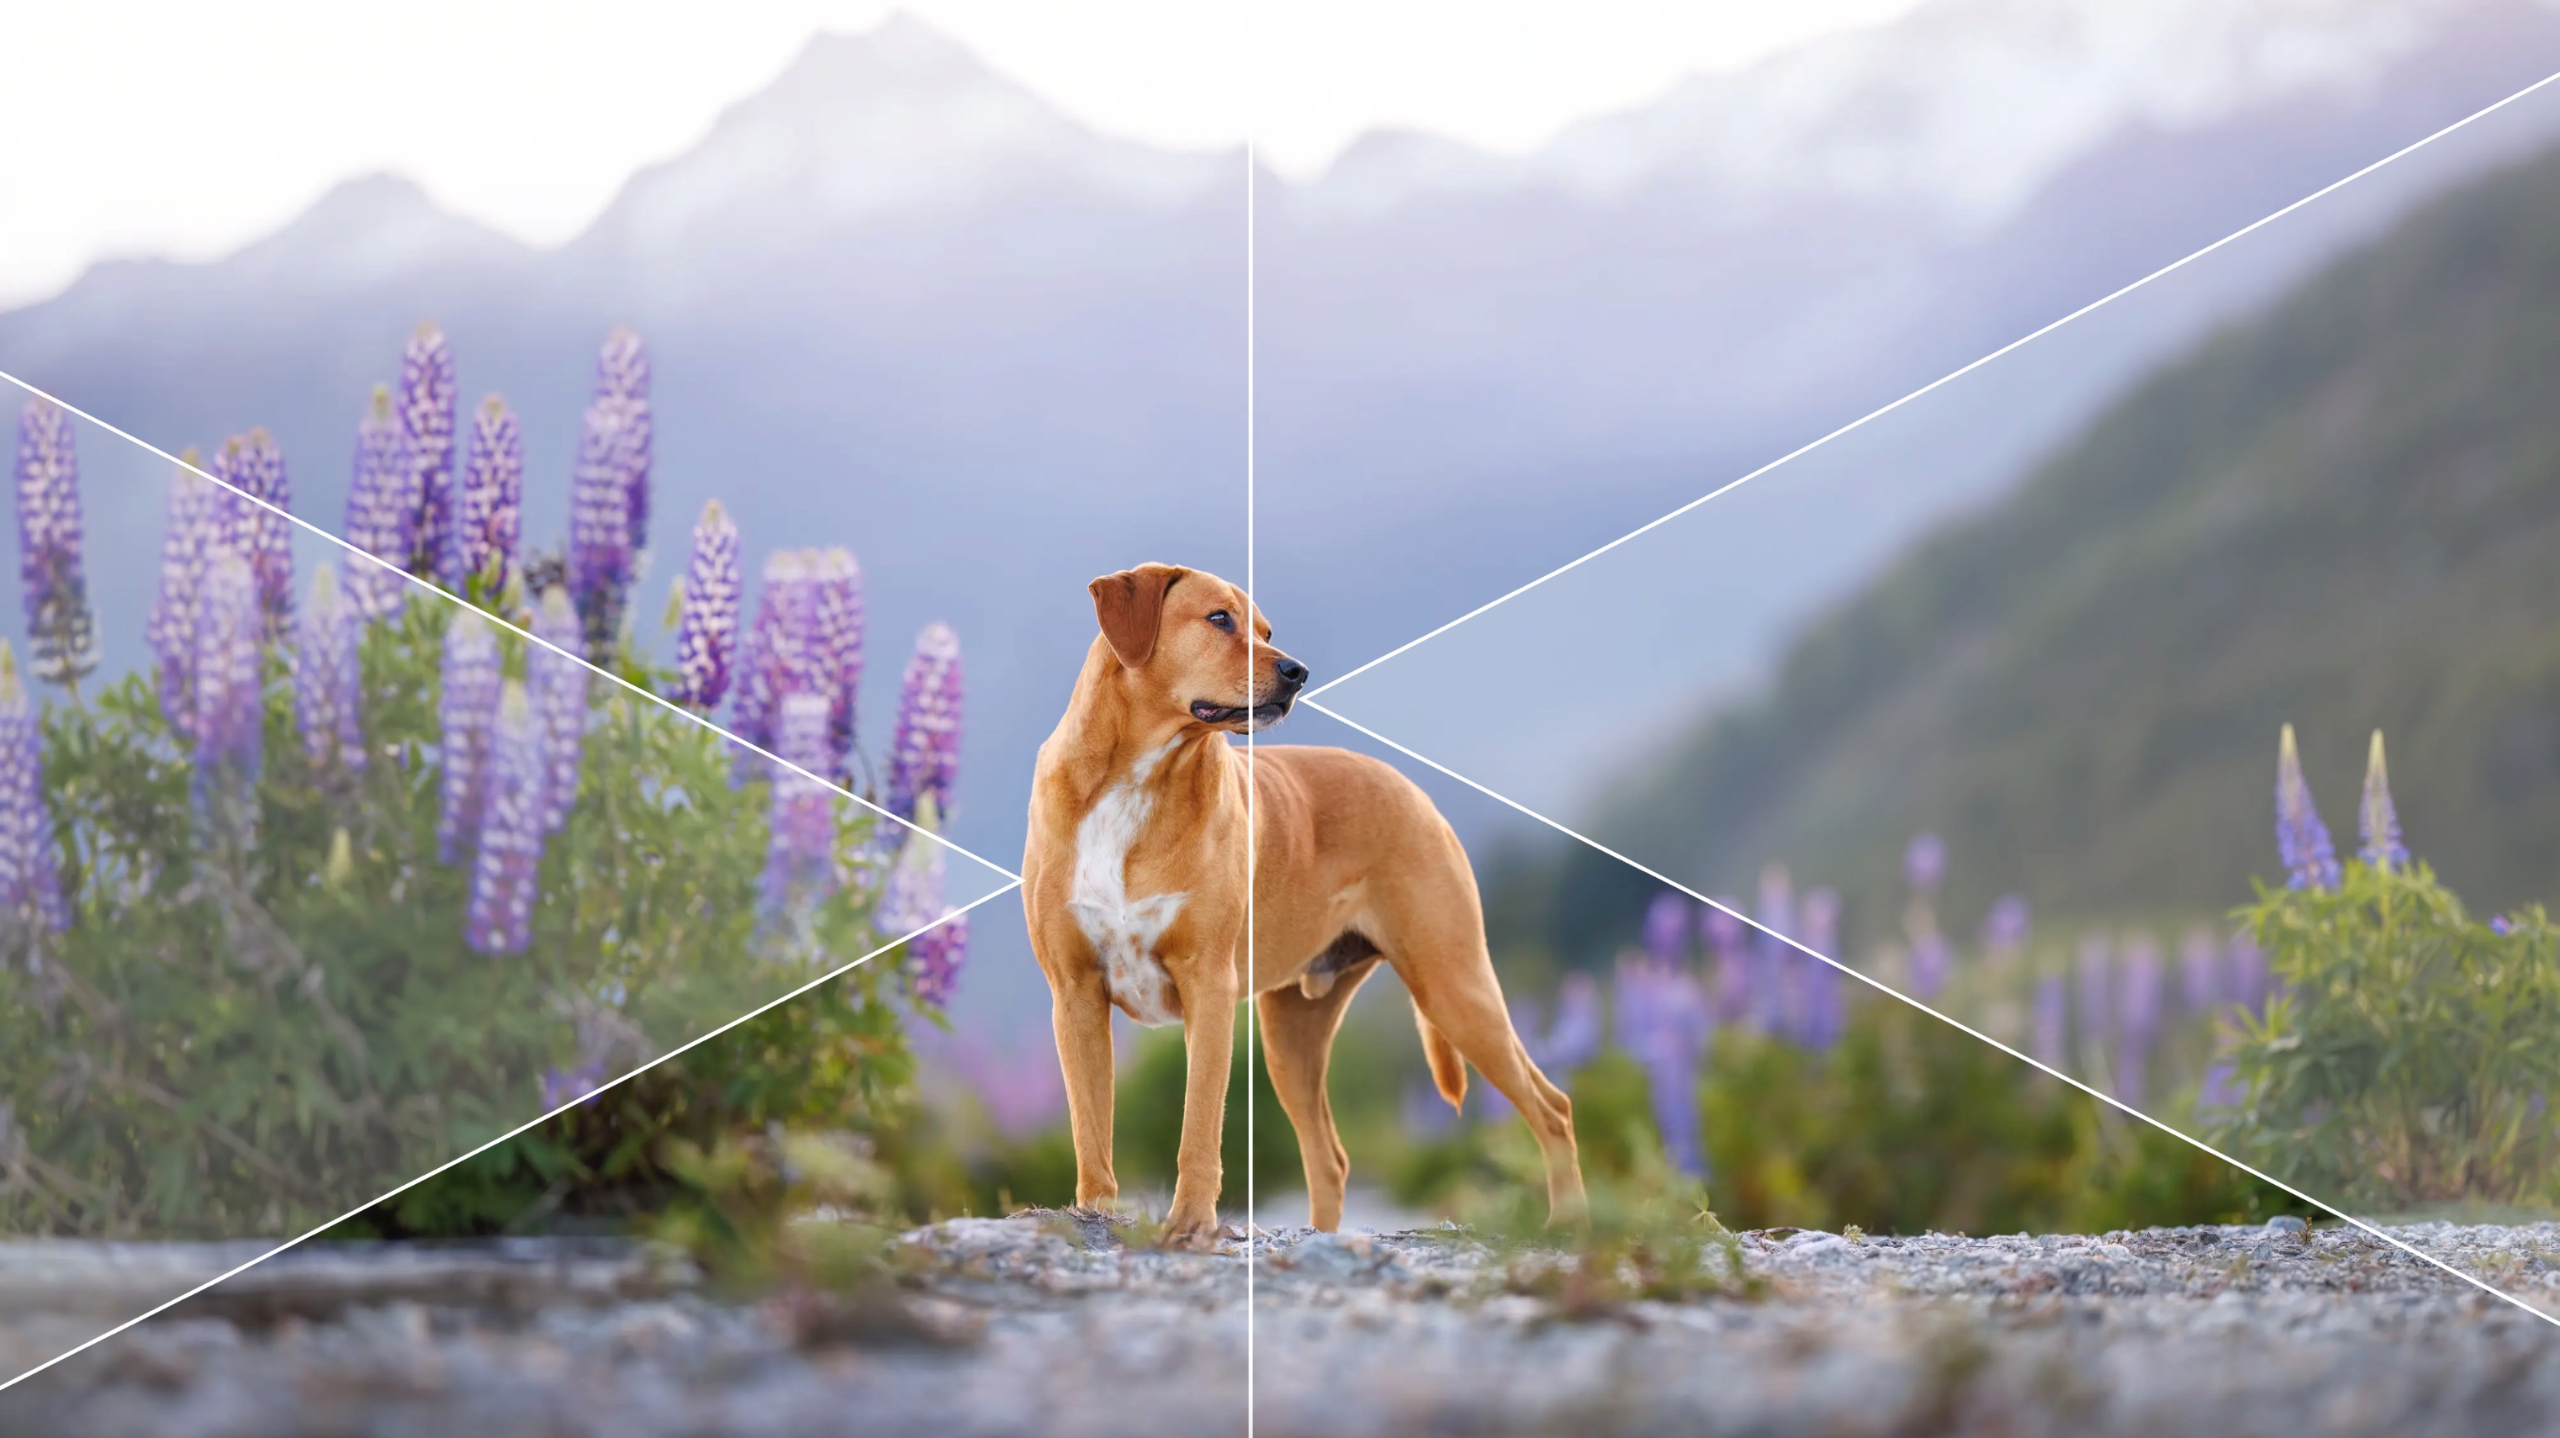
However, even with this same pose, you can still bring the rule of thirds into play, as long as there is another element of composition to help balance the image, like a prominent leading line, or lighter tone in the negative space.
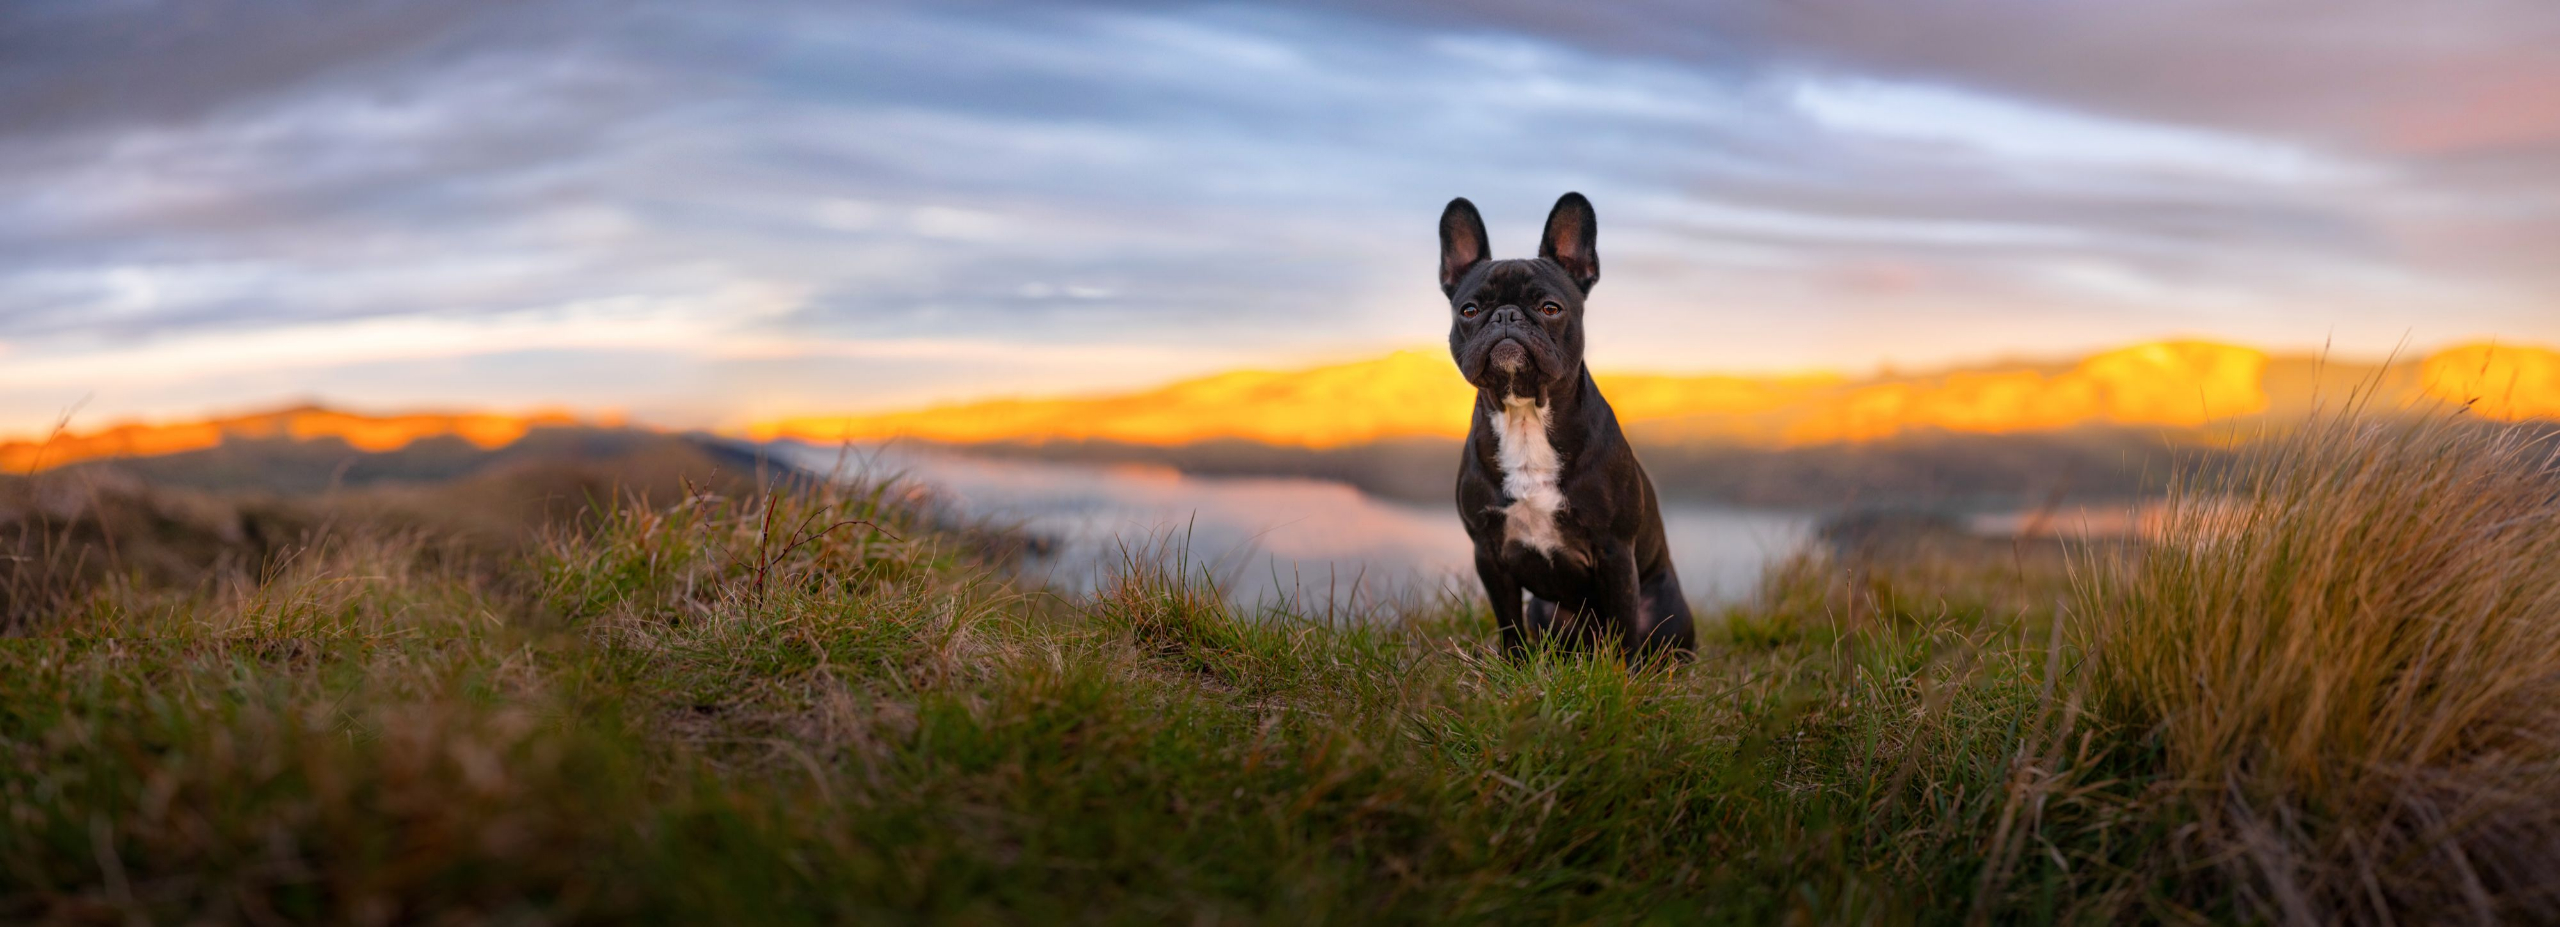
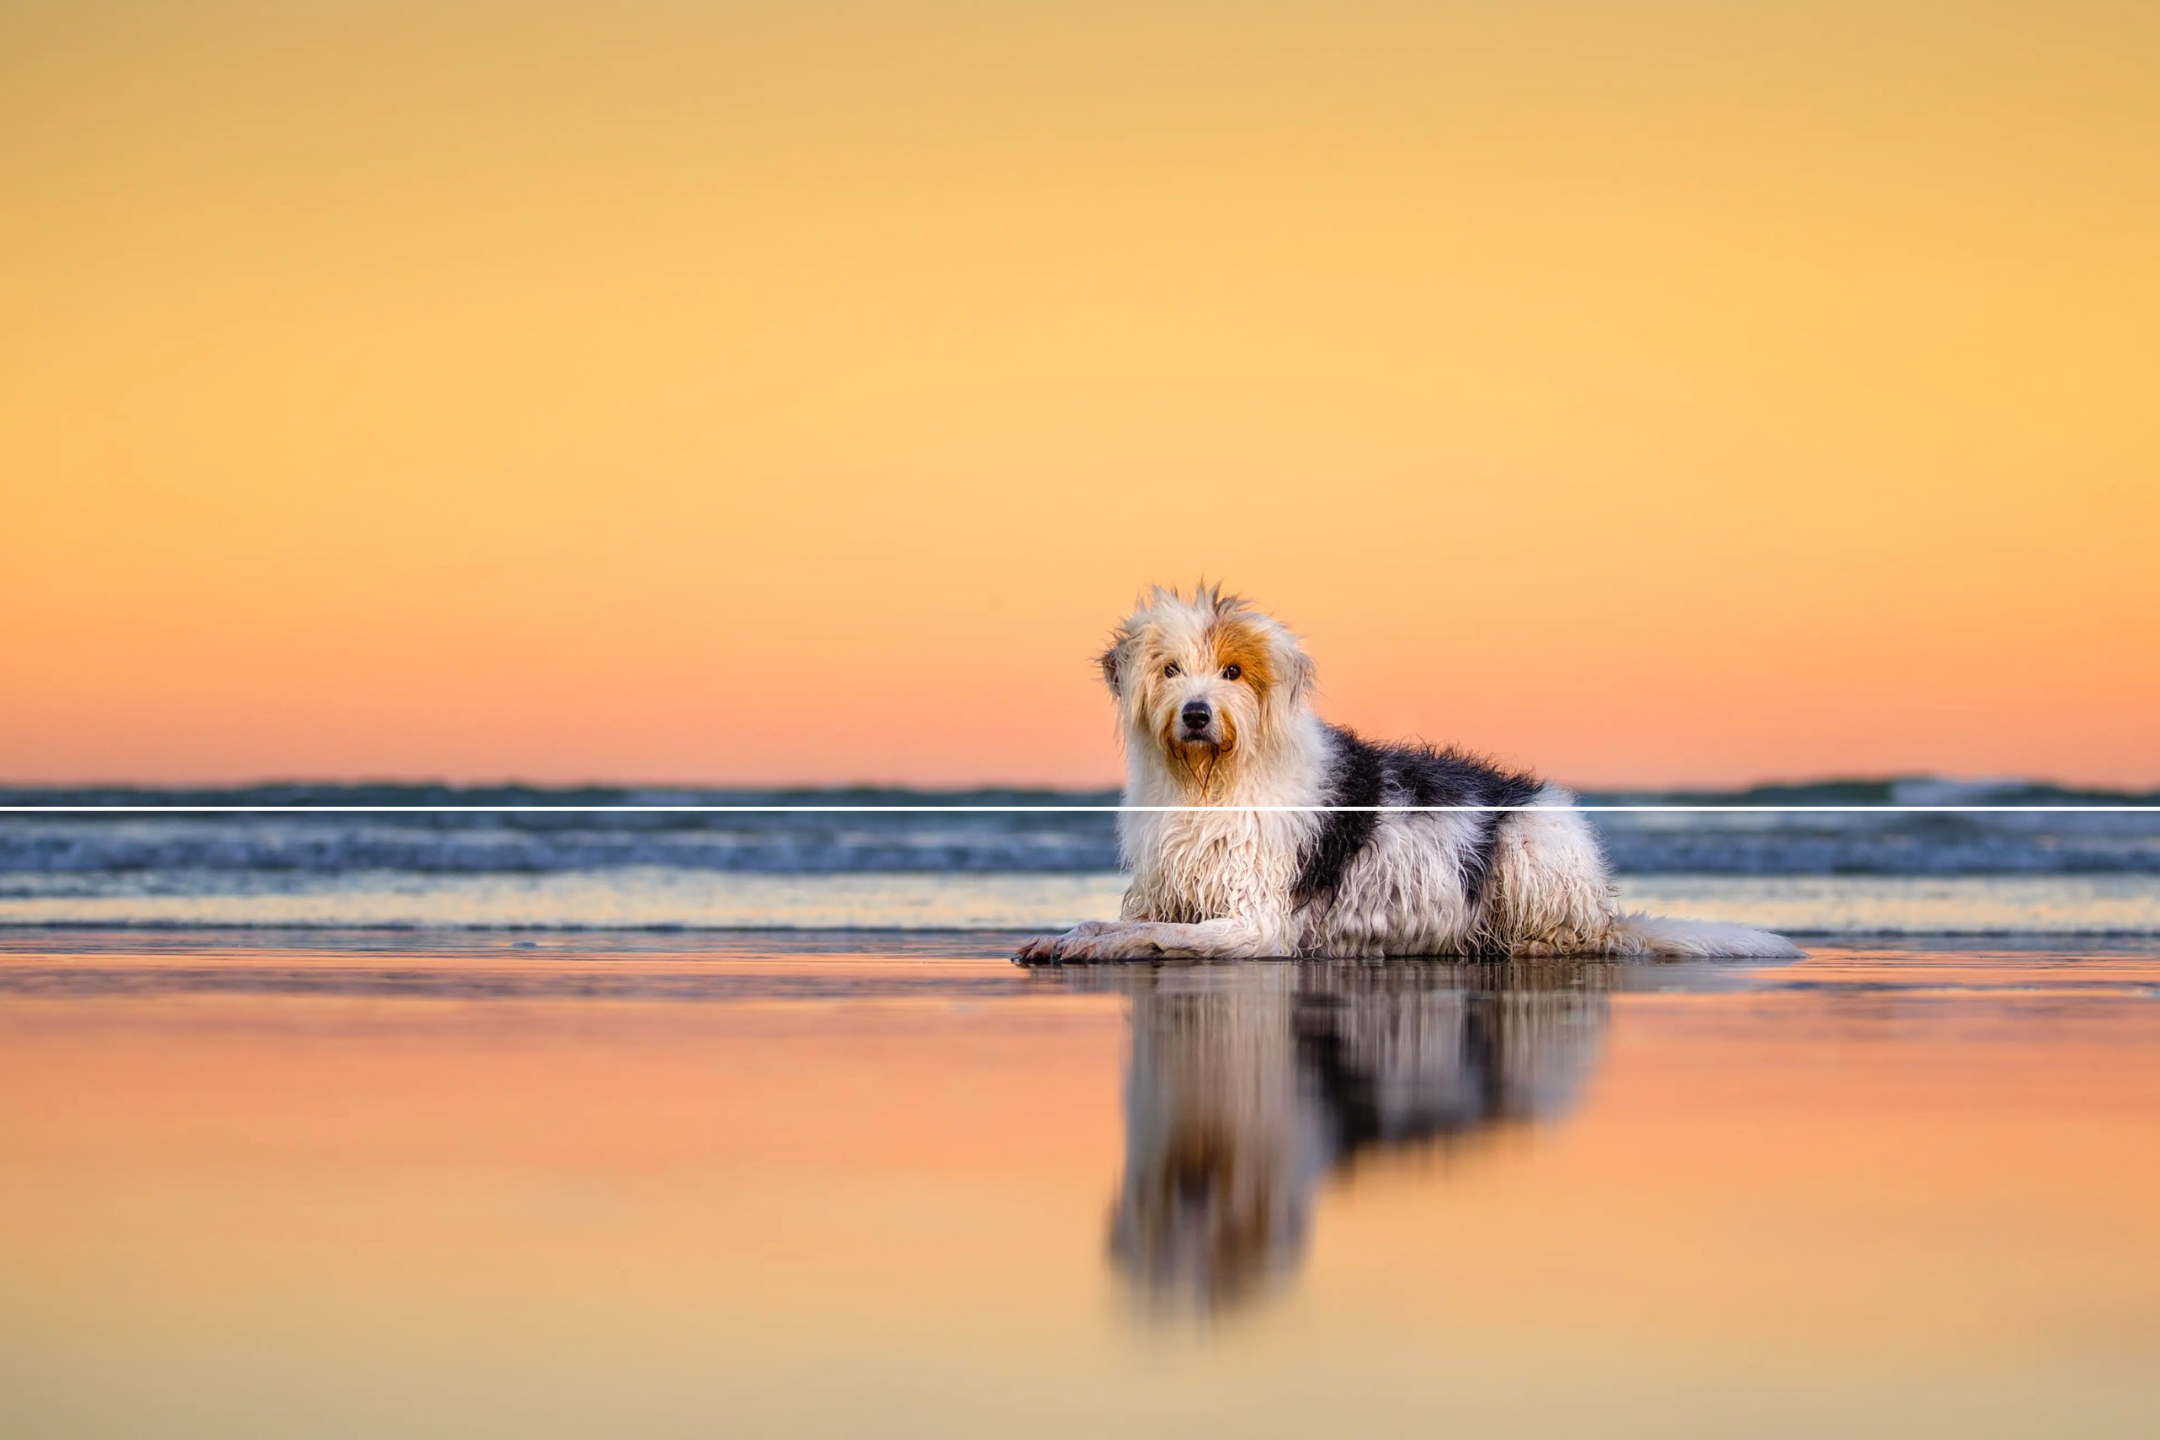
Then you have poses where the subject is looking and facing directly towards the viewer.
What justifies placement on the thirds in these cases?
Often, it can be a secondary object or focal point which acts as a balancing element.
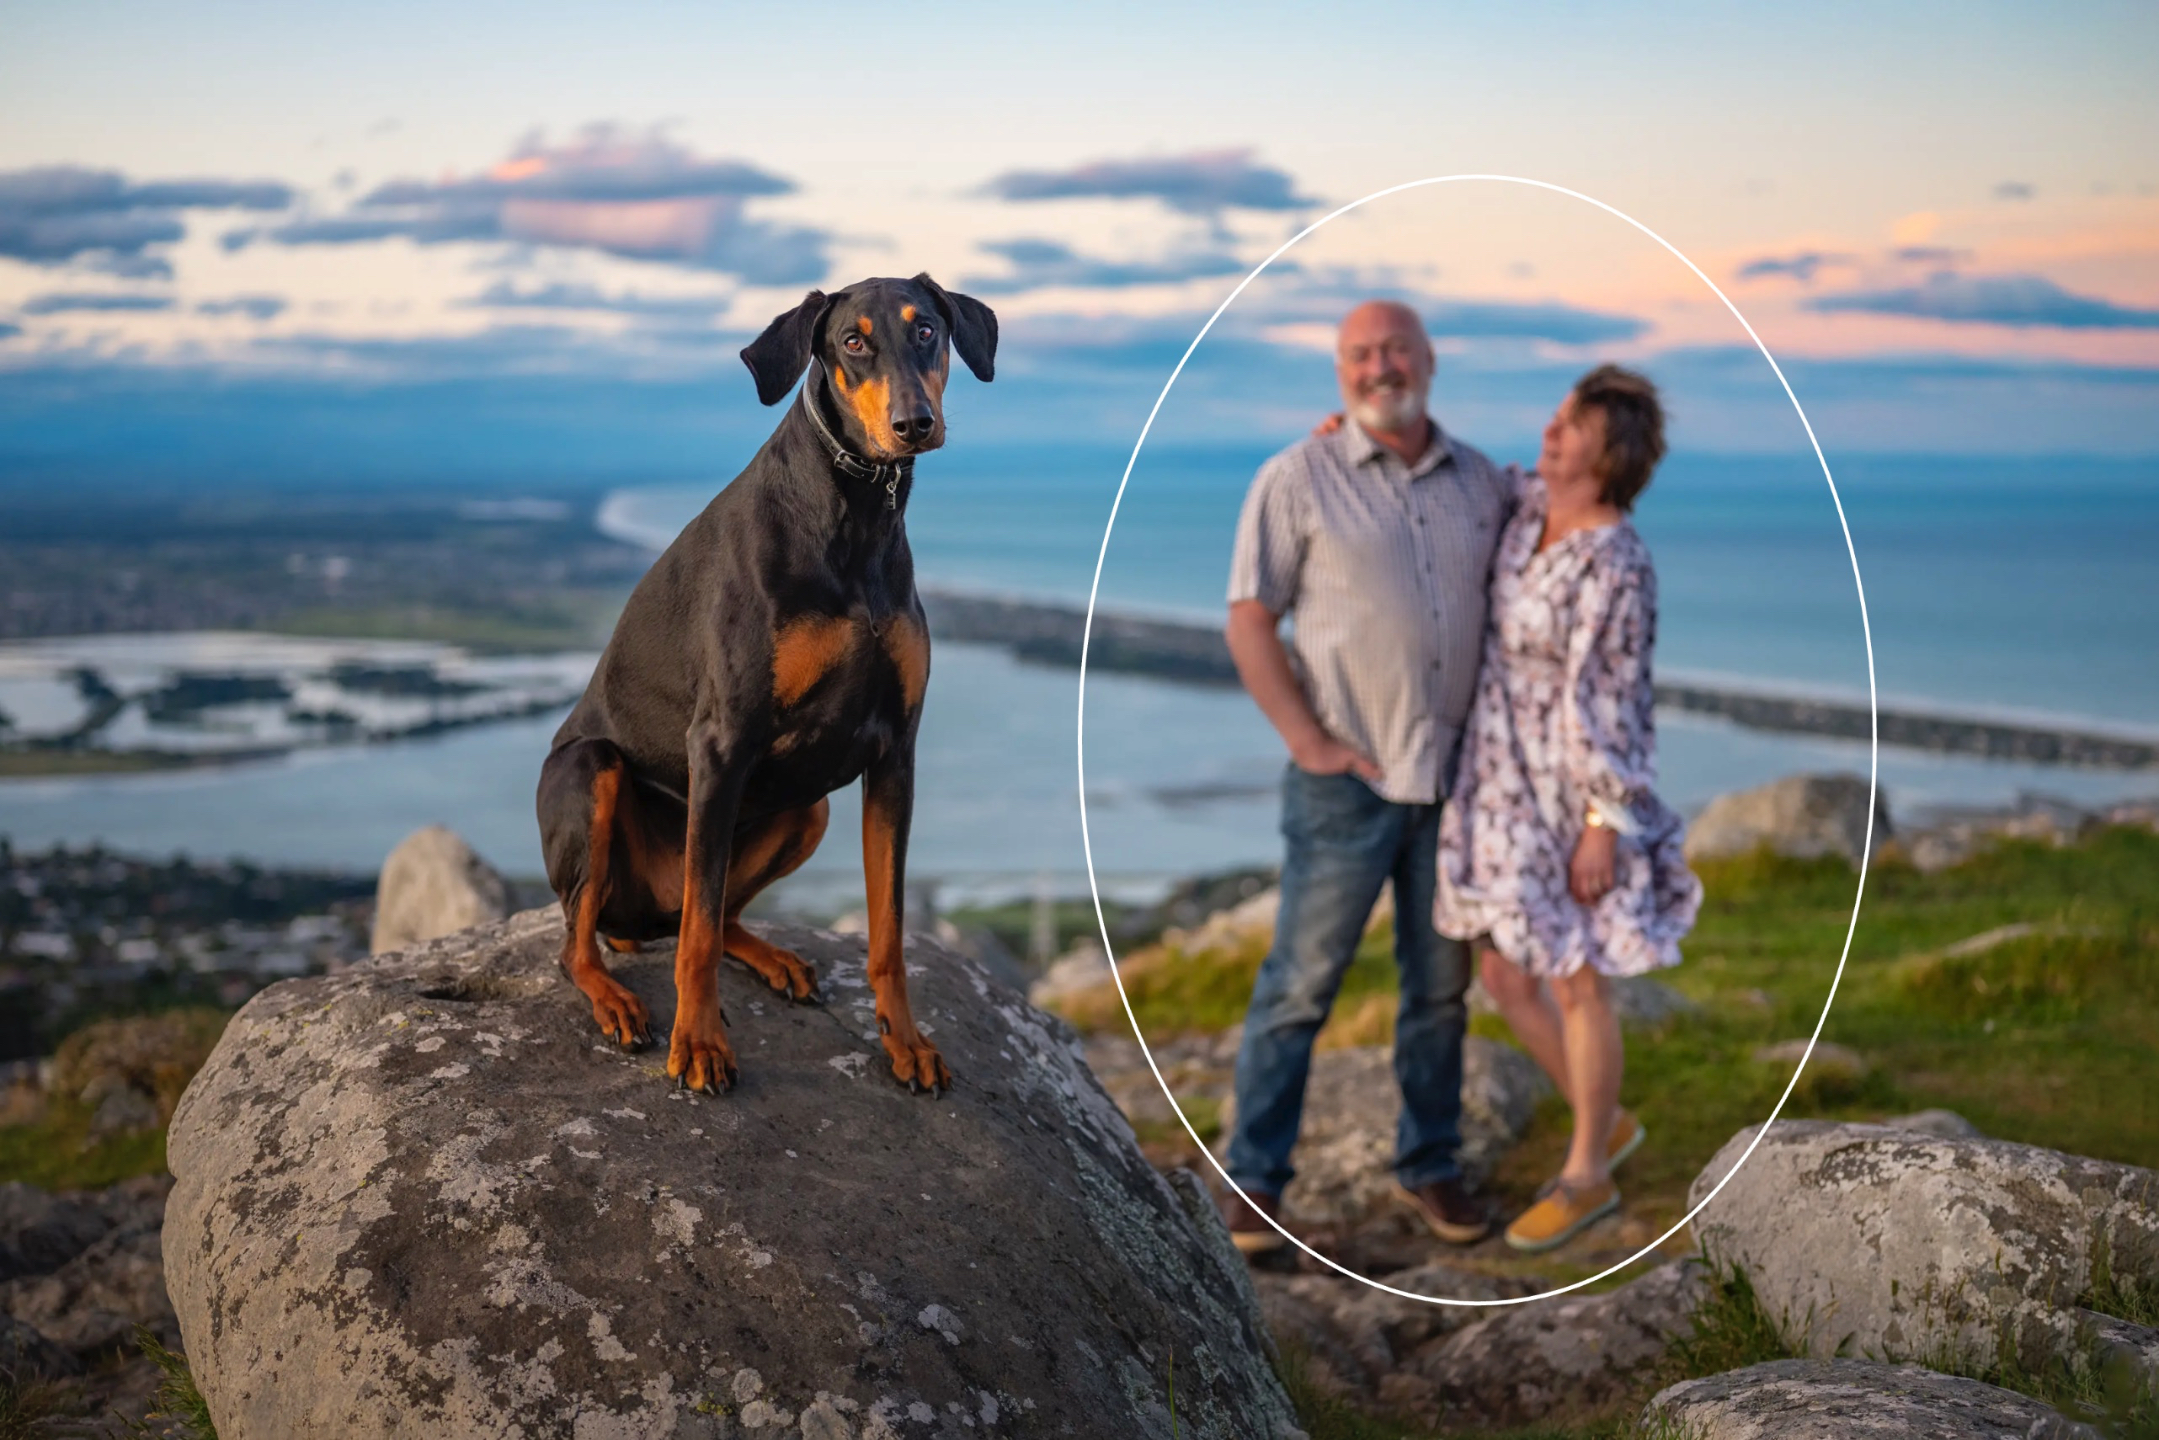
In this case, it’s the lighter tones and leading lines on the left that help to balance out the negative space, even though the dog is looking and facing directly towards us - which would usually mean centering is the best option.
Using the subject itself as an indicator of how to leave negative space, and where to place your subject on the vertical third lines - is so helpful!
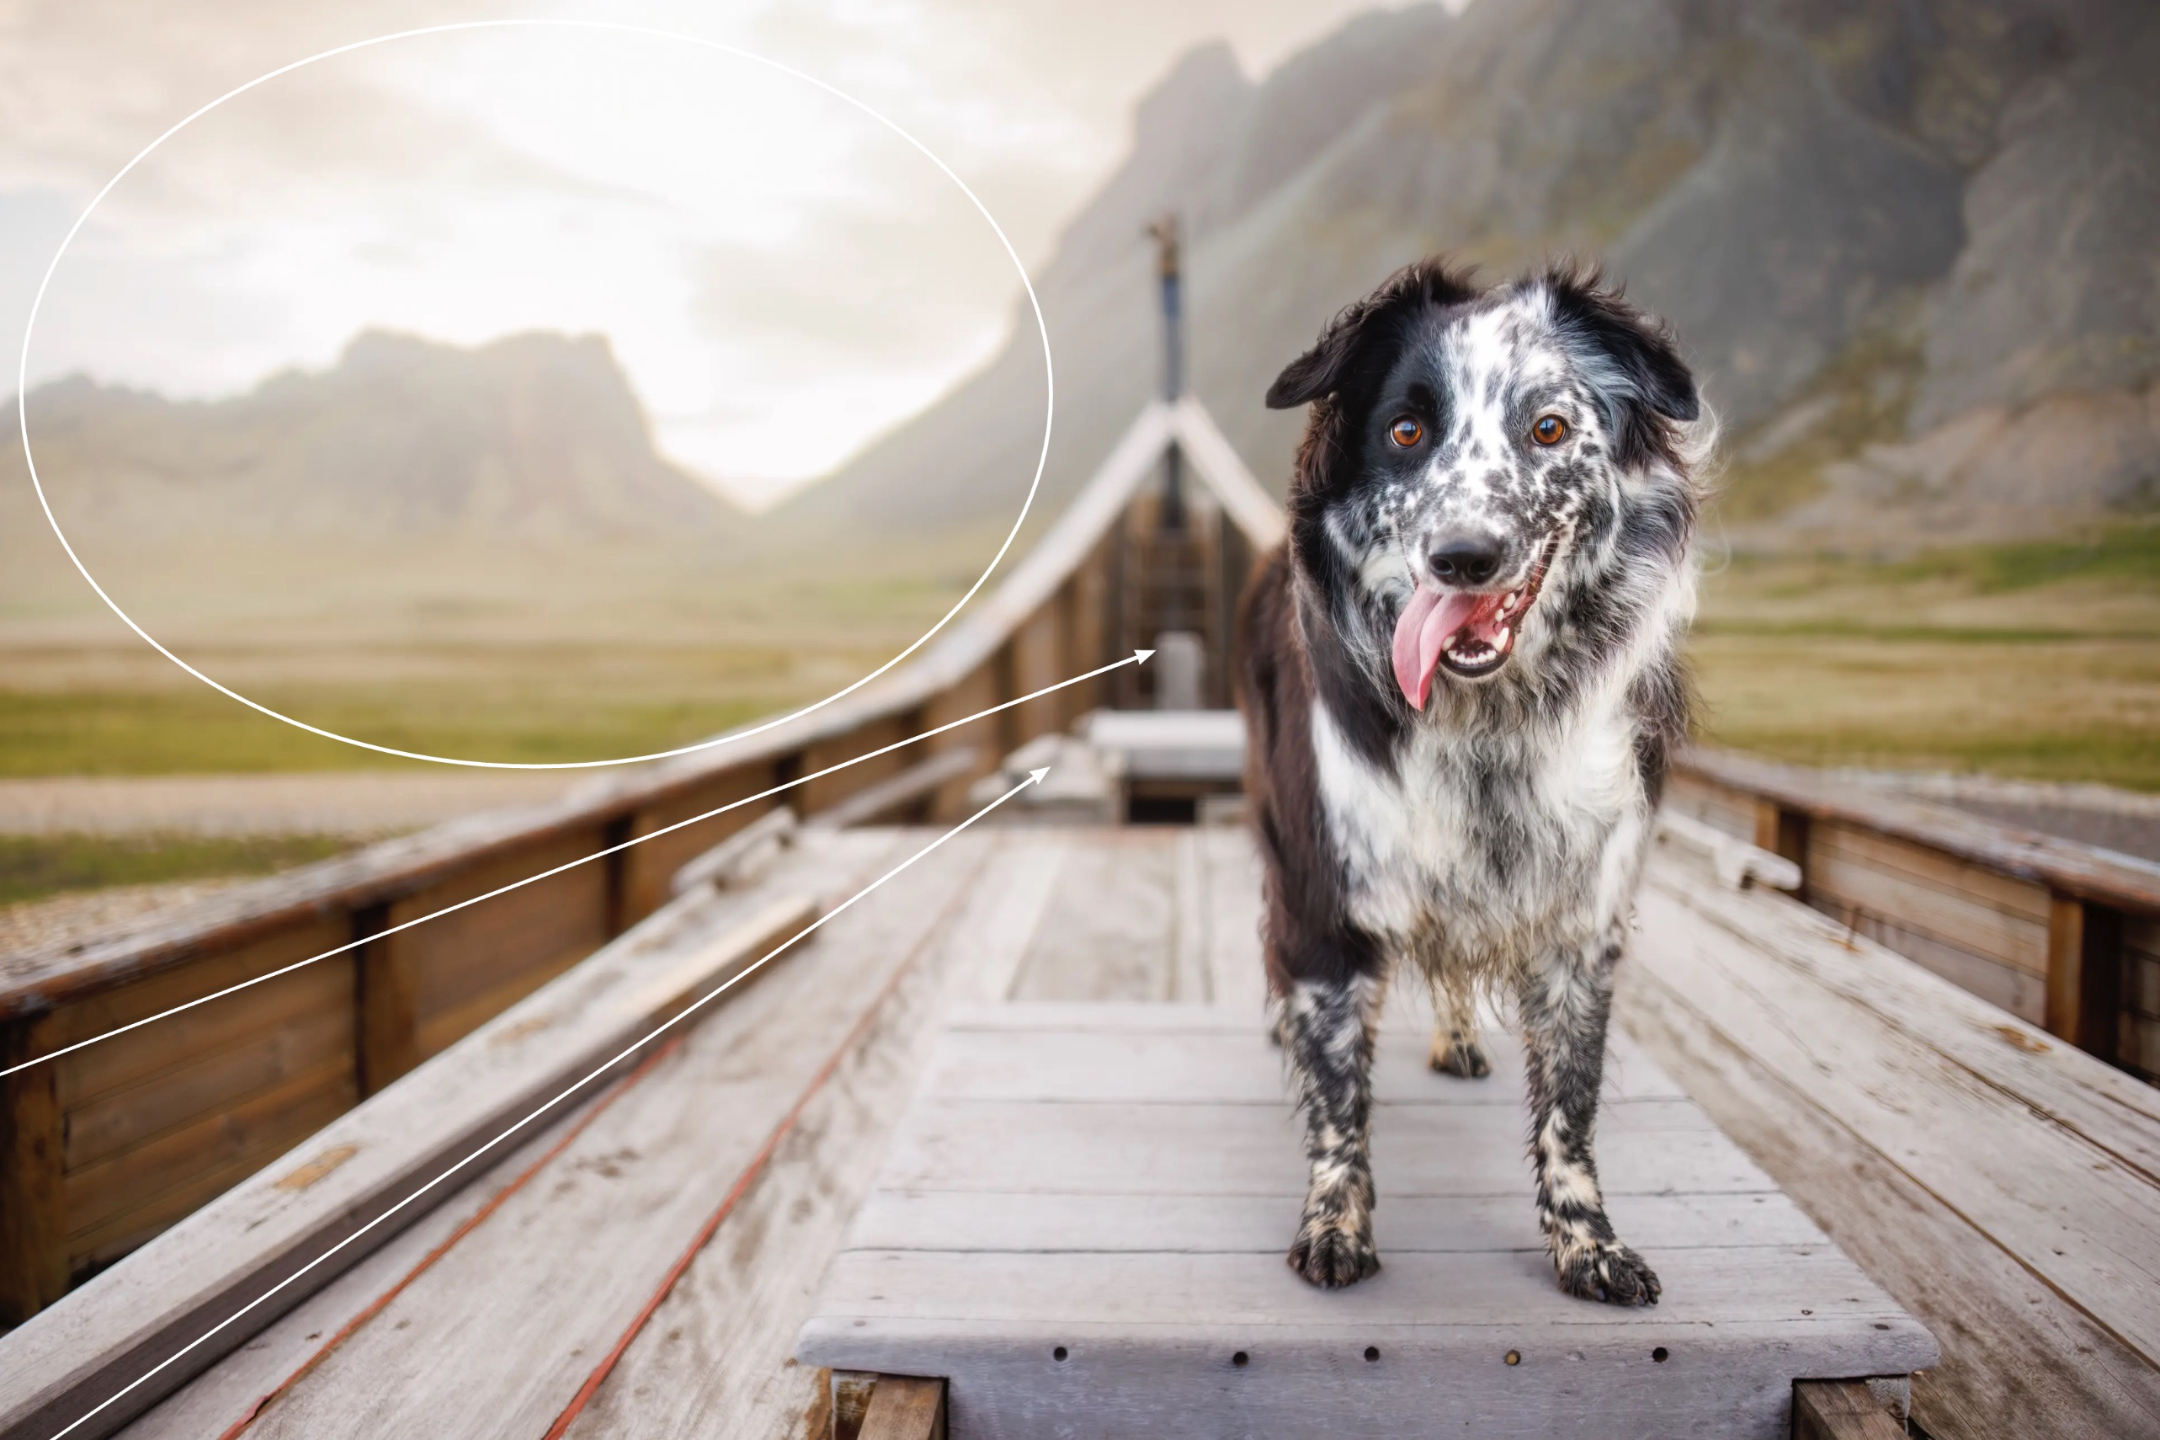
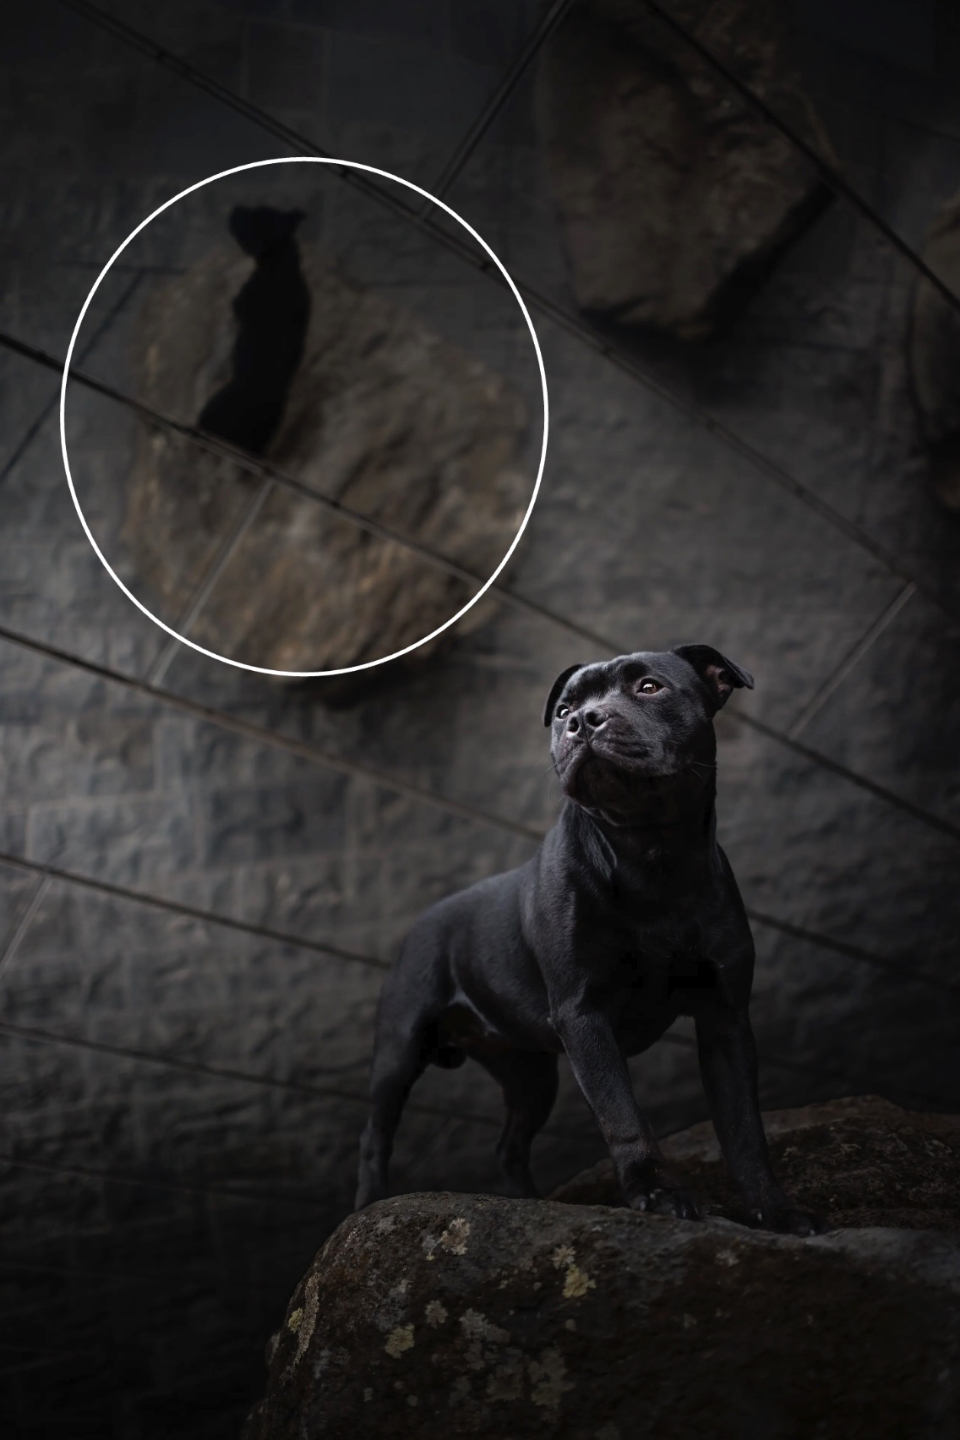
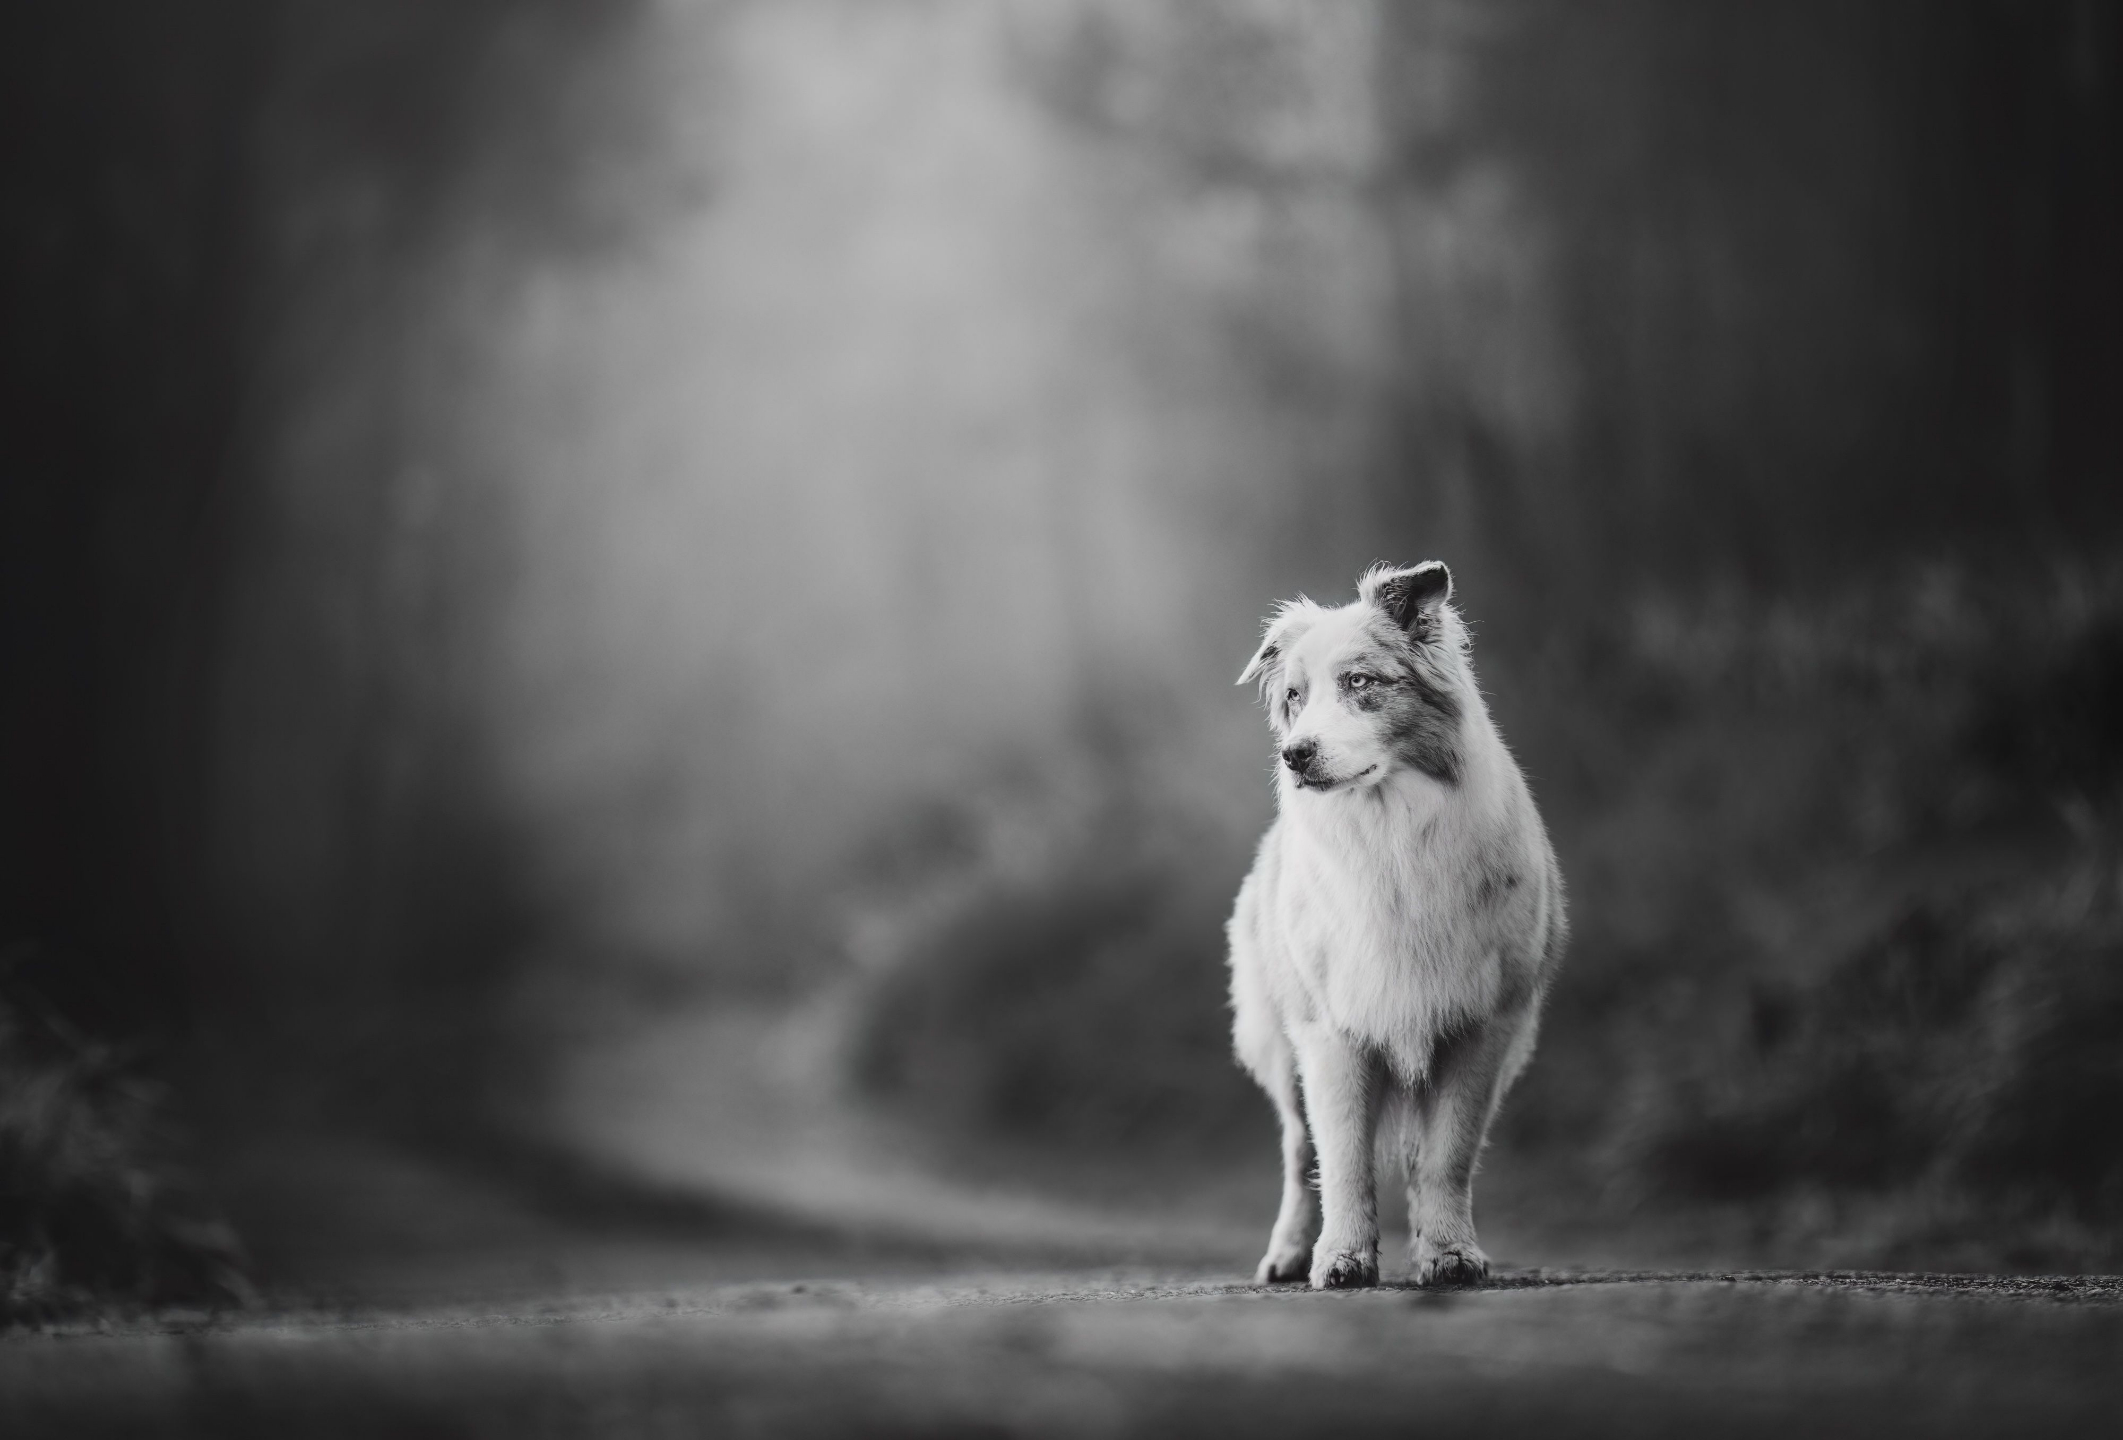
Another aspect to consider is what is in the negative space - which is defined as basically any area in the image where the subject isn’t. If that area contains messy objects or distractions, it can pull attention away from your subject.
Clean negative space with nothing that is high in contrast, bright, colourful or sharp, is best to absorb any of that energy from your subject’s pose, gaze or movement.
If there is something there that draws the eye, ensure it has a purpose, and works to visually balance out your subject or add context. Make sure it’s there for a reason.
Always take a moment before shooting to look at what’s contained within the entire frame, not just the main subject.
When reviewing your images on the back of the camera, look into each of the four corners in turn. This forces you to take notice of the entire frame, not just the central areas.
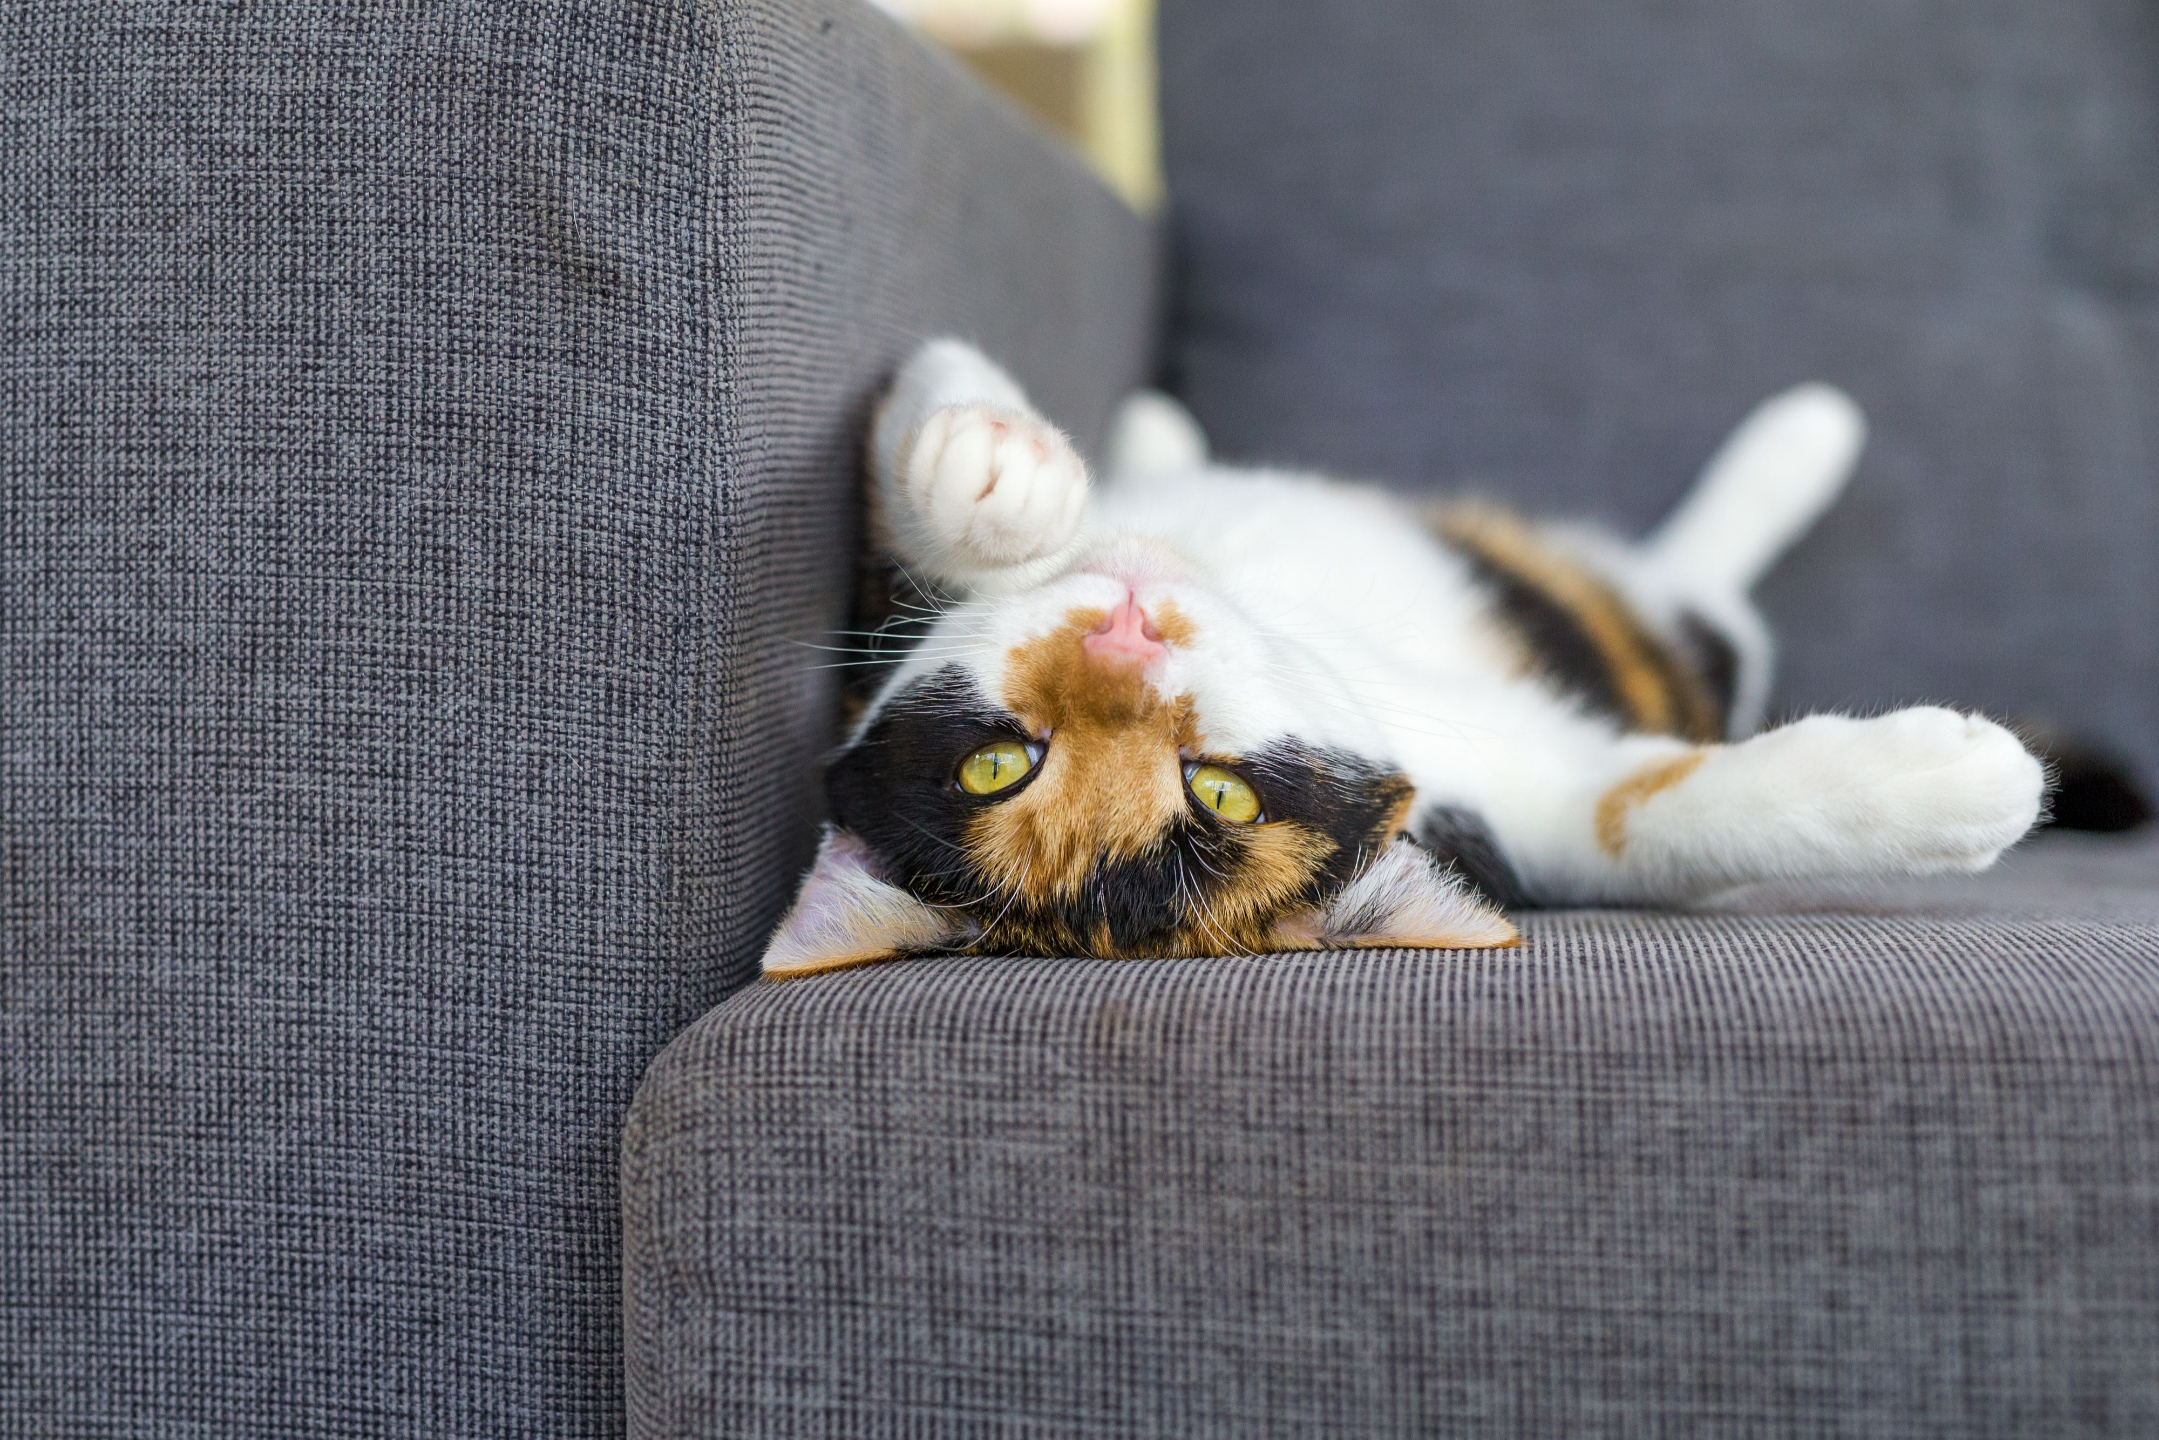
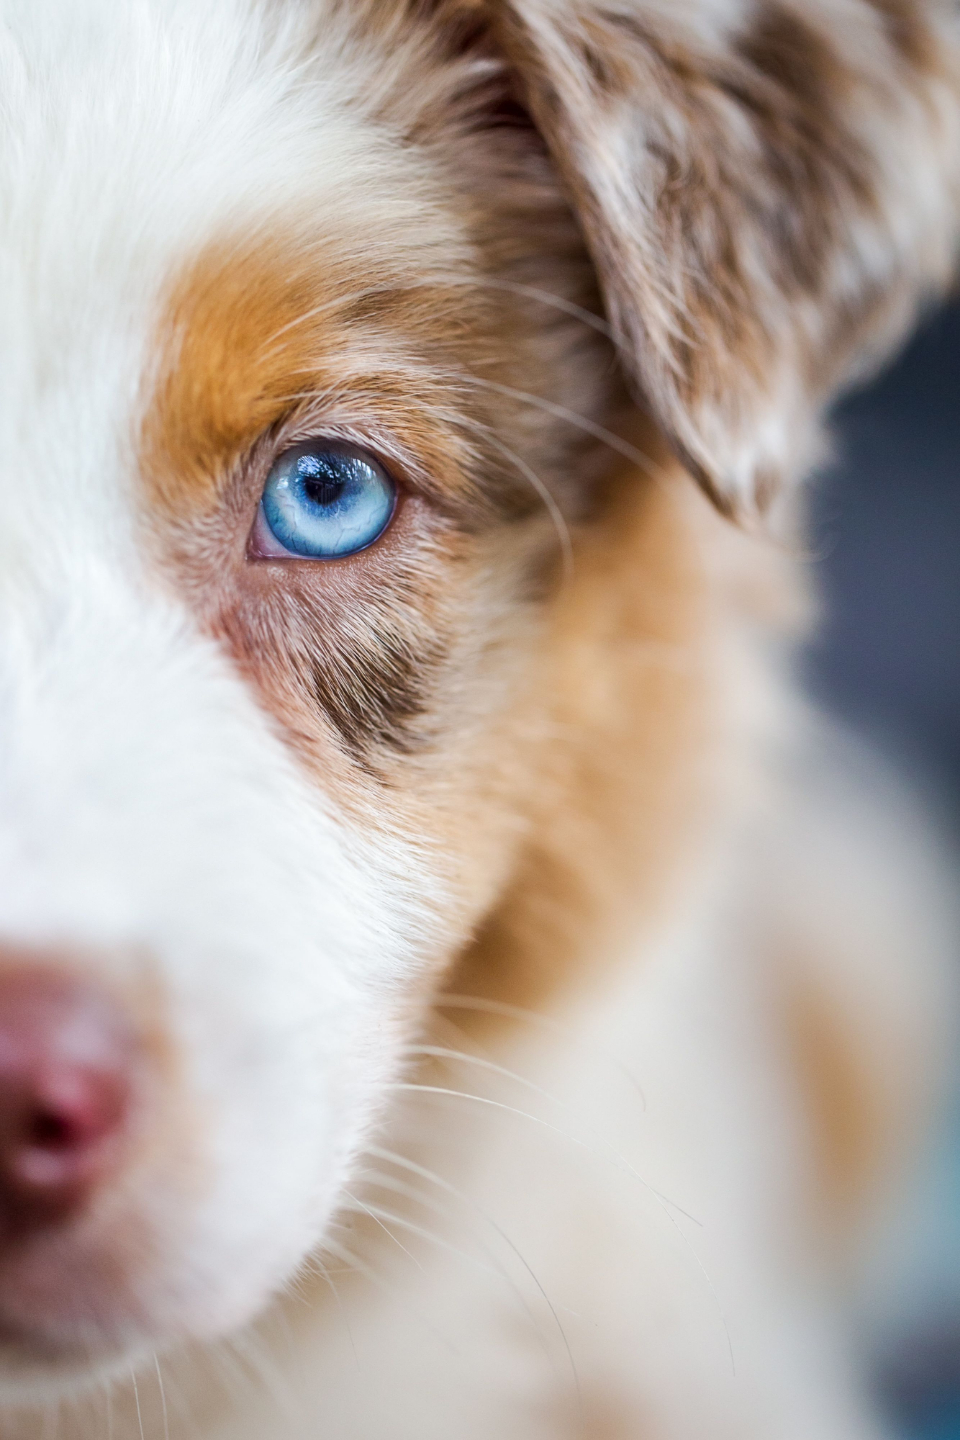
Headshots and Close Ups
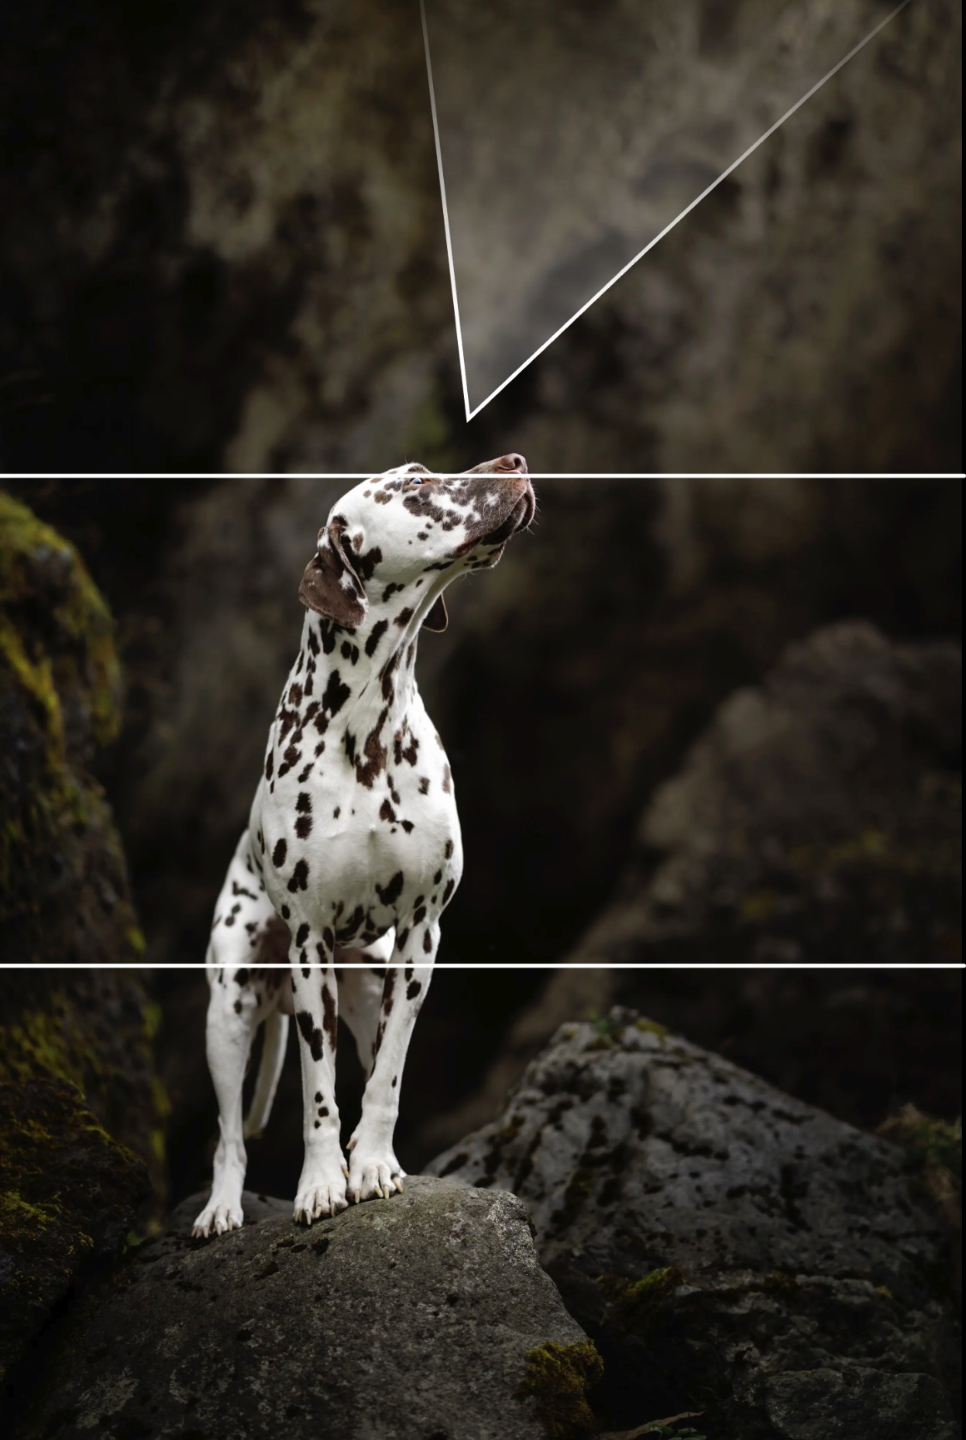
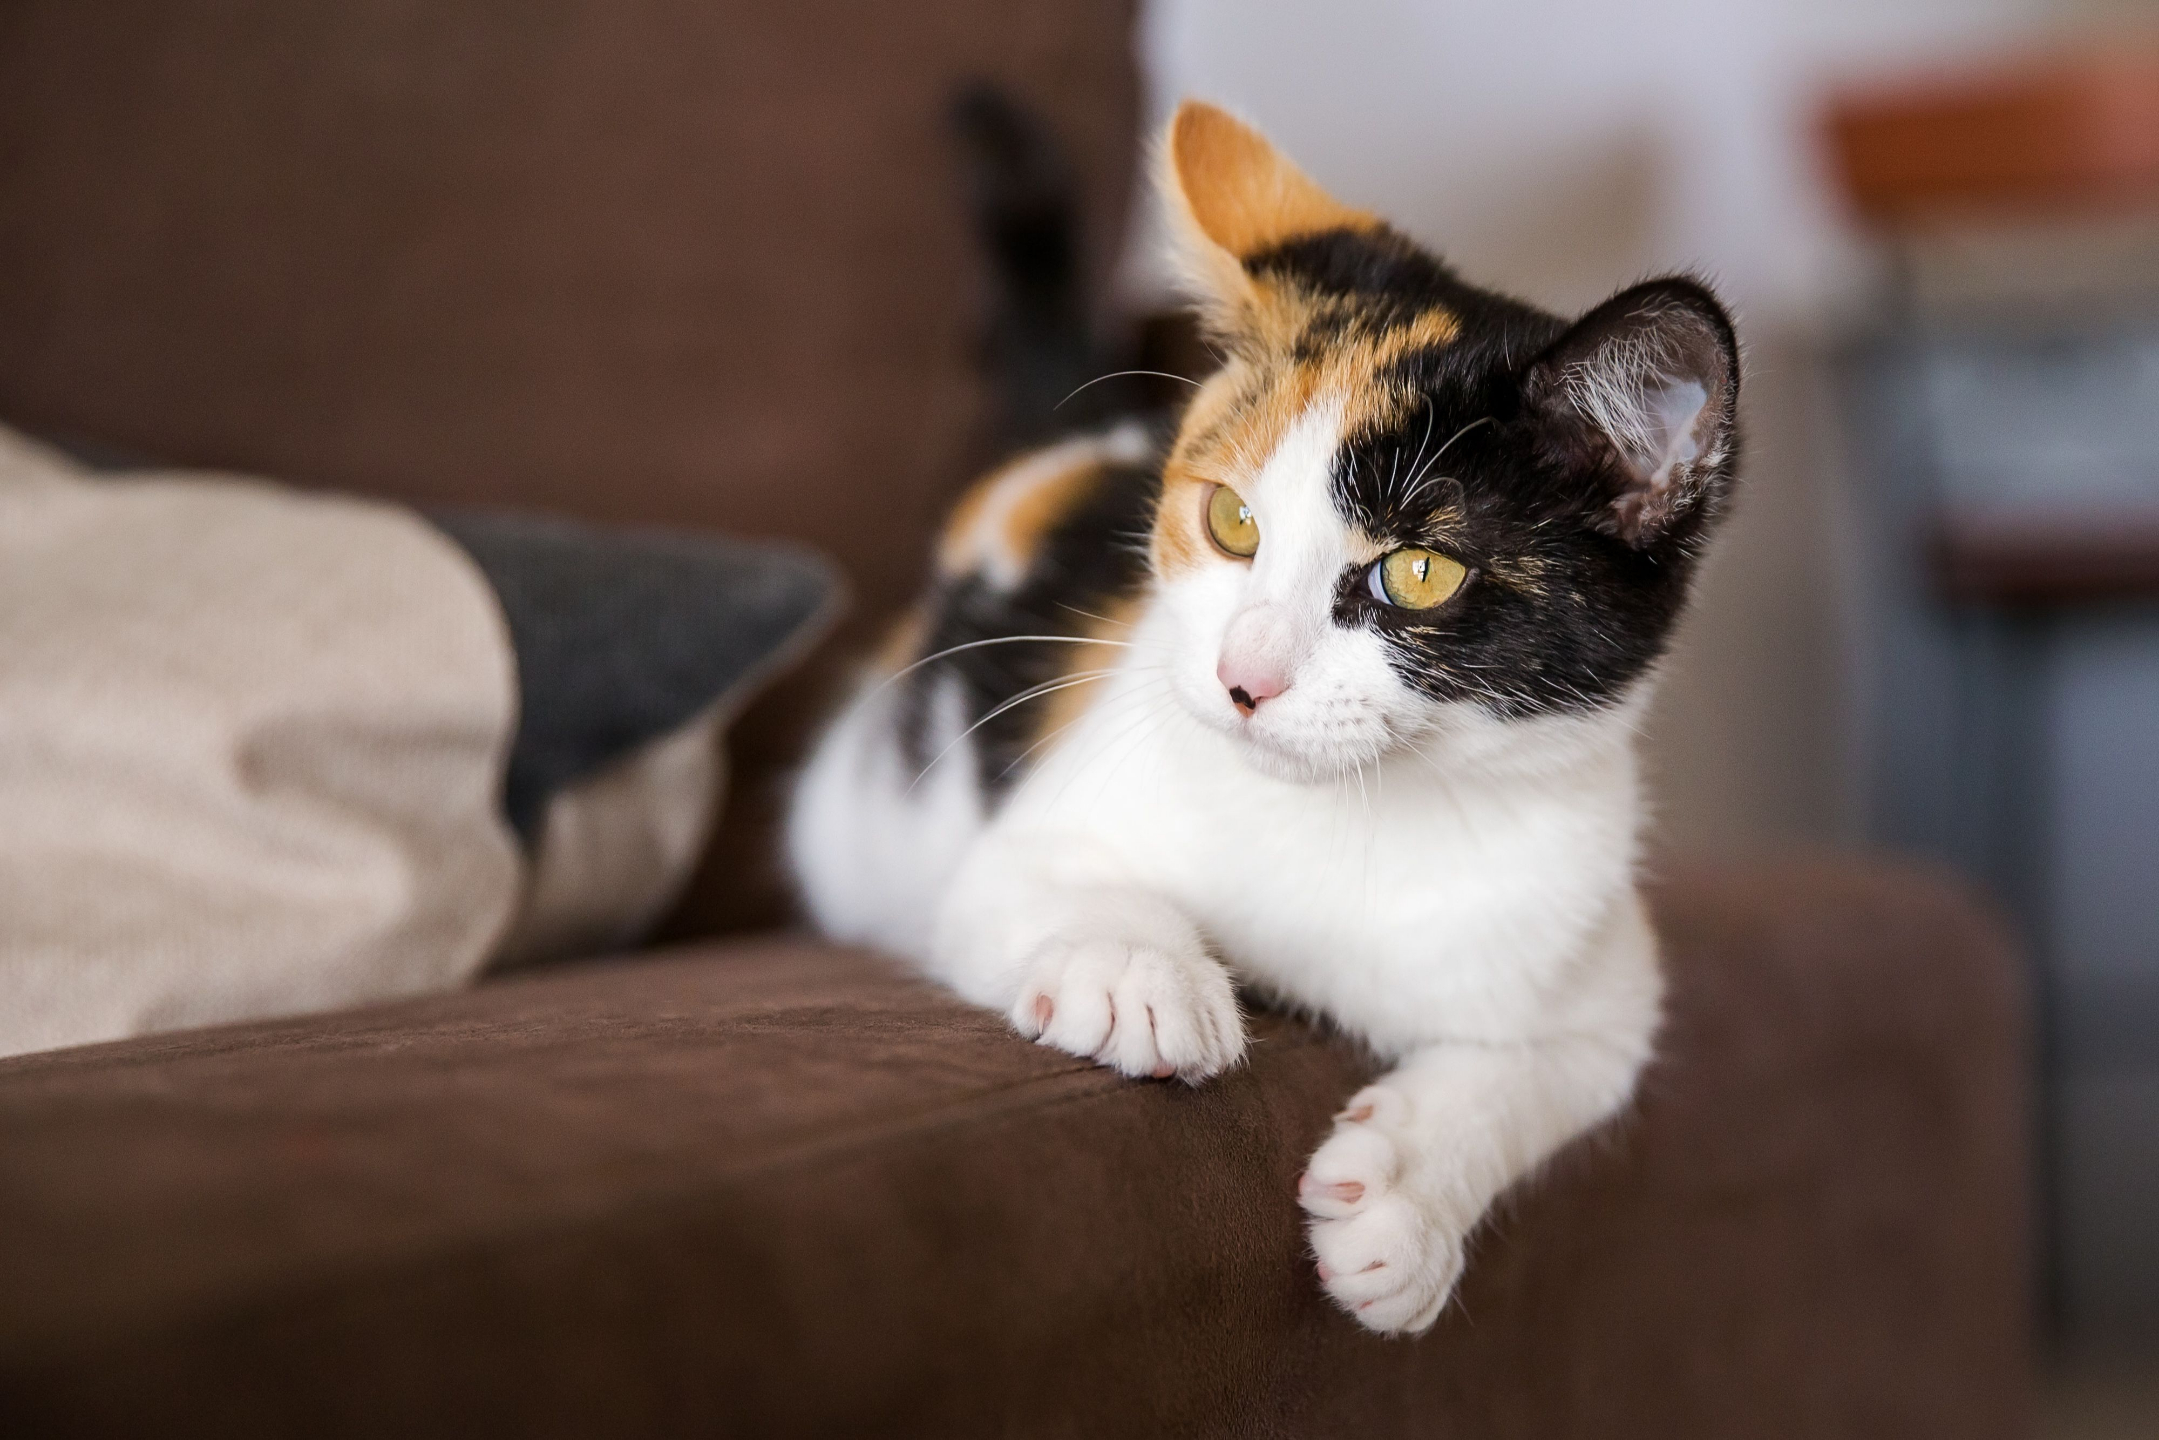
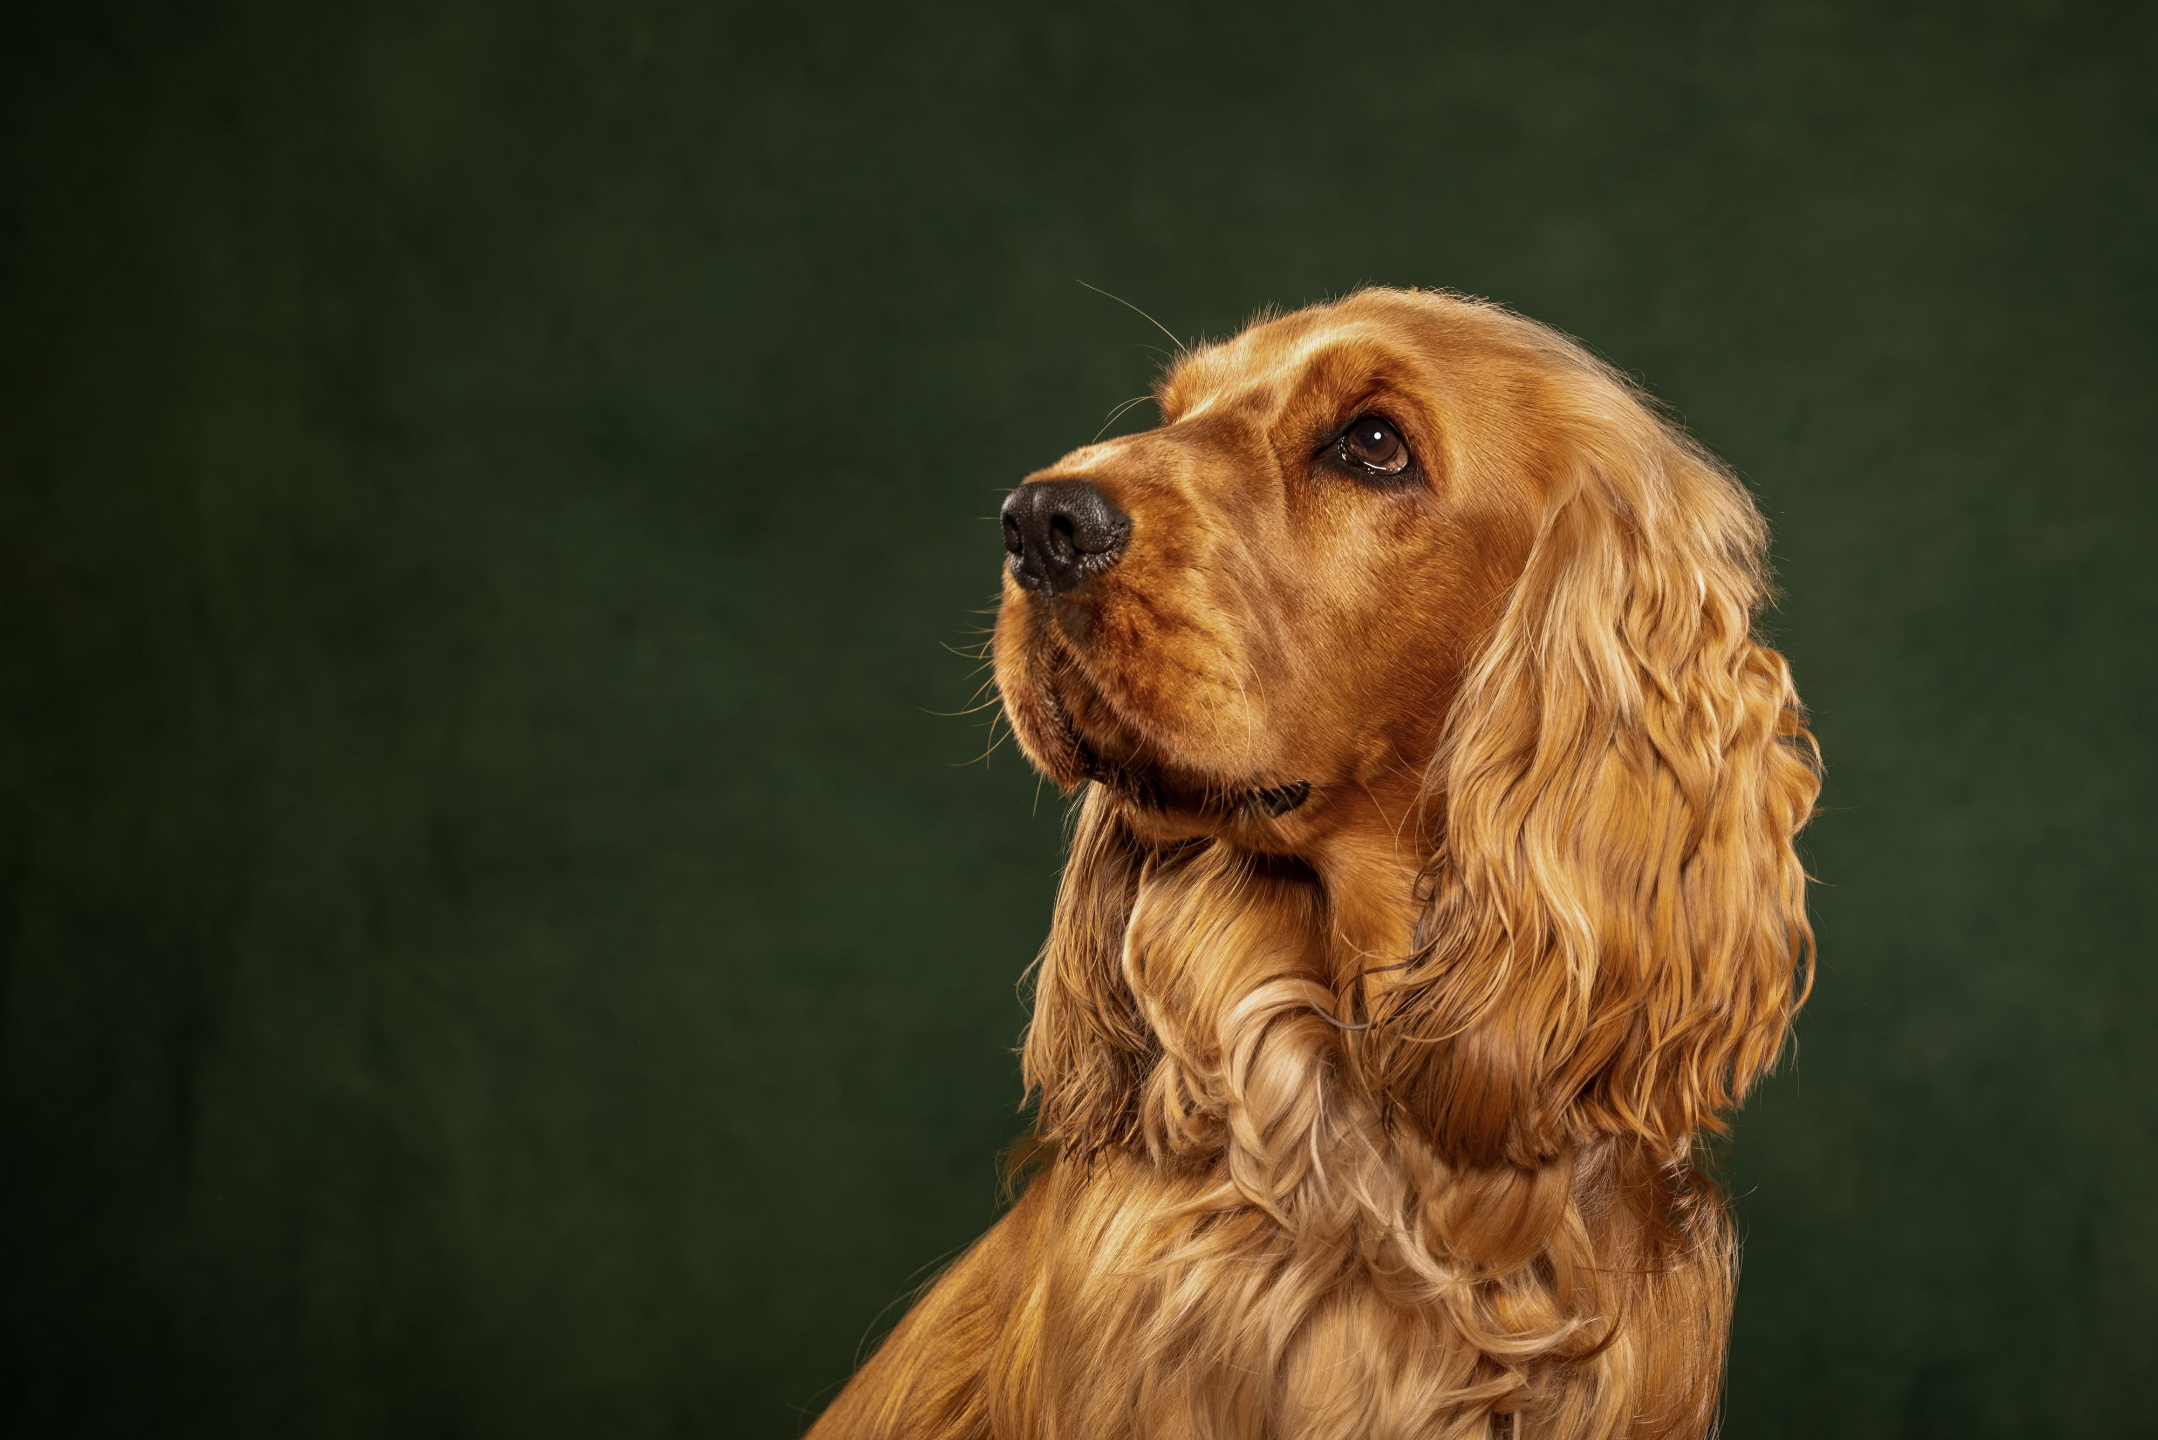
If you’re shooting a closer portrait, it often makes sense compositionally to place the eyes along the top horizontal third line.
The eyes are usually the most important element in a portrait, so placing them there helps draw attention to them immediately.
Just make sure that the image’s main compositional technique is still the rule of thirds though, and not something else like centering.
Centering is a very powerful compositional technique. In this image, even though the eyes are on the top third line, centering is still the most dominant element of composition.
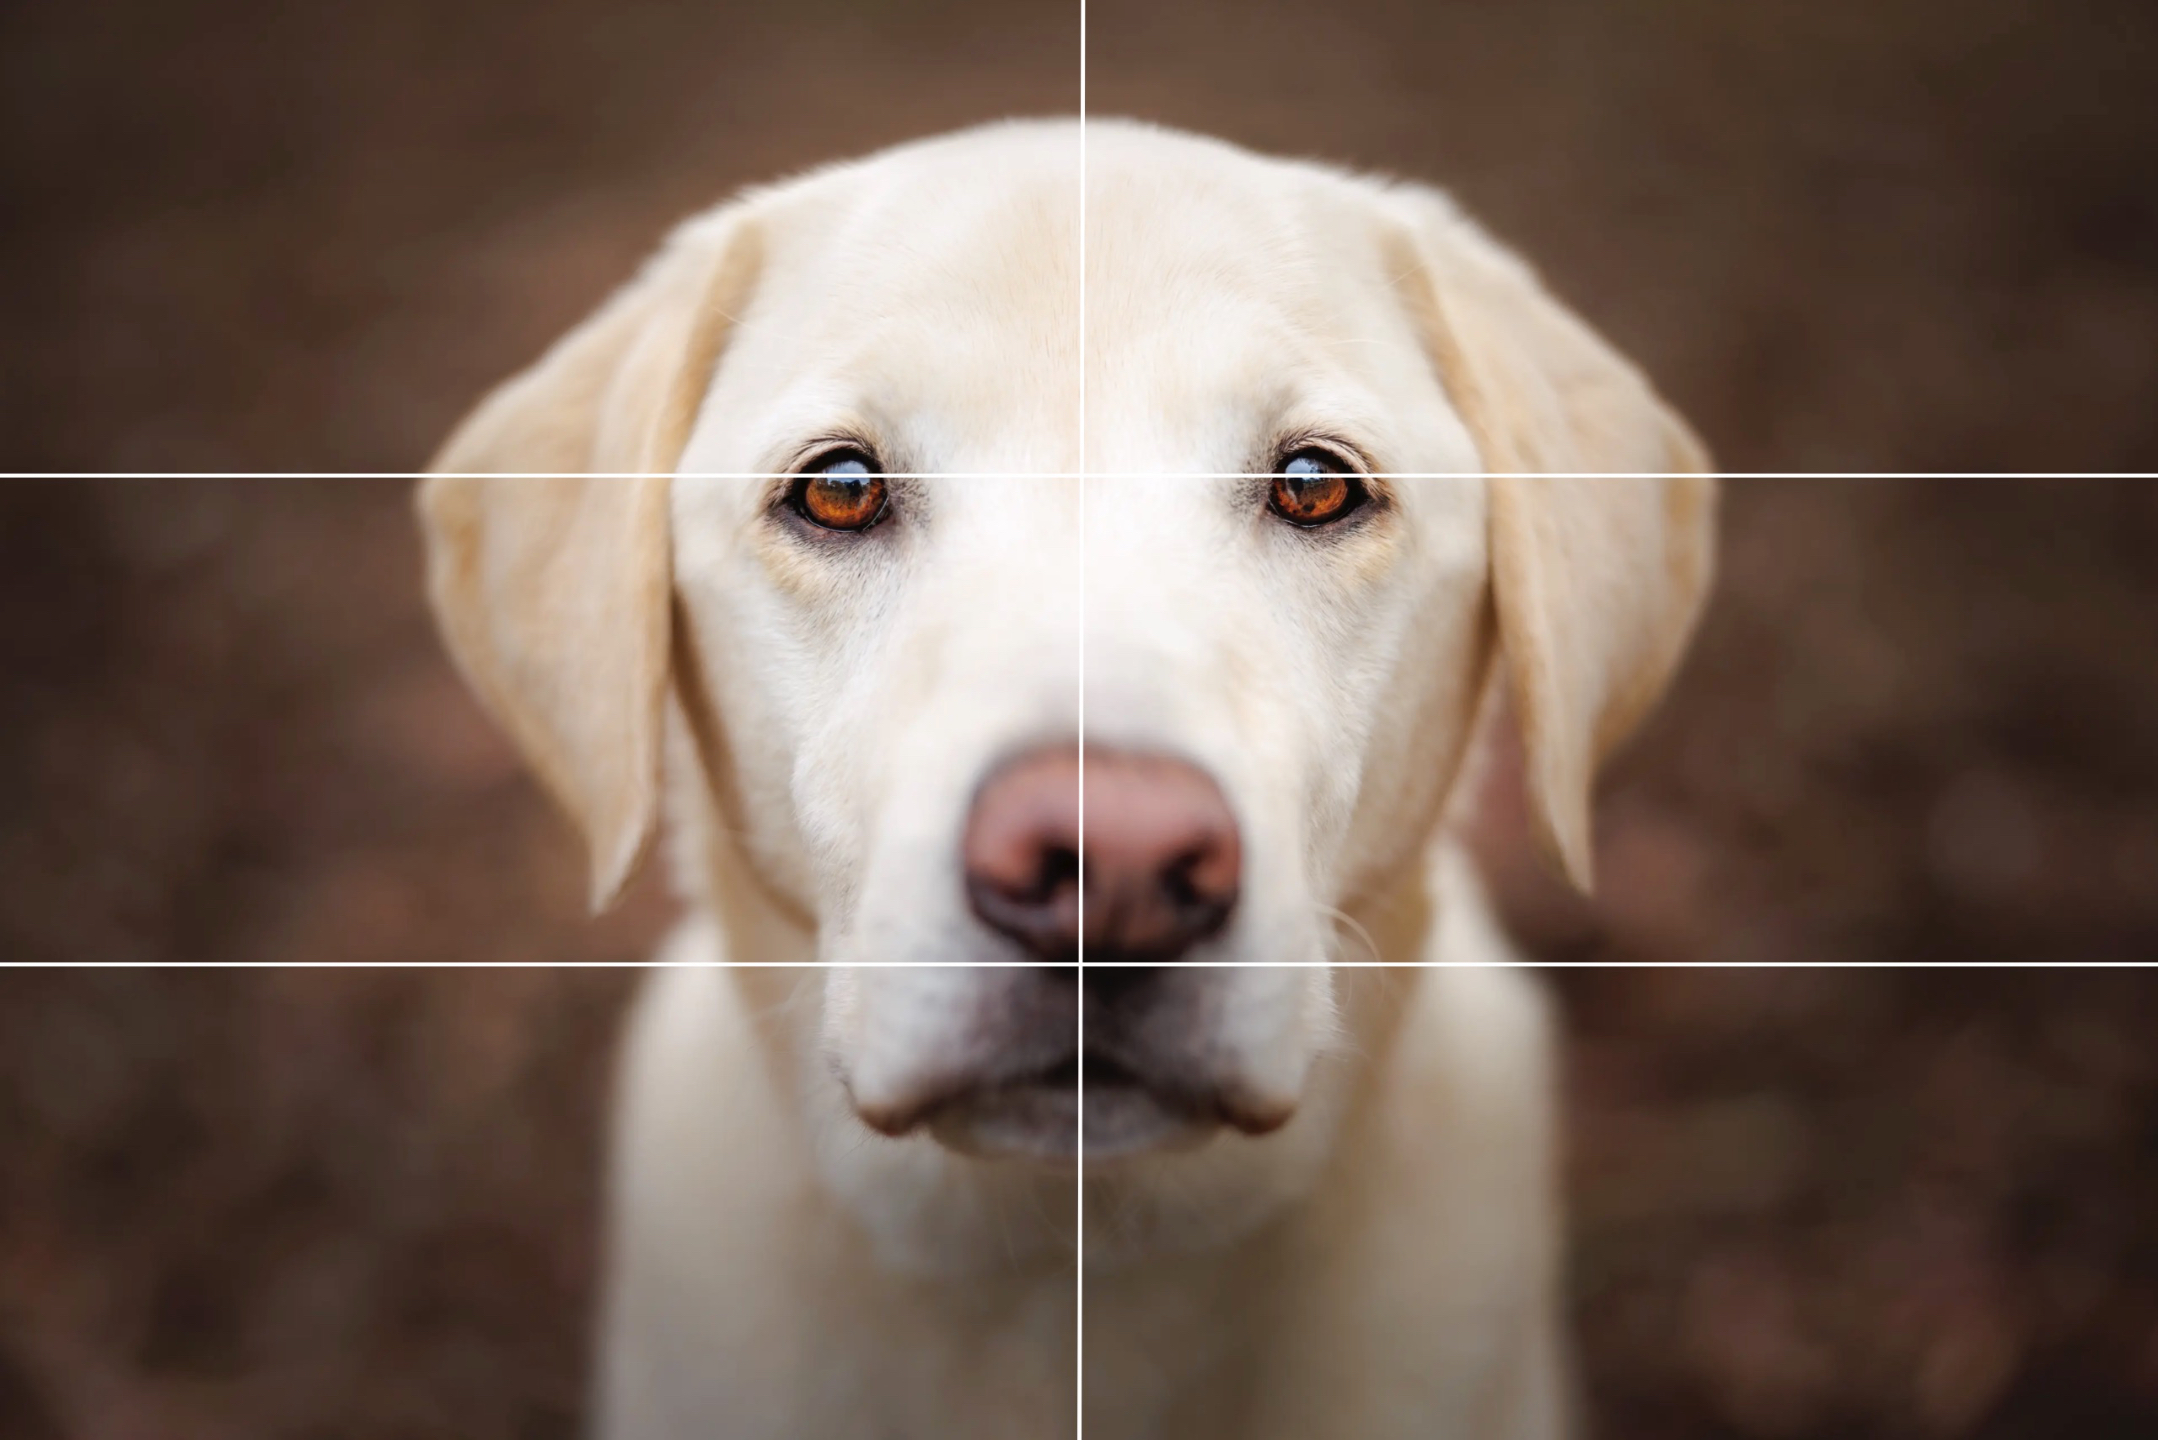
With the subject looking directly at you, centering is often the obvious, most balanced choice.
Ensuring the image is asymmetrical will make the rule of thirds element the dominant one instead.
Or just having the pet look to one side will naturally invite leaving negative space in that direction, making the rule of thirds composition feel more balanced and intentional.
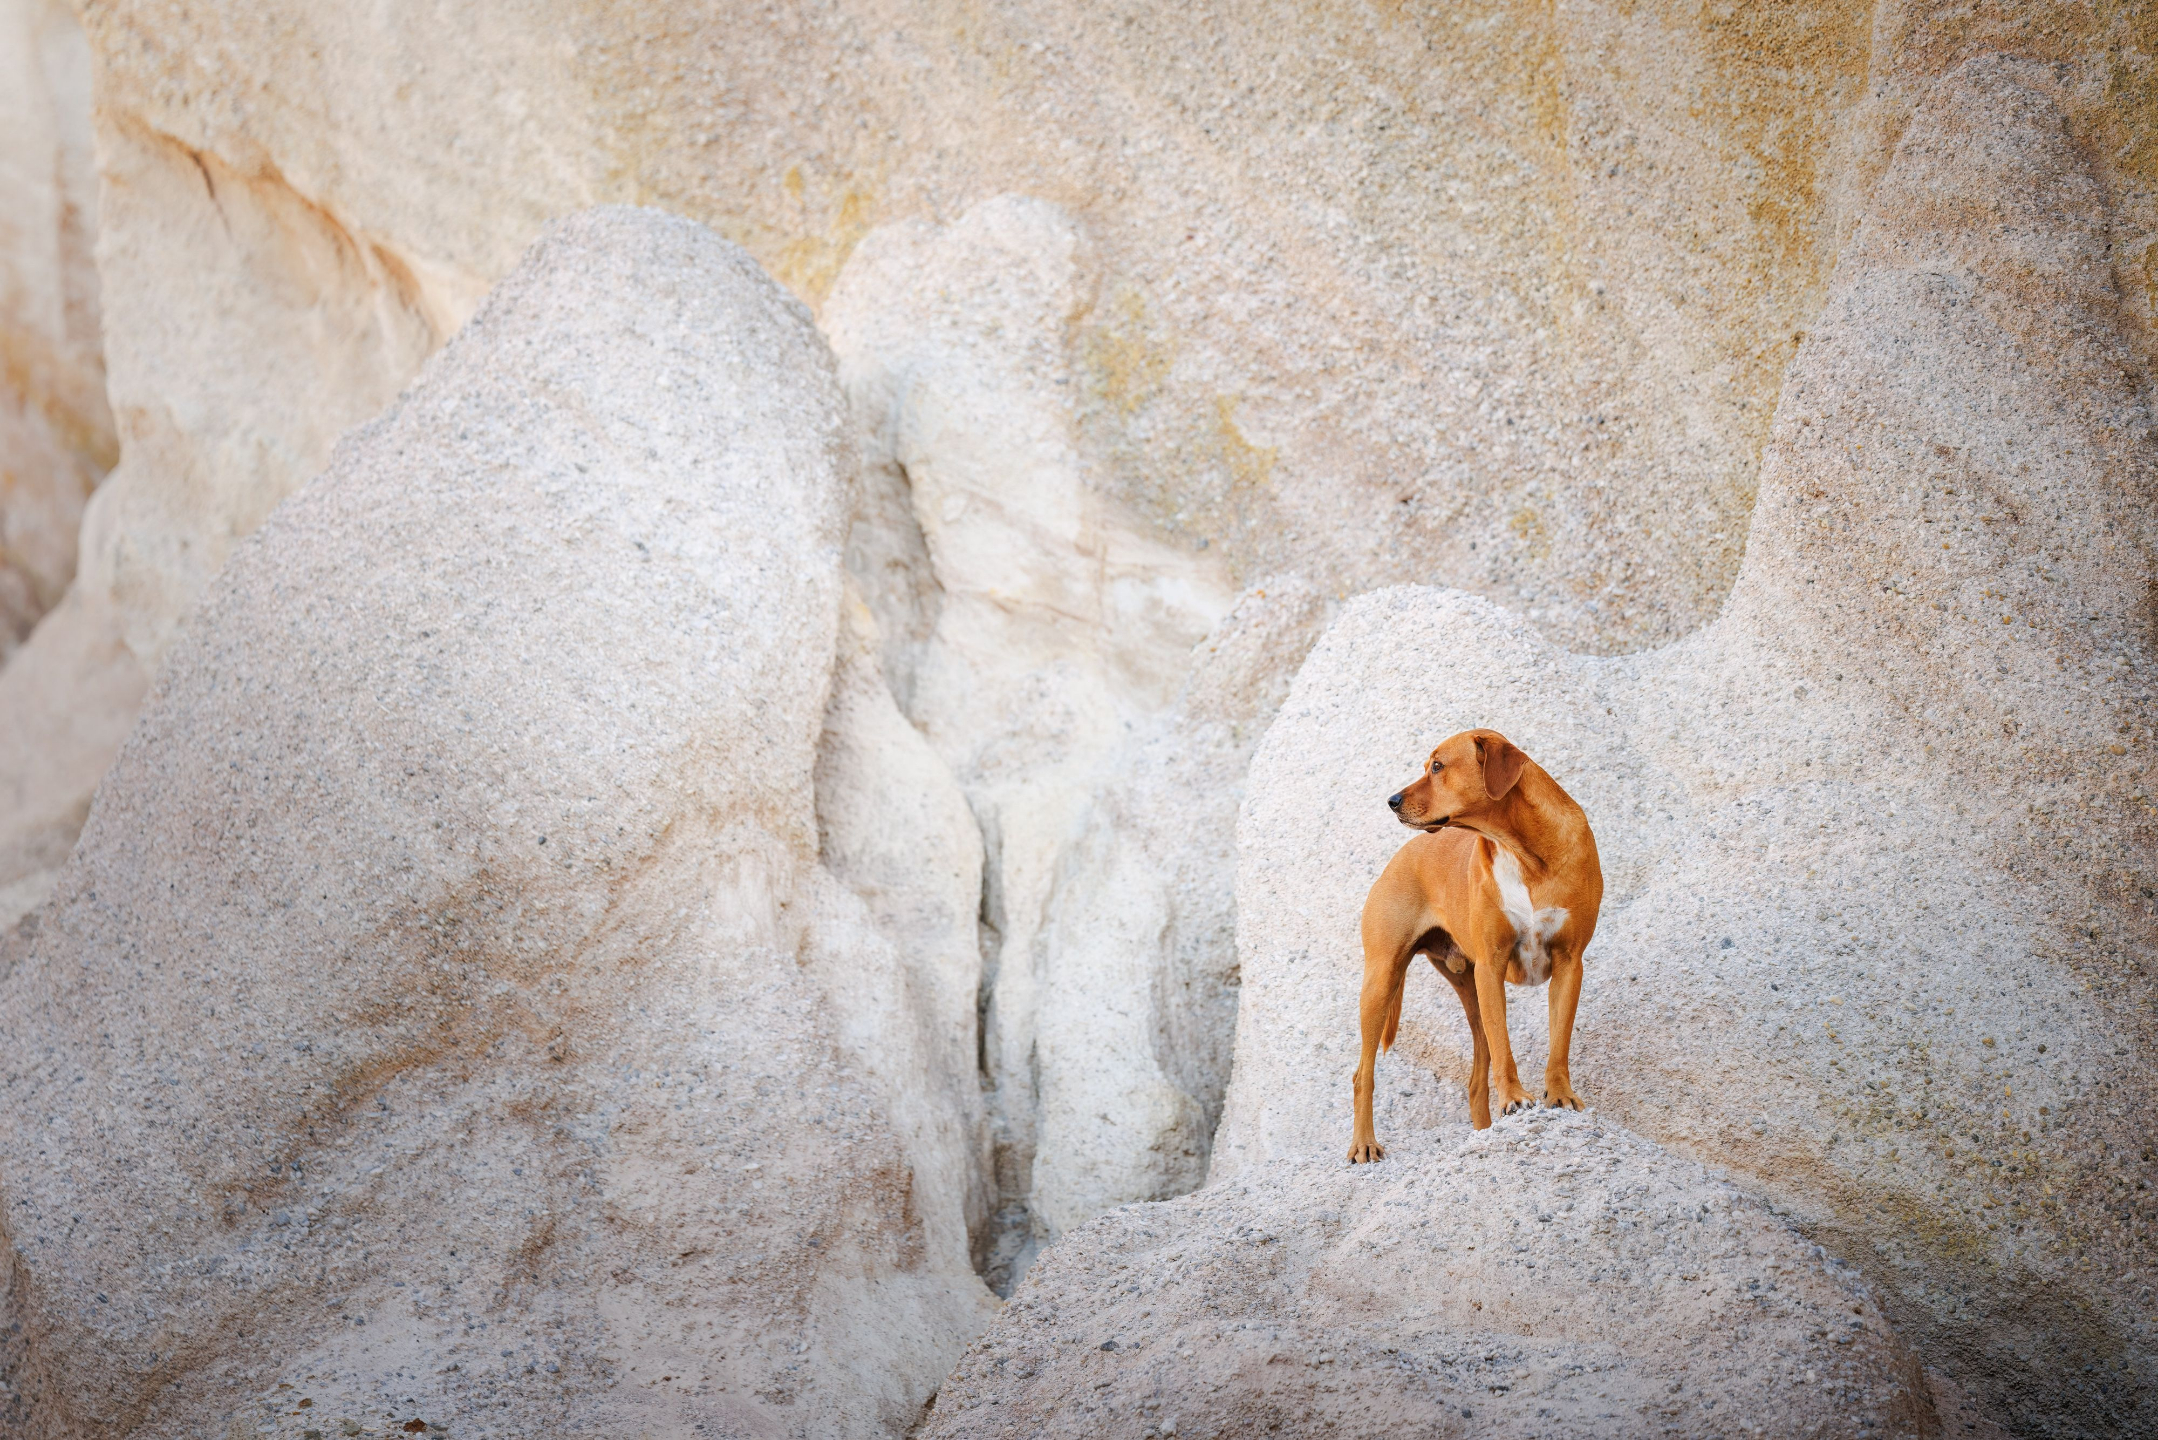
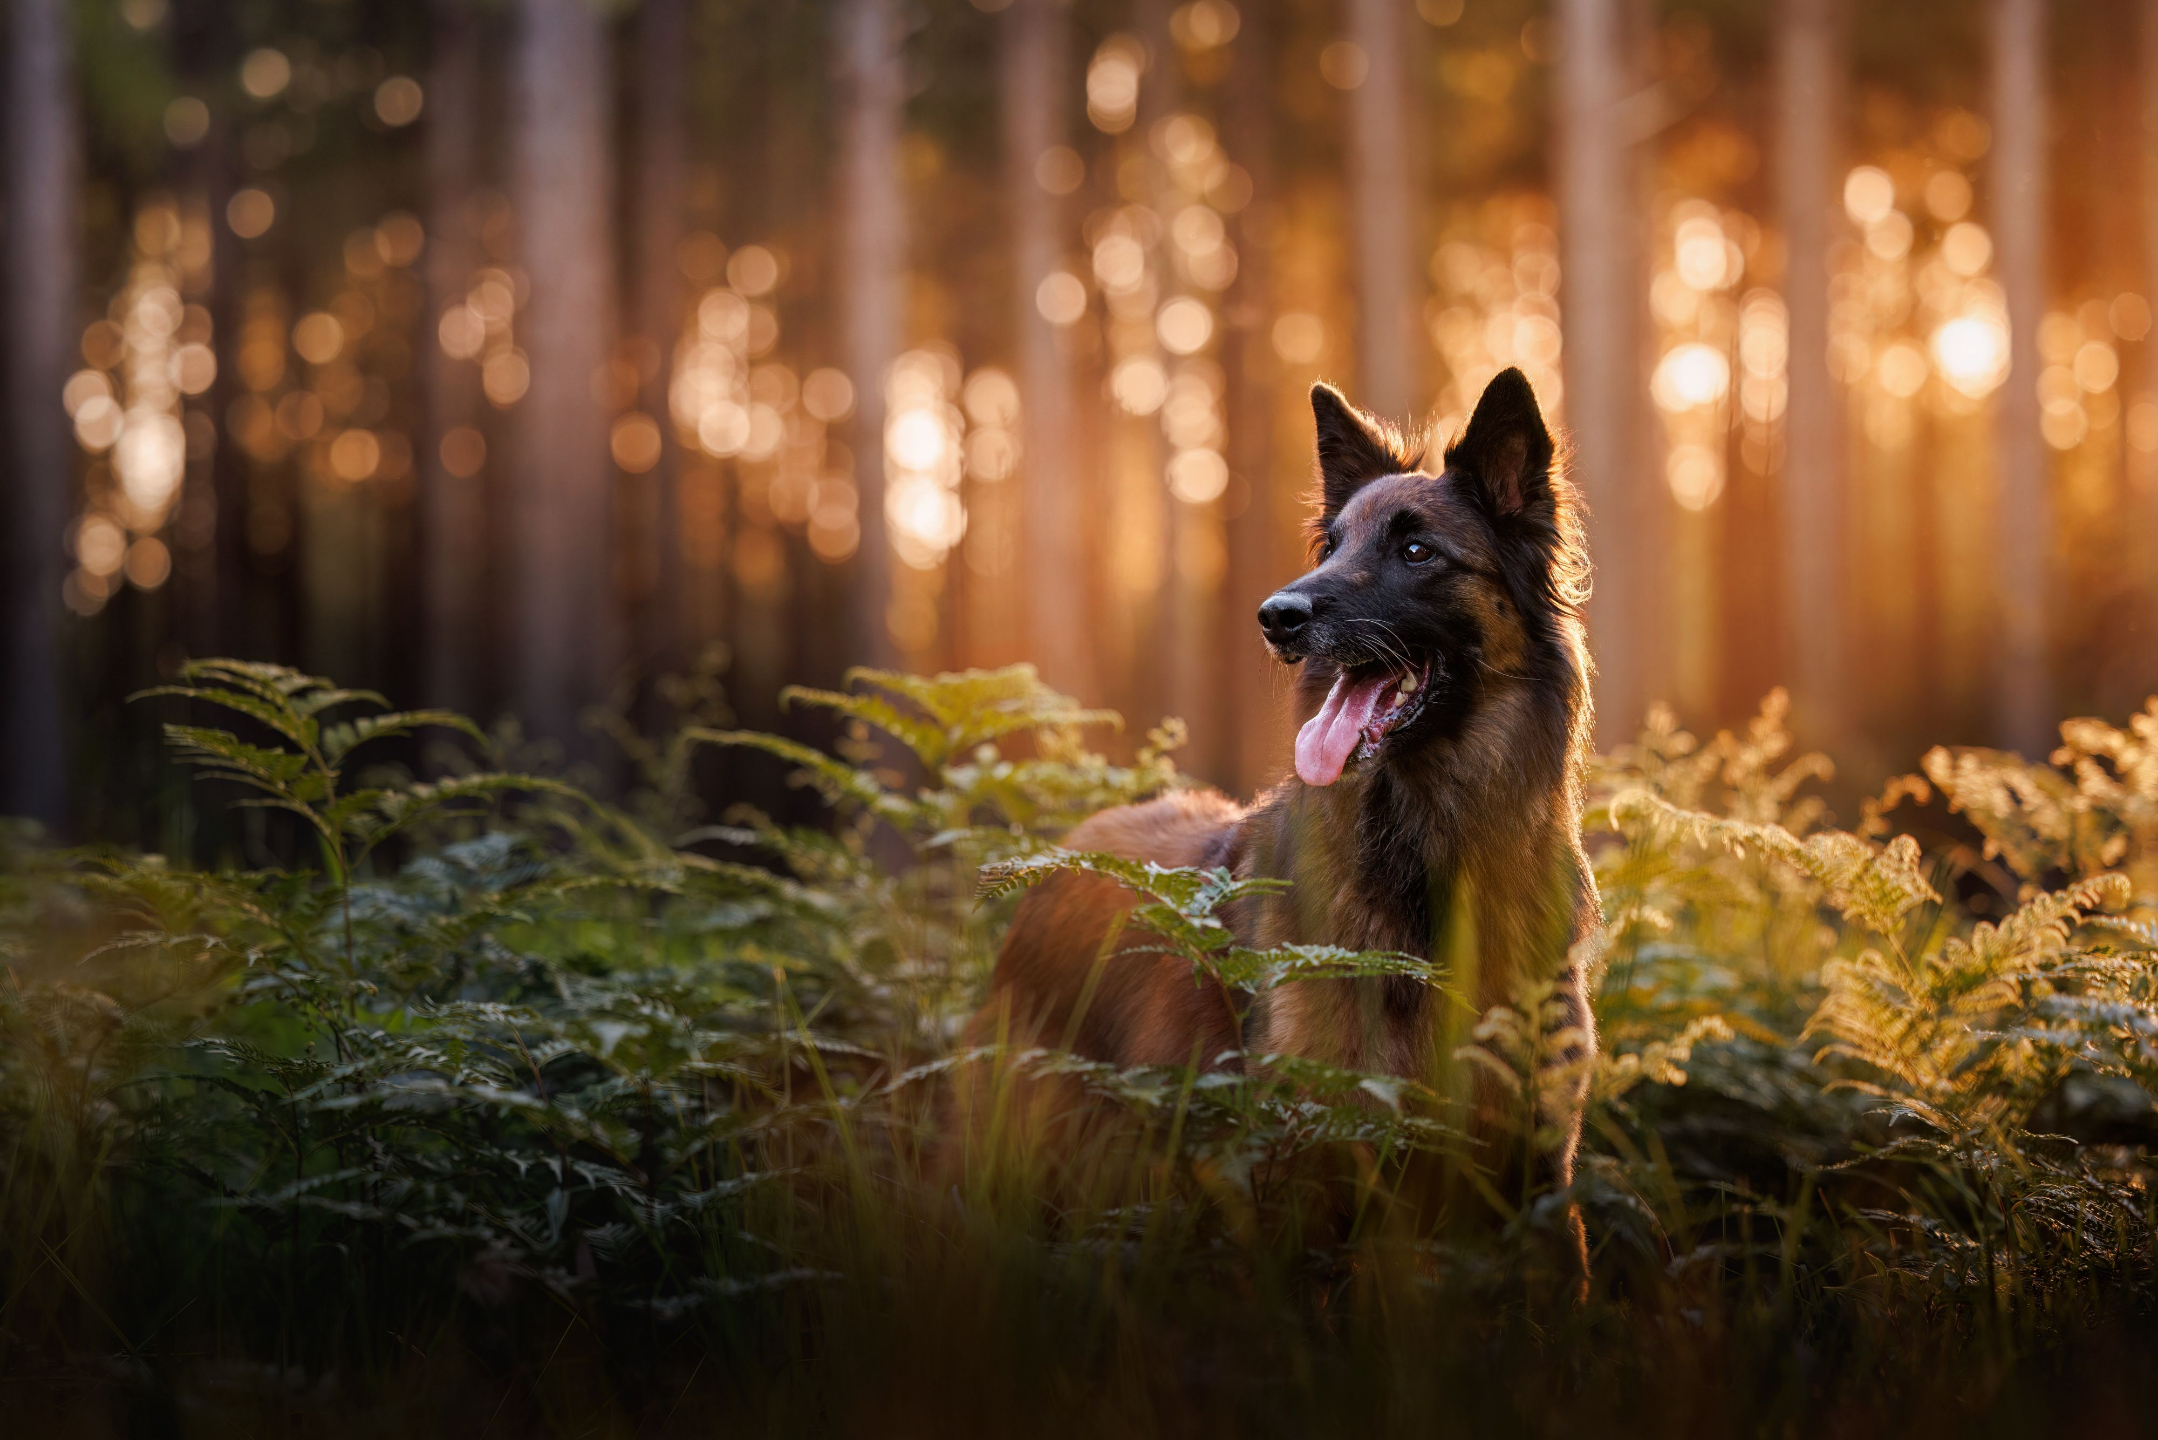
Environmental Images
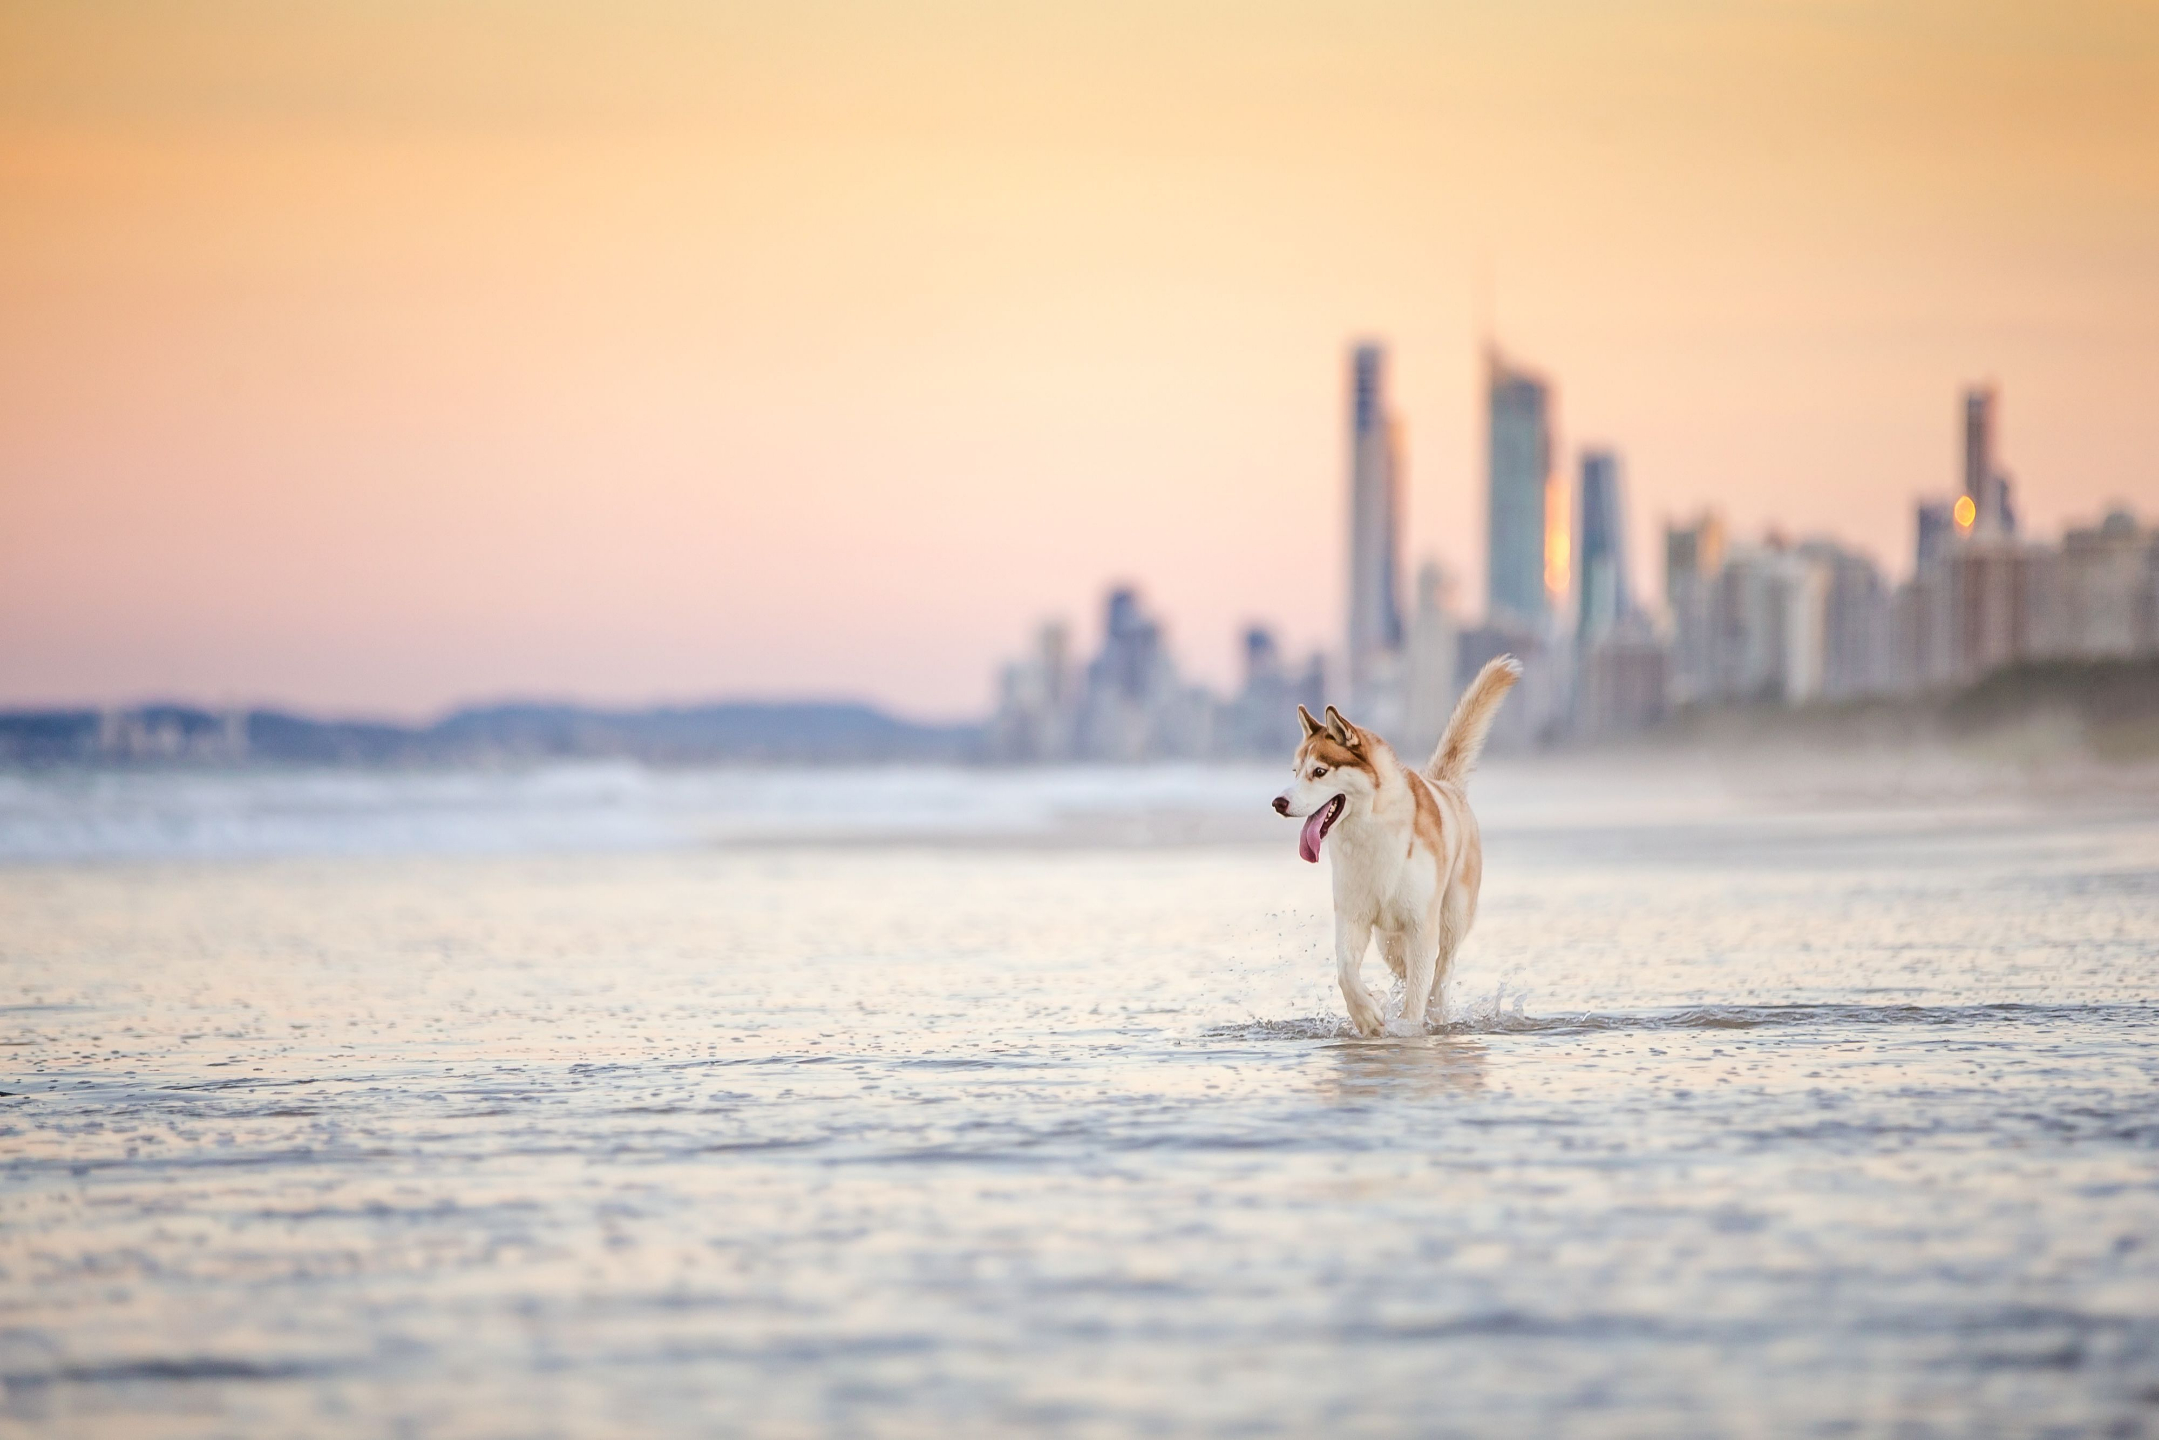
If you’re including more of the surrounding environment, try positioning the subject on one third while allowing the background or landscape to fill the remaining space.
It’s important to make sure your subject is still the most interesting point in the frame, so consider how you can do this with leading lines, tone, sharpness or colour.
Most modern cameras and smartphones have a grid overlay option that displays the rule of thirds lines directly on the screen.
If you haven’t used this before, it’s a great tool to help guide your composition. Check your camera manual or manufacturer's website if you are not sure how to change the display.
With the grid enabled, you can use it when shooting to help align your subject with the lines or intersections.
Horizon Placement
One way to utilise the grid and divide up the image is to place the horizon on either the top or bottom horizontal third line.
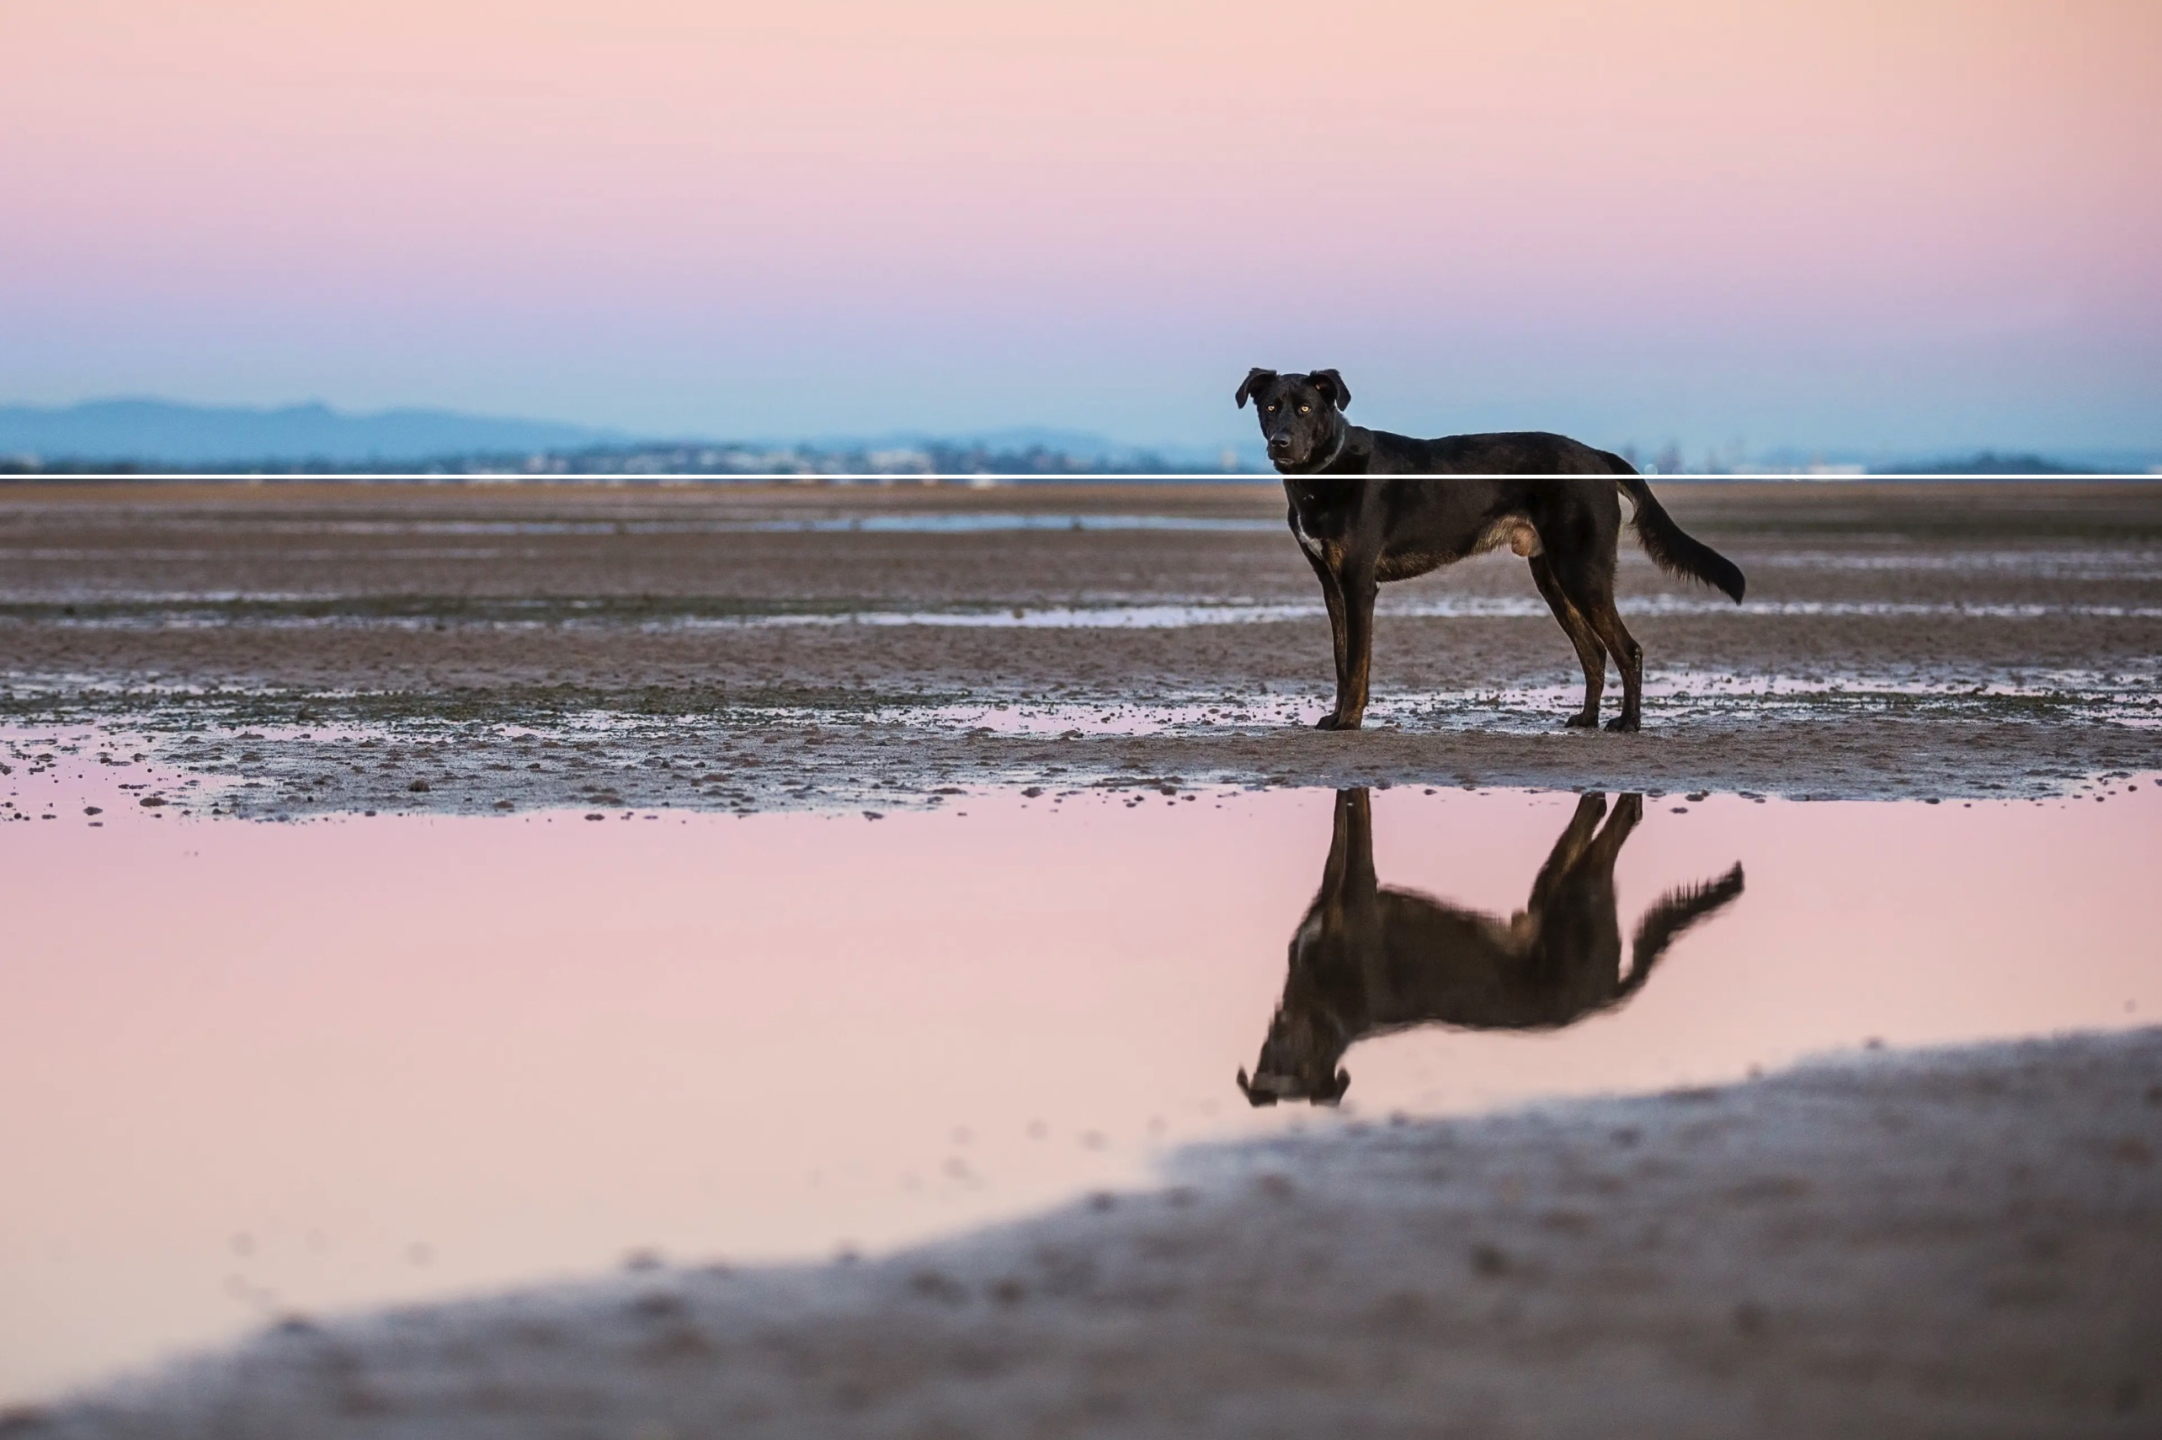
You do need to be careful where the horizon is placed in relation to the subject though. Avoid horizon lines running through the head and neck, especially the eyes.
In general, having the horizon as low down as possible, or through the widest part of the subject's body is best.
If the horizon must go through an awkward part of the subject, make sure it’s softer and indistinct, instead of hard and sharp. This helps to soften that “cutting” effect that a sharply defined horizon can create.
Getting it Right in Camera
For this challenge, we want you to learn how to see composition when you are taking the image. So enable the grid lines when shooting with your camera and aim to get the composition as close to perfect in camera as you can.
When you’re shooting, small adjustments in camera position can make a big difference, so when your model is set up, move the camera left to right while looking at the screen or viewfinder.
Be flexible when you’re shooting. If small movements don’t fix the composition, try stepping slightly left or right until the subject sits clearly on those third lines.
Don’t rely on completely changing the intended composition when you crop the image - we encourage you to be intentional when shooting this challenge.
Location
Video Timecode – 10:12
Successful composition is something every image needs, no matter where it is taken. So images for this challenge can be captured almost anywhere.
Outdoors in natural environments.
In urban environments.
Inside the home.
Or even in a studio environment.
Look for locations that offer clean backgrounds.

Interesting textures.
Colours that complement your subject.
Natural framing elements.
Or elements that balance the placement of your subject.
One important thing to consider during this challenge is how the background might support your composition.
If something appears in that space - how can you make it contribute to the composition, rather than setting it off balance?
This converts it from a distraction, to a balancing element - which is a secondary, supporting rule of composition.
If you’re shooting in a studio, you will most likely be using body language and the direction of gaze to guide where the negative space is left, but you could also use props to add interest and help balance the composition.
Lighting
Video Timecode – 11:26
Lighting for this challenge can be natural light or artificial light. What matters most is that the subject is clearly visible and well lit.
Soft light is often a great choice for portraits because it is lower in contrast and produces more graduated tones.
Overcast days, open shade, or window light indoors can work beautifully.
If you’re shooting outdoors with full sun, shooting during early morning or late afternoon when the sun is lower in the sky is essential. This helps avoid harsh shadows under the chin or across the eyes.
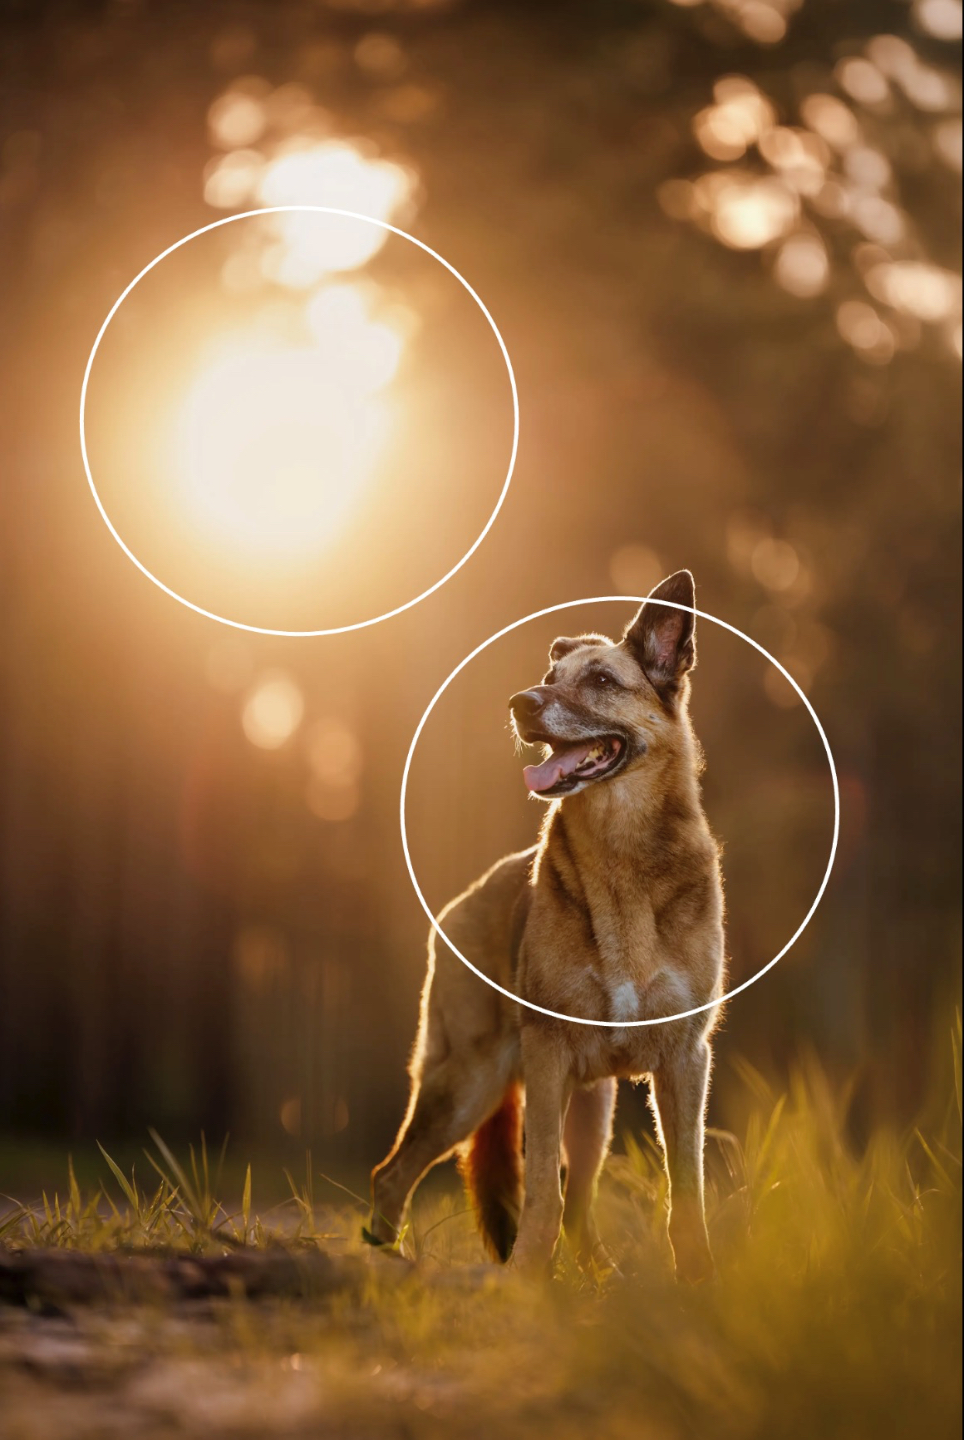
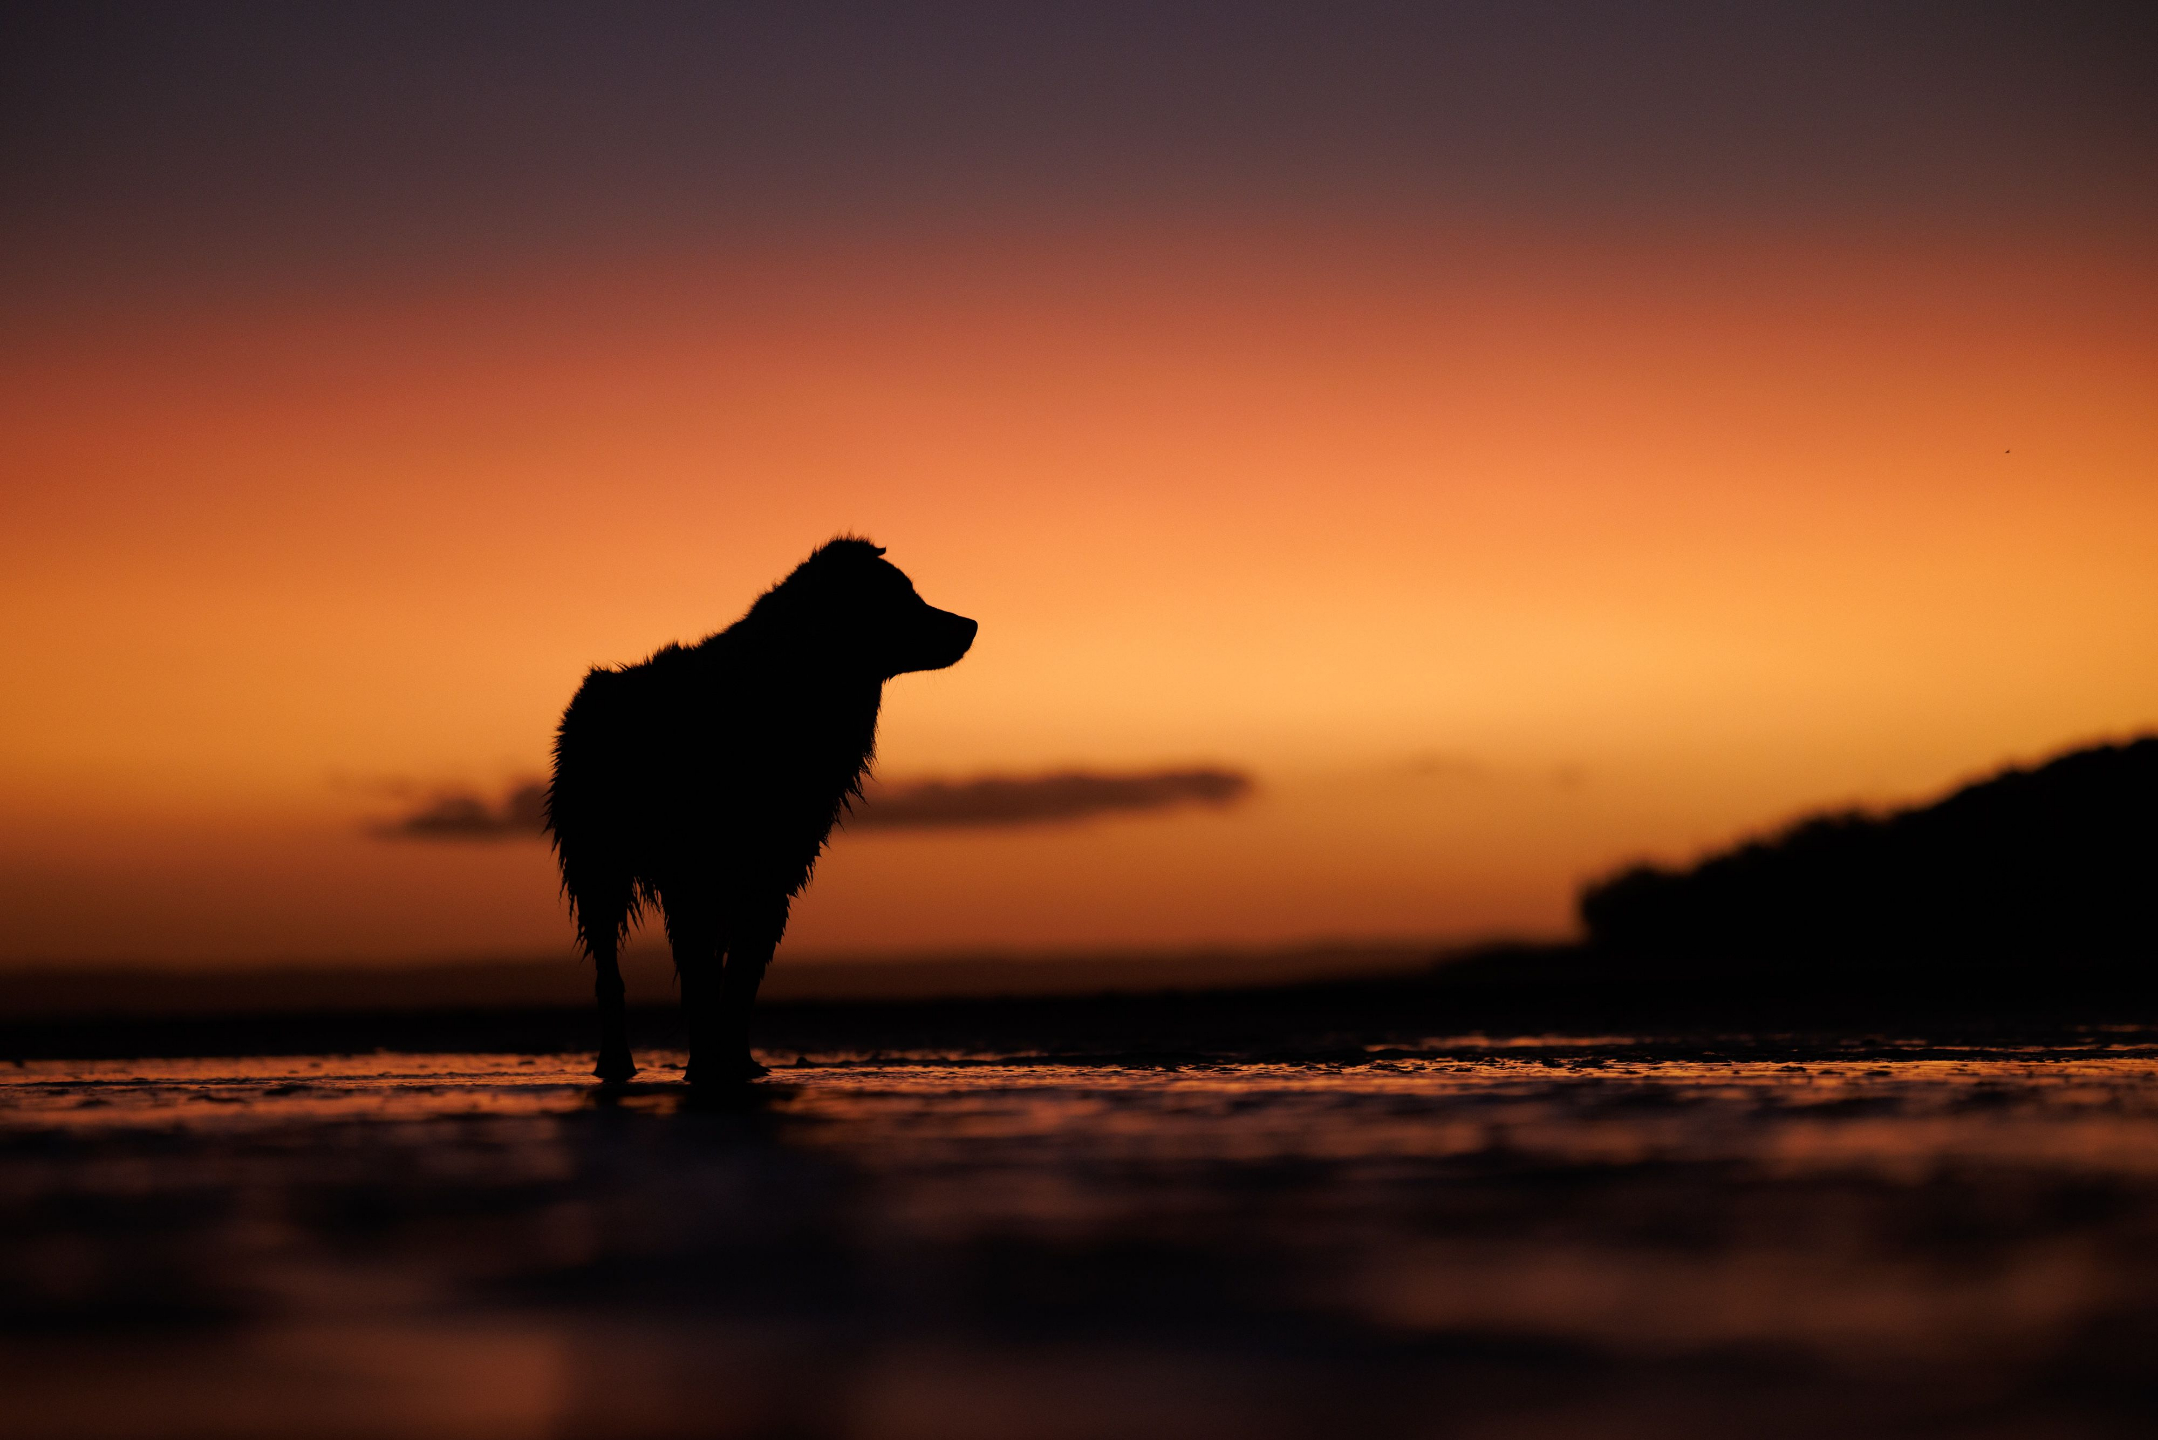
Backlighting can also work nicely for rule-of-thirds compositions, particularly when the rim light helps separate your subject from the background.
If the light is directional, think about facing your subject towards it, so the face - especially the eyes - are well lit and clearly the focal point of the image.
Handling
Video Timecode – 12:22
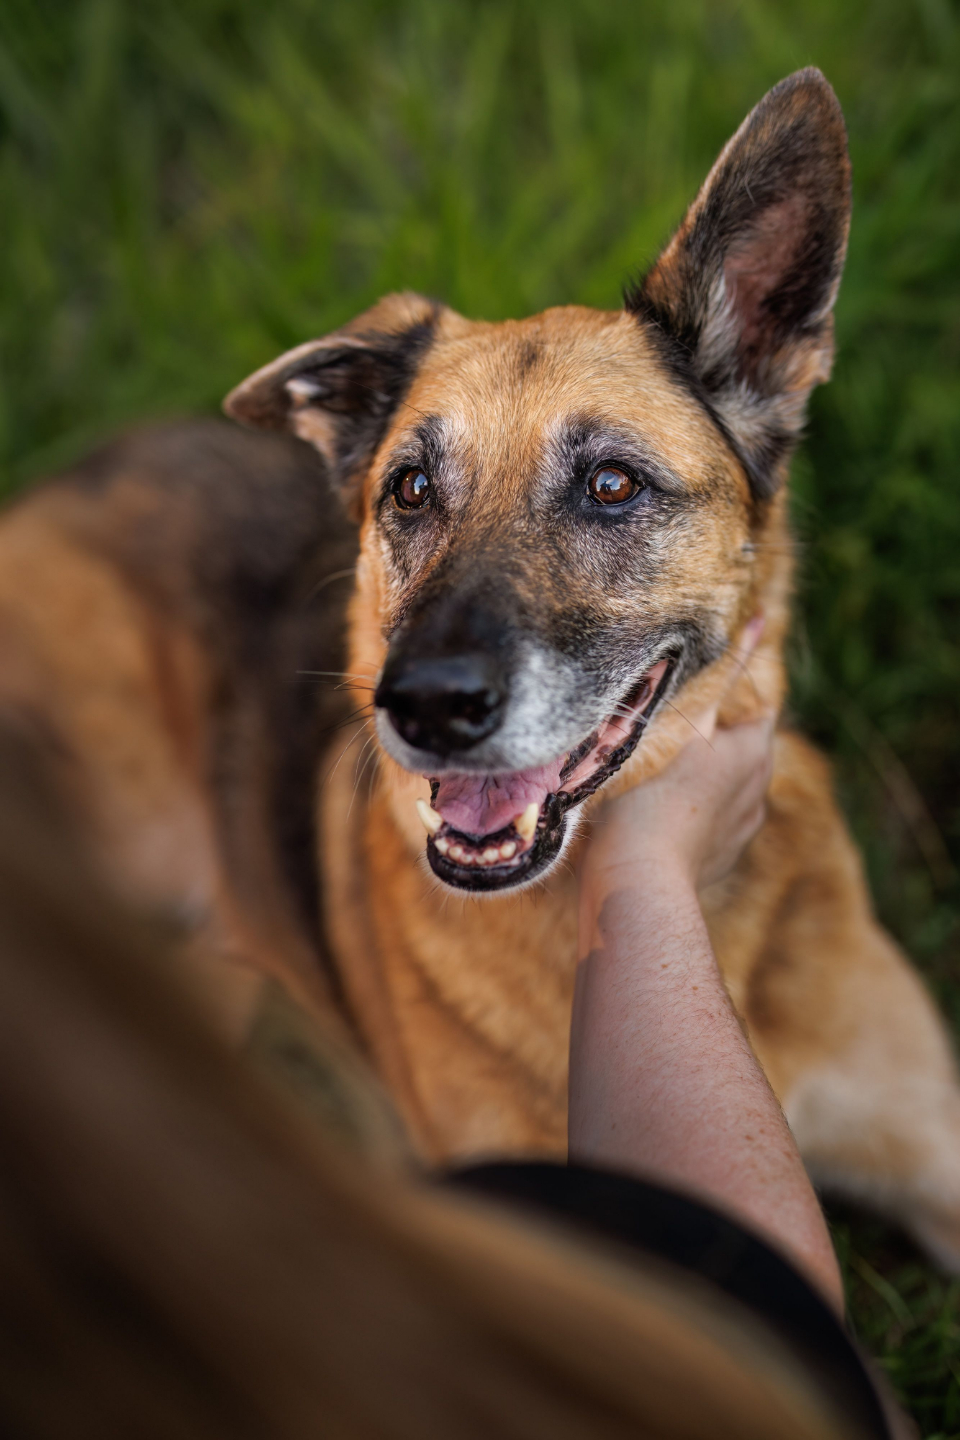
Since this challenge focuses on composition, you may find it easier if your subject remains relatively still so you can carefully frame the image. Finding a model that knows basic obedience and commands like sit and stay, or wait, will make your job easier.
In some cases, you may want your subject to look directly at you, in which case, using attention-getting techniques such as noisemakers, your voice or treats will do the job.
But in most cases, utilising the grid in rule of thirds requires an asymmetrical composition, which means they will not be looking at you. The direction your subject is looking can strongly influence your composition.
If the pet is looking to the left, you’ll generally want to leave more space on that side of the frame.
And vice versa.
Think about how you can keep your subject in place, facing in the desired direction, and looking in a direction that supports your composition.
Having two handlers can be helpful for this - one to hold the dog in place if they’re on-leash, and one to get their attention.
Working with a calm, relaxed pet will make this much easier. Take things slowly and make sure your subject is comfortable with what you are asking of them.
Ensure you give clear and calm instruction to the owners or whoever is handling your subject. And always build in plenty of breaks and reward your subject frequently.
Make sure the resulting pose feels natural and the pet appears relaxed and comfortable - we don’t want to see any negative body language in this challenge.
Technical
Video Timecode – 14:02
There aren’t any specific techniques to consider for this challenge. The most important thing is that the image is sharp and well exposed.
If the pet is mostly still, the minimum recommended shutter speed is 1/500 second to avoid subject motion blur.
If your subject is in motion, use a minimum shutter speed of 1/1000 second.
A wide aperture like f/2.8 - f/4 can help blur the background and isolate your subject against the background.
If you are working with multiple subjects or if you want more of the environment visible and sharp, try f/5.6 - f/8.
After setting the two most important settings, shutter speed and aperture, the ISO can just be whatever it needs to be to properly expose the image. Noise reduction is so easy and effective to do these days in most editing programs, we shouldn’t be seeing super noisy images.
When it comes to focus, we always recommend shooting with continuous focus (AI Servo, AF-C) whenever you are working with pets.
They are living, breathing creatures and not static objects, so enabling a setting where the camera focuses continually as they move slightly will help keep your images sharp.
And what should you focus on?
We hate to roll out the cliche, but here we go again… the eyes are the windows to the soul. If the eyes are visible, they should always be the sharpest point in the image.
If you’re using a modern mirrorless camera with animal eye detection, you’re all set to compose the image however you see fit, as the camera will track the eye, left to right, up and down across the field of view, as you adjust your framing.
If you’re using an older DSLR without eye tracking, you’ll need to select a single focus point at a precise point in the frame to allow for your intended composition.
Place this exactly over the eye, or face if it’s a wider shot, before you hit the shutter.
As well as the capture of the image, we’re also going to be assessing the edit, in terms of white balance, saturation, tonal range, distraction removal and a whole host of other points. If you’d like a refresher on the kinds of editing mistakes we often see (and how to address them), we have a blog post for that!
Troubleshooting
Video Timecode – 16:22
“The subject is on the third line, but the composition feels awkward”
This can occur when you are trying to force a rule of thirds composition onto a scene or subject placement that doesn’t suit it.
Ask yourself - what justifies a rule of thirds composition for this image?
Is the subject looking or facing off to the side?
Are you utilising other compositional techniques to support the composition?
Is the negative space truly uninteresting and negative, or is it cluttered, distracting or visually busy?
If you are placing the subject on a third line and they’re looking straight at you, is there something on the other side of the image to create balance?
Are there leading lines in the image to help guide you towards the focal point?
“The space around the subject feels distracting”
Look carefully at your negative space.
If it contains clutter, areas of sharpness, bright highlights or deep shadows, these areas are likely to distract from the subject.
It’s best to find a better angle or change the location when you are taking the image, but you can fix some of these issues when you edit the image too.
“My subject keeps moving”
We’re working with real life pets, so patience is key. Take a moment to let the pet settle and be ready to capture the shot. When they are in position, use attention grabbing devices such as noisemakers to get them looking where you want them to - which for this challenge, may not be right at you!
If an owner or handler is working with the pet, give them clear concise instructions, show them how you want the subject to be posed, and where you want them looking.
Keep things positive, take breaks, reward your model frequently, and keep resetting them until you have your shot.
Outside The Box
Video Timecode – 18:18
Once you’ve captured a classic rule-of-thirds composition, you can start experimenting with more creative ideas.
Image areas
A more advanced way to use the rule of thirds that we’ve already touched upon, is to use it as a grid instead of (or in addition to) specifically placing important elements on the lines or intersections.
The grid divides your image up into equal segments, extending its usefulness and allowing for more subtle compositional decisions.
Think about using three equal horizontal sections. Or three equal vertical sections. Or one large section on the right, and a smaller one on the left.
The sections could have hard borders, or be purely delineated by colour.
Or tone.
There are so many possibilities!
Using a grid like this to divide up the image and help place important things, creates a more balanced and visually interesting photograph.
Detail shots
Instead of a full portrait, try placing a detail - such as the pet’s nose, paws, or eyes - on one of the intersection points.
Multiple subjects
Multiple subjects can be included, whether that’s a dog with their owner, or multiple pets.
If photographing a pet with their owner, try placing the two subjects on different thirds to create balance across the frame.
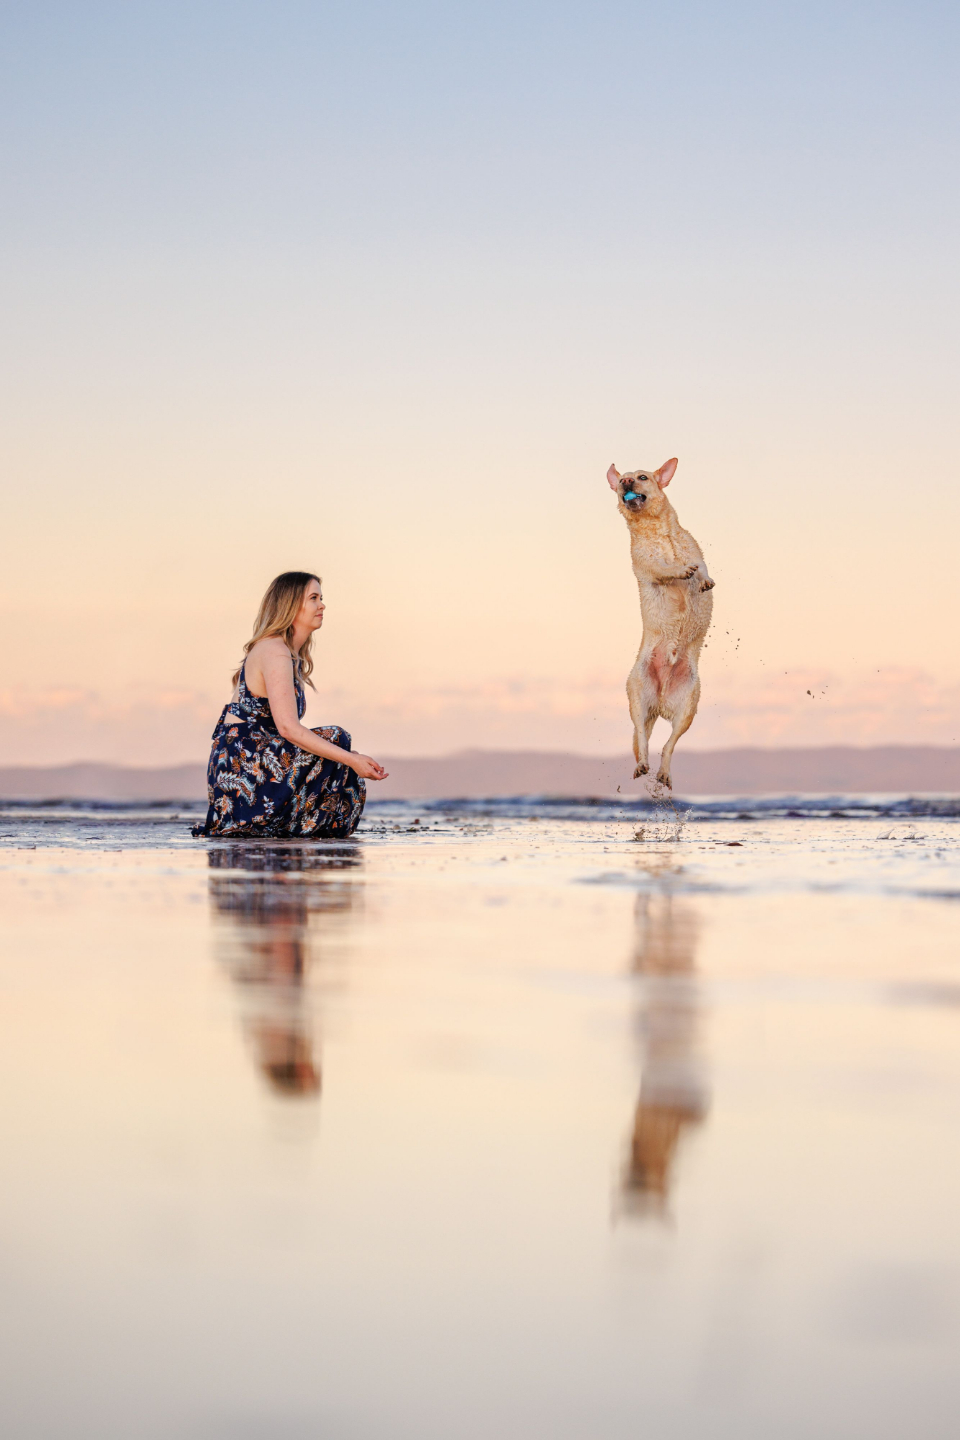
You could also incorporate the owner in a close up.
With enough negative space around them, multiple subjects can also be “clustered” together and treated as just one subject in the composition.
Conclusion
Video Timecode – 19:54
We hope we’ve given you a lot to think about in this challenge, as it does cover quite a lot of compositional information, not just the rule of thirds. But that’s also the point - because composition is rarely limited to just a single type in each image.
The most important thing to keep in mind is that when we look at your image though, is that the rule of thirds is the dominant compositional element.
There can be other elements, but if we look at your image and for example - are immediately struck by the vast amount of negative space - then the dominant element is actually negative space, even if the subject has been placed on an intersection of the thirds.
We also want to see that your image has been intentionally composed and not just cropped from a much wider frame.
Finally, we want to see that your rule of thirds positioning is justified by how the pet is posed, and what else is in the frame.
There’s a lot to think about, and we can’t wait to see what you come up with!
